

CogniteMigration data model.
Prerequisites
Before migrating files and time series, complete the following:- Creating a data model and mappings
- Deploying the CogniteMigration data model
- Migrating data sets
- Migrating source systems
- Migrating assets
Required capabilities
Time series
The following capabilities are required to runcdf migrate timeseries:
The
timeseries:write permission is only required when you do not use --skip-linking. Linking time series to data modeling requires updating the original time series resource.Files
The following capabilities are required to runcdf migrate files:
The
files:write permission is only required when you do not use --skip-linking. Linking files to data modeling requires updating the original file resource.Migrating files and time series
Migrating files and time series differs from migrating assets and events. For assets and events, the Cognite Toolkit creates independent data modeling nodes and leaves the original resources unchanged. For files and time series, the default behavior links the original resource to data modeling and locks it so most changes must go through data modeling APIs. Read Link vs copy and the data modeling syncers documentation before you migrate in production. Select resources by data set or CSV file, then runcdf migrate timeseries or cdf migrate files.
1
Choose how to select time series or files
Use data set selection if all resources in the data set go to the same view, mapping, and instance space. Use CSV file selection to map specific resources to different views, such as time series in the Kelmarsh example.
2
Run `cdf migrate timeseries` or `cdf migrate files`
Run the command in interactive mode, or pass the options as arguments. See
cdf migrate timeseries --help and cdf migrate files --help.3
Verify the migration
Confirm that lineage nodes exist in the
InstanceSource view. See Verify the migration.Data set selection
To migrate all time series or files in a data set, run the command in interactive mode:cdf migrate timeseries --help and cdf migrate files --help for details.
The disadvantage of data set selection is that all time series or files in the data set must use the same resource view mapping, target view, and instance space.
CSV file selection
To migrate time series using a CSV file, run:<path to csv file> with a path relative to your Cognite Toolkit project root.
This CSV file migrates a time series:
migration.timeseries.csv
space: The target instance space where the time series or file will be created.externalId: The external ID of the resulting time series or file.id: The integer internal ID of the source time series or file to migrate. This ID appears in the asset-centric API response and remains the same after linking to data modeling.
ingestionMapping: The resource view mapping to use. If omitted, the default mapping for the resource type is used (typically the CogniteTimeSeries or CogniteFile view in the CogniteCore model). The Cognite Toolkit reads mappings from theResourceViewMappingview in theCogniteMigrationdata model. Deploy custom mappings withcdf buildandcdf deployusing the Resource view mapping resource type.consumerViewSpace,consumerViewExternalId,consumerViewVersion: The preferred consumer view for the time series or file. Canvas and Charts use this setting when they display the resource.
Verify the migration
After a successful run, the Cognite Toolkit stores lineage for migrated time series and files in theInstanceSource view in the CogniteMigration data model.
In the Kelmarsh example, lineage nodes for time series look like this:
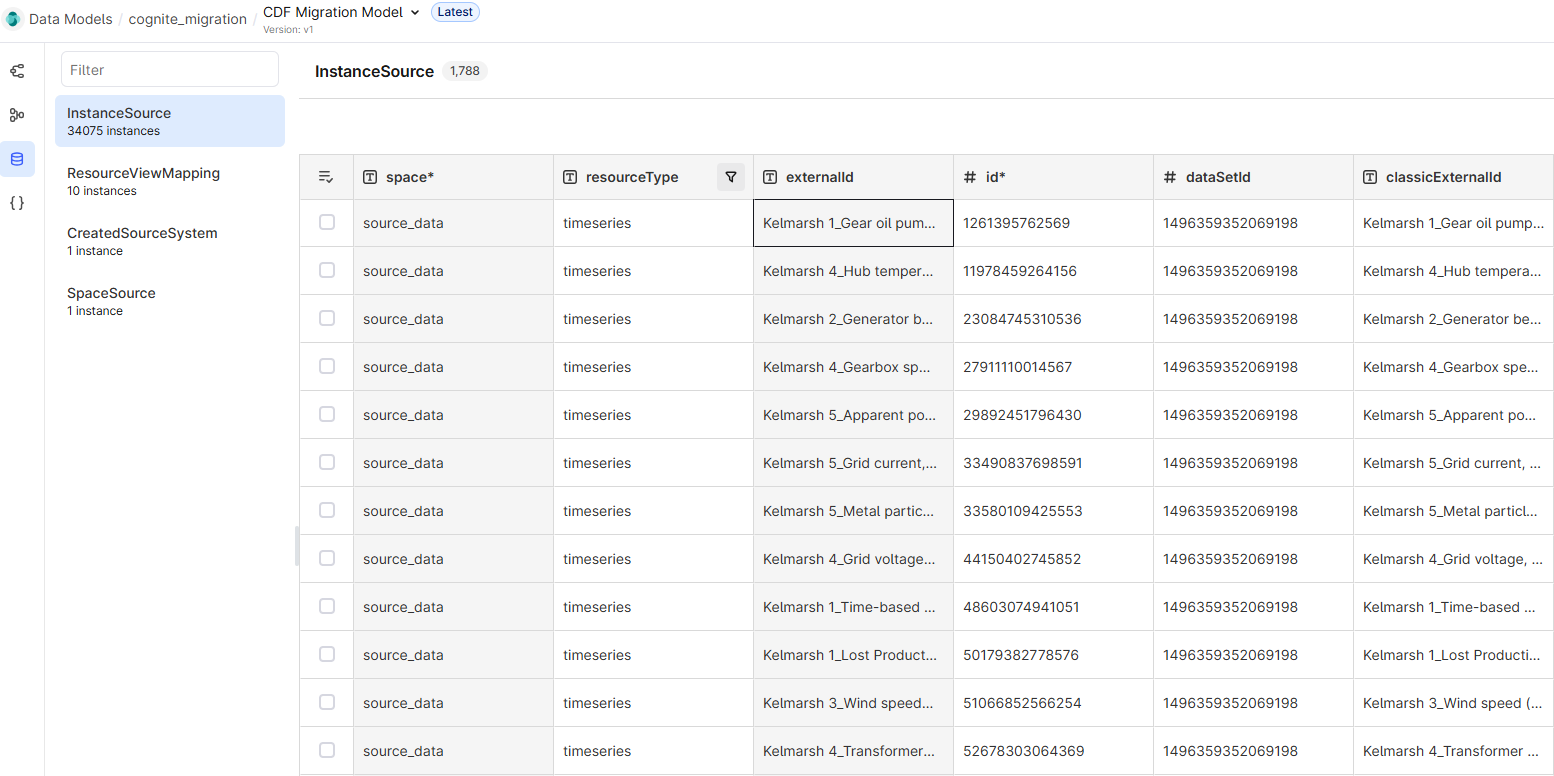
CogniteTimeSeries nodes:
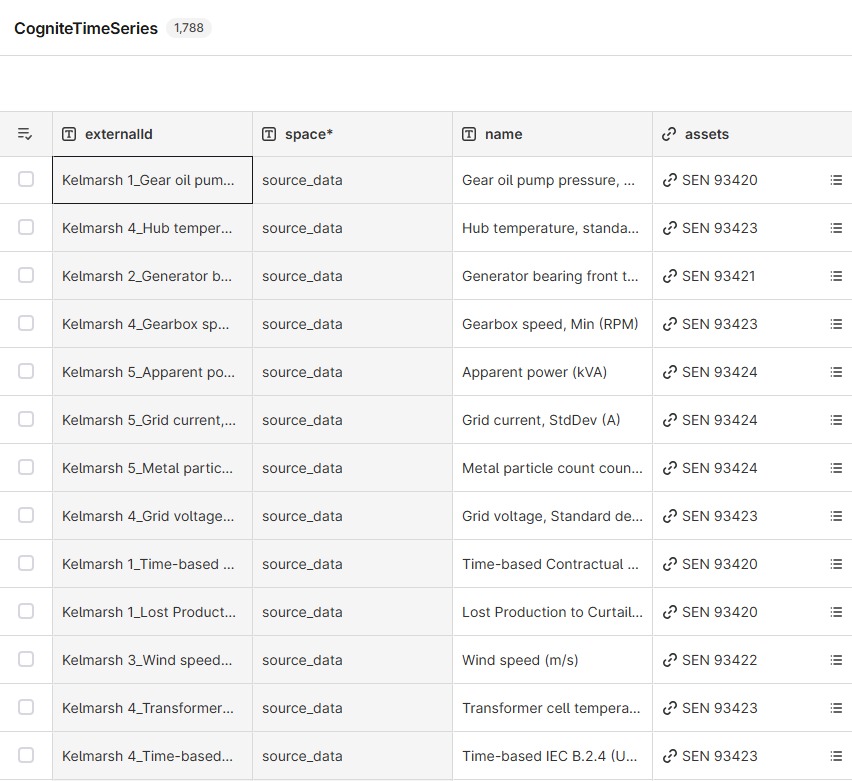
InstanceSource, but this guide does not include a file screenshot.
What cdf migrate timeseries does
When you run cdf migrate timeseries, the migration plugin performs the following steps on batches of time series:
1
Download time series metadata
The Cognite Toolkit reads time series metadata from the asset-centric
/timeseries/byids or /timeseries/list endpoints, depending on the selection method.2
Convert time series to instance nodes
The Cognite Toolkit looks up the mapping and converts each time series to an instance node. Mappings are defined
by
externalId in the ResourceViewMapping view in the CogniteMigration data model. The mapping for each time series comes from the ingestionMapping column in the CSV file or from the --ingestion-mapping
CLI argument. If no mapping is specified, the default mapping is used.3
Link time series to data modeling
Unless you use
--skip-linking, the Cognite Toolkit updates the original time series with the expected ID of the new node to link it to data modeling.
Call /timeseries/list or /timeseries/byids with the alpha flag set to inspect pendingInstanceId, which shows the expected data modeling node ID.4
Write instance nodes to CDF
The Cognite Toolkit writes the created instance nodes to CDF using the
/models/instances endpoint.5
Create lineage nodes
While writing instances, the Cognite Toolkit creates lineage nodes in the
InstanceSource view in the CogniteMigration data model
to record the lineage from source time series to the created instance nodes.What cdf migrate files does
When you run cdf migrate files, the migration plugin performs the following steps on batches of files:
1
Download file metadata
The Cognite Toolkit reads file metadata from the asset-centric
/files/byids or /files/list endpoints, depending on the selection method.2
Convert files to instance nodes
The Cognite Toolkit looks up the mapping and converts each file to an instance node. Mappings are defined
by
externalId in the ResourceViewMapping view in the CogniteMigration data model. The mapping for each file comes from the ingestionMapping column in the CSV file or from the --ingestion-mapping
CLI argument. If no mapping is specified, the default mapping is used.3
Link files to data modeling
Unless you use
--skip-linking, the Cognite Toolkit updates the original file with the expected ID of the new node to link it to data modeling.
Call /files/list or /files/byids with the alpha flag set to inspect pendingInstanceId, which shows the expected data modeling node ID.4
Write instance nodes to CDF
The Cognite Toolkit writes the created instance nodes to CDF using the
/models/instances endpoint.5
Create lineage nodes
While writing instances, the Cognite Toolkit creates lineage nodes in the
InstanceSource view in the CogniteMigration data model
to record the lineage from source files to the created instance nodes.Link vs copy
When you runcdf migrate assets or cdf migrate events, the Cognite Toolkit:
- Downloads the asset or event resources.
- Defines a node in data modeling using the mapping you provided.
- Uploads new, independent nodes in data modeling. The original assets or events remain unchanged.
cdf migrate files or cdf migrate timeseries, the Cognite Toolkit by default links the original resources to data modeling:
- Downloads file or time series metadata.
- Defines a node in data modeling using the mapping you provided.
- Updates the original resource with the expected instance ID of the new node.
- Uploads the new node to data modeling.
--skip-linking to skip linking and create independent copies instead. See Underlying syncing mechanism for implications.
After linking, you can still modify these fields through the asset-centric API:
Time series: externalId, metadata, assetId, dataSetId
Files: externalId, metadata, assetIds, dataSetId, labels, geoLocation
Other metadata is locked and can only be changed through data modeling. This list of modifiable fields may change in future releases. After linking, prefer the data modeling API for metadata changes instead of continuing to use the asset-centric API.
Underlying syncing mechanism for files and time series
File contents and time series datapoints use specialized storage and are not stored directly in the data modeling service. Data modeling syncers keep files and time series in sync withCogniteFile and CogniteTimeSeries instances. When you create or update such an instance, the syncer creates or updates the corresponding file or time series resource in CDF.
If you run cdf migrate files --skip-linking or cdf migrate timeseries --skip-linking, the syncer creates a new file or time series with copied metadata but without file data or datapoints. You must download and re-upload the data to the new resources.
For more information, see the data modeling syncers documentation.
Unlinking resources
If you linked files or time series to data modeling and need to migrate them to a different node, you cannot delete the data modeling node without also deleting the original resource, file contents, and datapoints. Unlink the resources first to restore the original asset-centric state. Usecdf data purge instances, which includes guardrails against accidental data loss. Do not use cdf data purge spaces for unlinking; it deletes all instances and other data modeling resources in a space and does not support unlinking.
To unlink and then delete all time series nodes in instance space my_timeseries_space, run:
cdf data purge spaces skips time series and files by default to avoid accidental deletion of underlying data, but it still removes other data modeling resources in the space. Use cdf data purge instances for unlinking.