Step 1. Create templates
Optional. Add labels
Add existing or create new labels to organize, categorize, and filter work. You can also add labels to existing Draft templates when editing them (… > Edit template).
Enter task details
Enter name and description, and, optionally, link the task to an asset. A description can be a step-by-step instruction for the task with links where necessary.
Optional. Add task components
Select Add to task and then select:
- Numerical reading
- Check item
- Schedule
- Message
- Condition
Ask field workers to add measurement readings from equipment. You can set the measurement unit, for example, bar for pressure readings and minimum and maximum values. You can search and connect time series created in InField only.To create a numerical reading:
- Select + and fill out the required fields to create the time series.
- Optional. Link the time series to a specific asset, otherwise, the time series is linked to the root asset.
- Optional. Enter the description for the time series. If provided, the description is used as the numerical reading name in checklists.
Add more tasks
Select + Add task to add another task.
One template has a limit of 500 tasks. However, to make it easy for the field worker to navigate them in the field, keep them as short as possible.
Set template to Ready
Ready templates can be assigned to disciplines or users and can be created as checklists manually and automatically. The templates left in Draft will remain templates and won’t appear as checklists.

You need extended access to plan and schedule tasks, and you need to assign activities using the InField desktop version, not mobile.
Step 2. Manage tasks
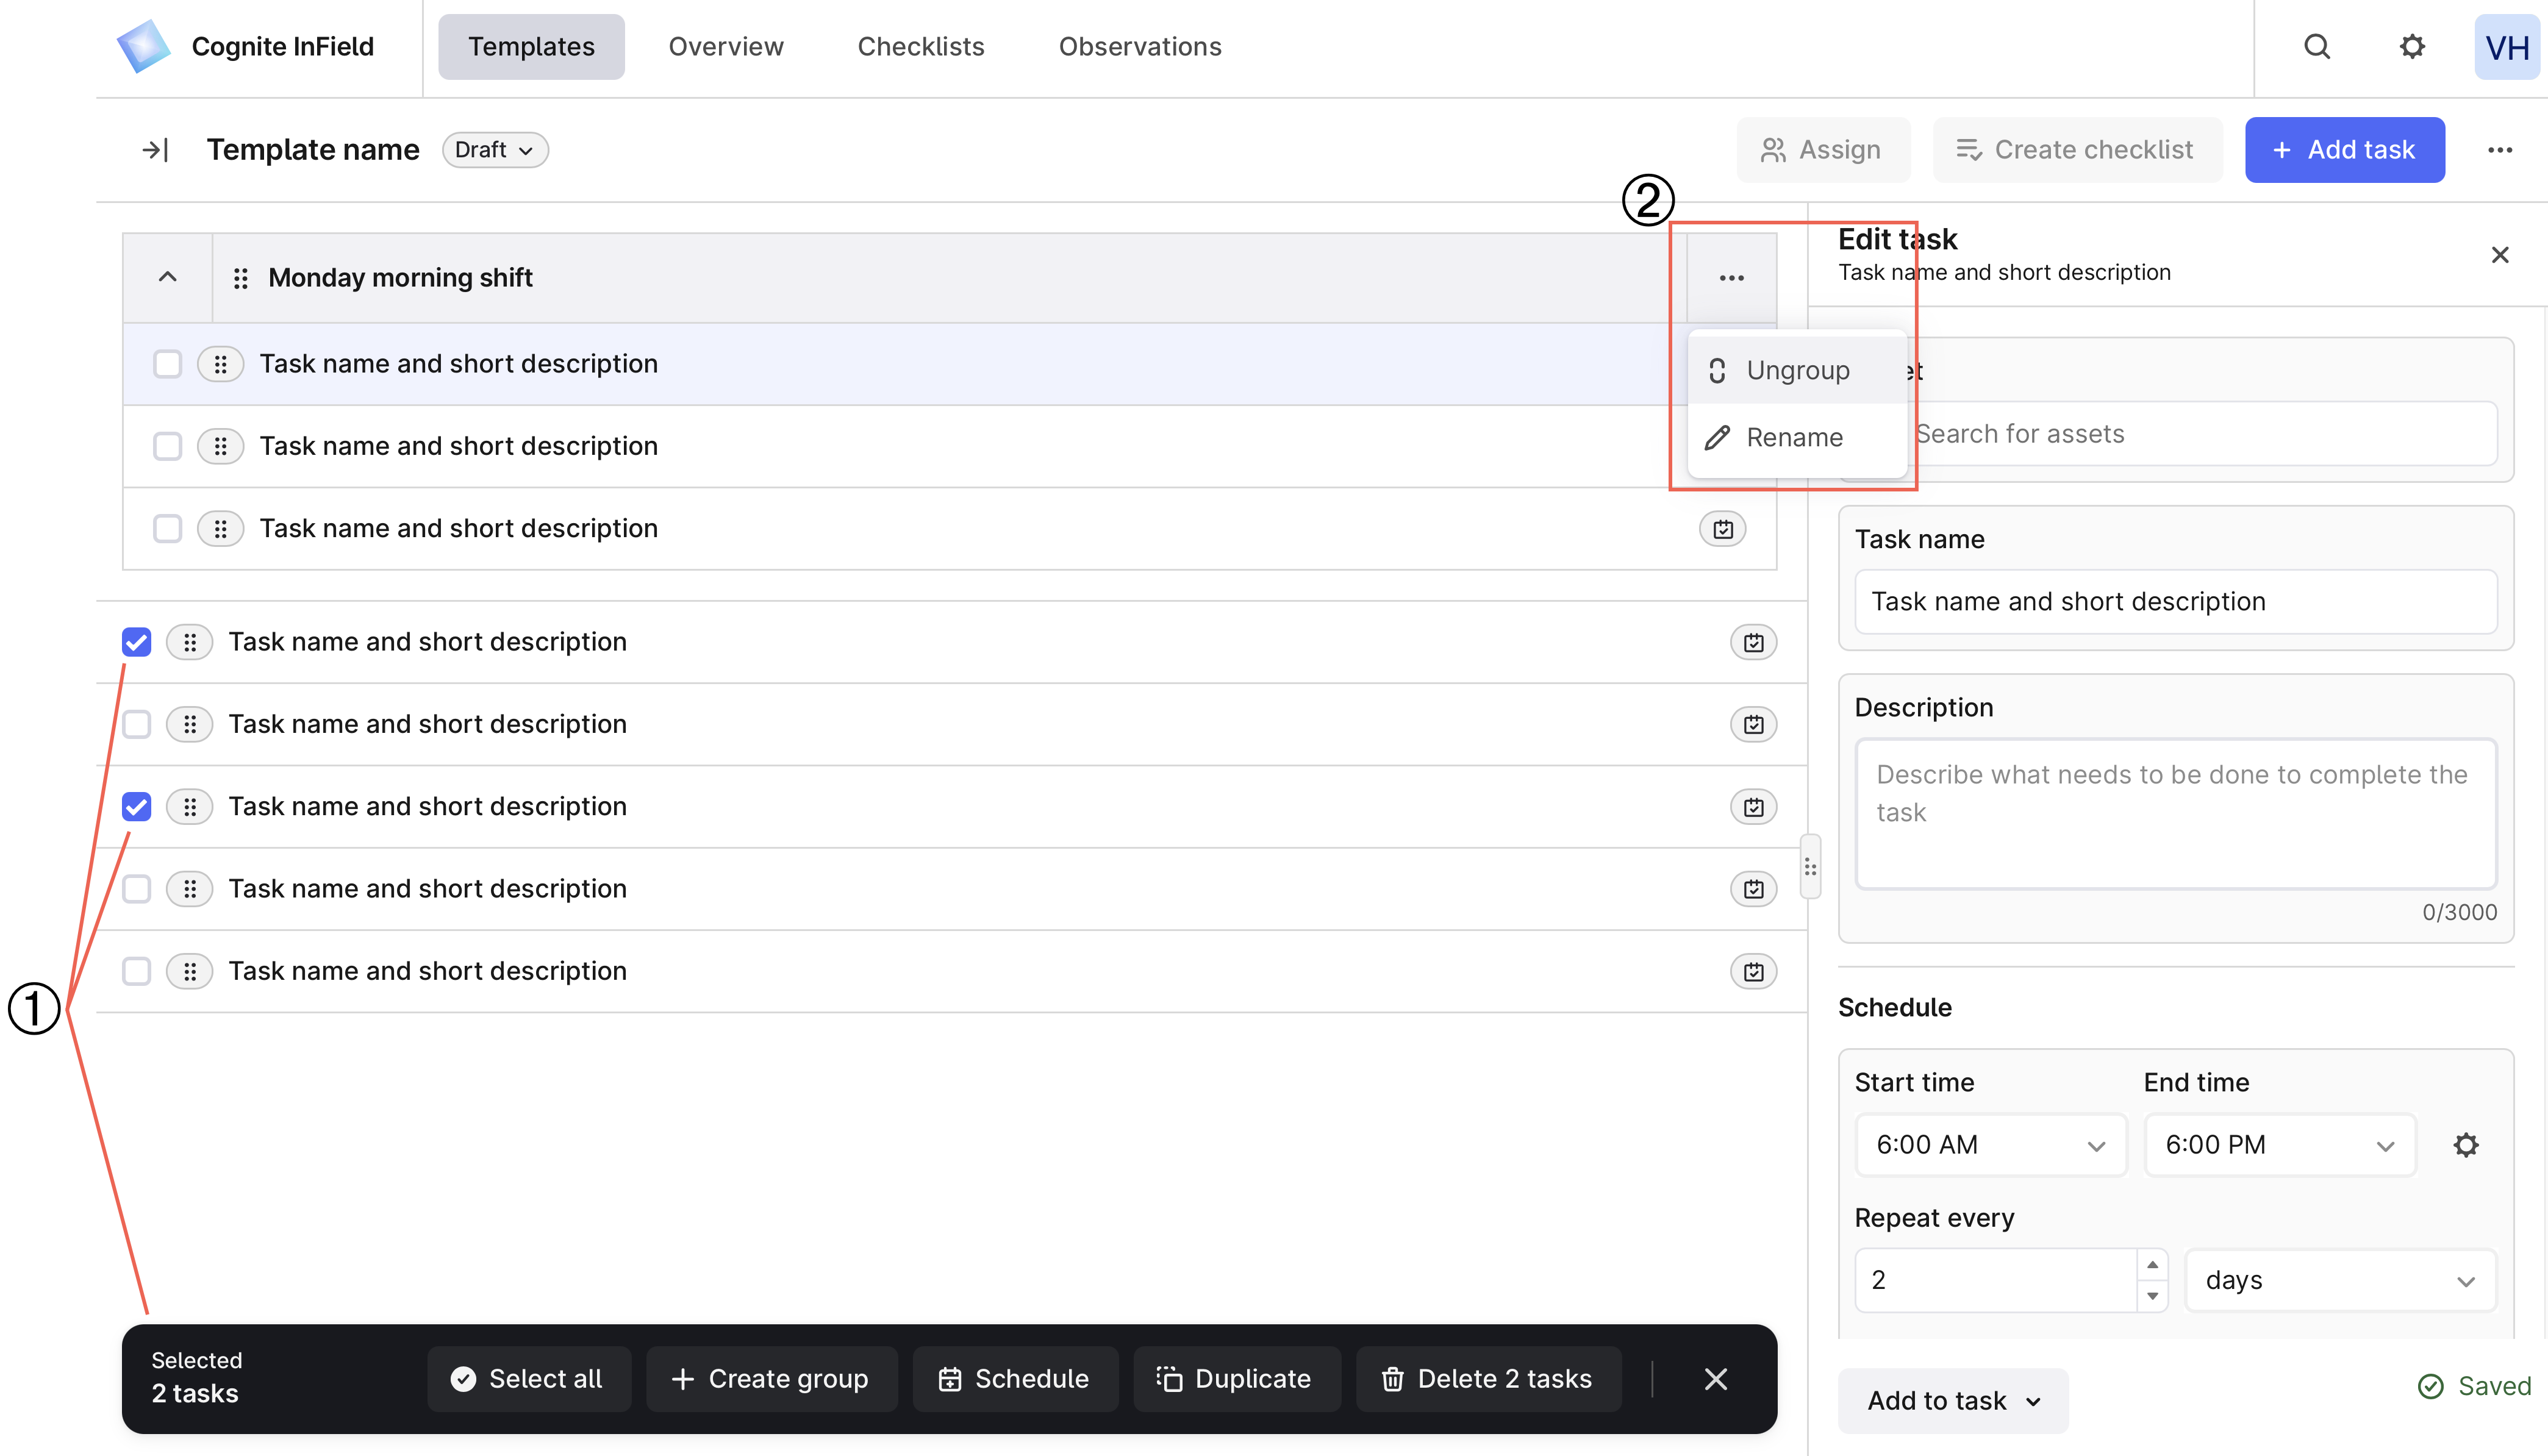
To work with several tasks at once, you can:
Step 3. Create checklists
A checklist is a task or a list of tasks generated from a template or a work order. On the Templates tab, you can create a checklist from a template or its tasks in two ways:- Manually. Select a template in the Ready status and, on the right, select Create checklist. Suggest a start and end date and confirm the creation. The dates are used for sorting only. You’ll create a checklist that’s a copy of the template, even if some tasks are scheduled for a different date and time.
- Automatically. Once you add a schedule to a task or a group of tasks, the tasks automatically appear in the created checklist based on the schedule. Remember to move the templates to Ready, otherwise, the schedule won’t start. Template tasks that aren’t scheduled won’t be included in the checklist created from the scheduled tasks.
Automatic scheduling creates checklists with a delay unless you create them before the task start time.