Before you start
Make sure you have:- Access to a CDF project with permissions to view 3D models
- An active CDF license that allows token acquisition
- Power BI Desktop installed.
To use this visual, your 3D models must be stored in CDF using Cognite’s asset-centric data models. Models stored in CDF core data models are not yet supported.
Step 1: Configure Microsoft Entra ID permissions
This allows the Power BI visual to securely connect to your CDF project.This step requires administrator permissions and is a one-time setup per tenant.
Prepare two consent URLs by replacing the placeholders with your information
- Replace TENANTID with your tenant ID (found in Azure Portal > Microsoft Entra ID > Overview)
- Replace CLUSTER with your Cognite cluster name
Step 2: Add data to your report
Prepare your data set
Prepare a data set that you’ll connect to your Power BI report. It should include the following 3D model information:
- Model name (string) — the name of the 3D model
- Model ID (number) — the unique identifier for the model in CDF
- Revision ID (number) — the revision identifier for the model
Step 3: Add the 3D visual to your report
Open the Visualizations pane
In your Power BI report, select More options (…) in the Visualizations pane.
Add Cognite Data Fusion 3D Visual to your report
- Option 1: Import from local file
- Option 2: Download from AppSource
Import the visual from a local .pbiviz file.
- Select Import a visual from a file.
- Browse to your file location and select it.
- Confirm the import when prompted.
Step 4: Authenticate with CDF
Connect the visual to your CDF project.Step 5: Bind the data
Bind data fields
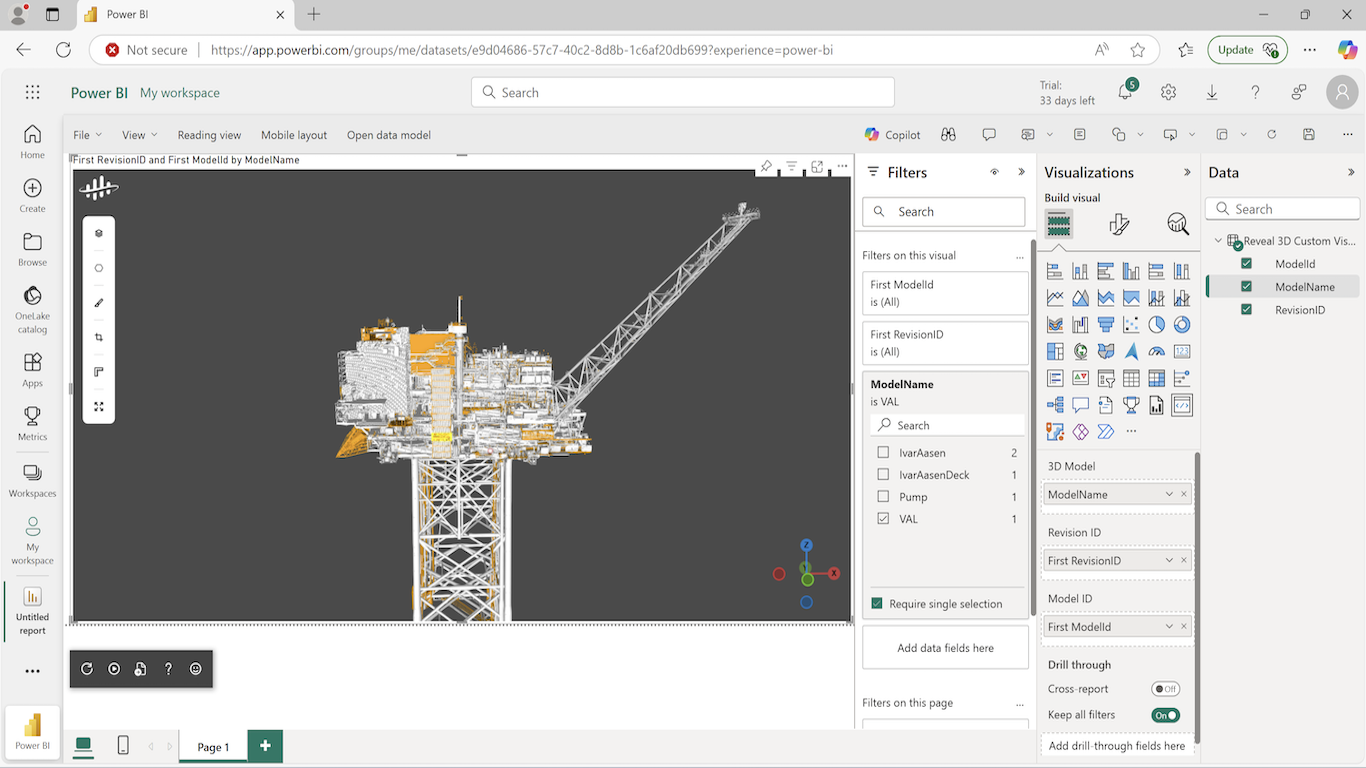
From the Data pane, drag Model name, Model ID, and Revision ID to the visual’s Filters section.
Step 6: Interact with the 3D viewer
Once a 3D model is loaded, you can navigate and interact with it using the viewer’s toolbar. Toolbar features- Filter the list of available 3D models
- Analyze and measure objects
- View node properties of the selected CAD model components
Troubleshooting
Find information to help you troubleshoot common issues.Token acquisition issues
Token acquisition issues
No data available
No data available