To perform the steps below, you must be an administrator of Microsoft Entra ID.
Before you start
Make sure you have registered the Cognite API and the CDF in Microsoft Entra ID and set up Microsoft Entra ID and CDF groups to control access to CDF data.Step 1: Register an app in Microsoft Entra ID
1
Sign in to the Azure portal
Sign in to the Azure portal as an admin.
2
Select a tenant
If you have access to multiple tenants, use the Directory + subscription filter in the top menu to select the tenant in which you want to register an application.
3
Select Microsoft Entra ID
Search for and select Microsoft Entra ID.
4
Add a new registration
Under Manage, select App registrations > New registrations.
5
Register an application
In the Register an application window, enter the app name and select Register.
6
Copy the Application ID
Copy and make a note of the Application (client) ID. You’ll need this value for authentication when reading and writing data with your integration service.
7
Create a client secret
Under Manage, select Certificates & secrets > New client secret.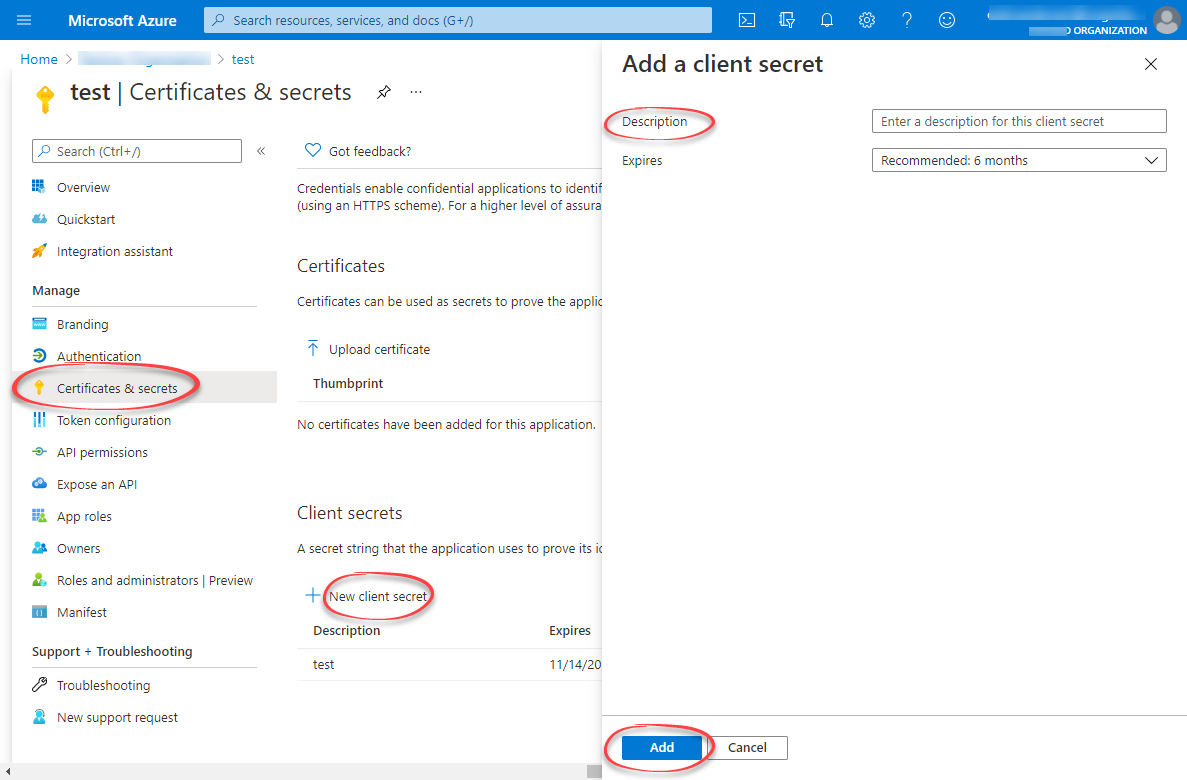
8
Configure the secret
Enter a client secret description and an expiry time, and then select Add.
9
Copy the client secret value
Copy and make a note of the client secret in the Value field.
Step 2: Create a group in Microsoft Entra ID and add the registered app as its member
1
Open Groups in Azure AD
Open the overview window in Microsoft Entra ID and select Manage > Groups.
2
Create a group
Create a group. Read more here.
3
Add members to the group
Open the group. Under Manage, select Members > Add members.
4
Add the app as a member
Find the app you created above and click Select.
5
Add users
Add all users you want to have access to the integration service as members.
6
Copy the Object ID
Return to the overview, and then copy and make a note of the Object Id.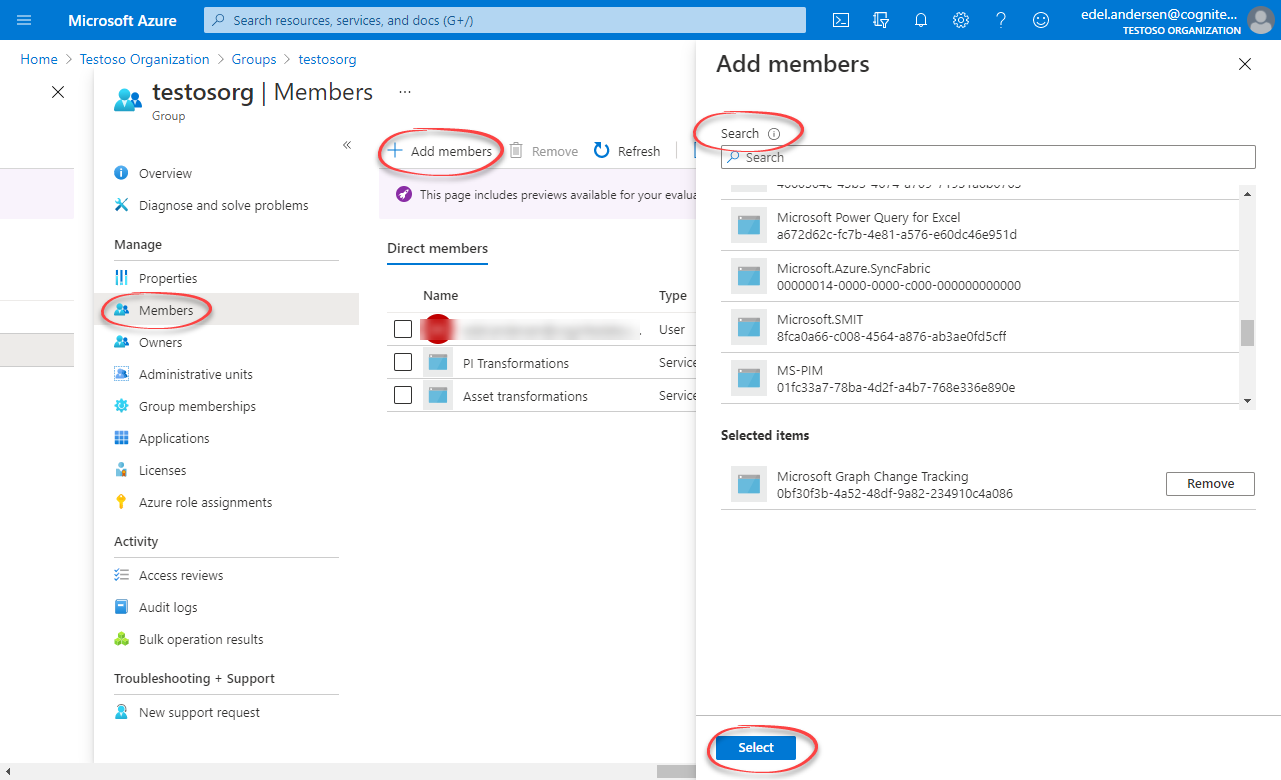
Step 3: Create a group in CDF and link to the Microsoft Entra ID group
1
Sign in to CDF
Sign in to CDF as an admin and navigate to Access > Groups > Create new group.
2
Create a new group
In the Create a new group window, enter the group name (case sensitive).
3
Add capabilities
Add the necessary capabilities for your integration service:
- For extractors, see extractor capabilities.
- For connectors, see connector capabilities.
4
Link to Microsoft Entra ID group
Link the group to a Microsoft Entra ID group:
- In the Source ID field, enter the Object Id for the AAD group exactly as it exists in AAD. You can use the same group Id for multiple services.
- In the Source name field, enter the name of the group in Microsoft Entra ID.
Step 4: Deploy your integration service
Configure and deploy your integration service according to the documentation:- For extractors, see the extractors documentation.
- For connectors, see the connectors documentation.