Before you start
To complete the configuration, you need to be a network administrator or use infrastructure-as-code automation, with permission to create Azure private endpoints.Step 1: Request a Private Link connection alias from Cognite
Contact Cognite support
If you have purchased Private Link, contact Cognite customer support and request a Private Link connection alias for your CDF projects.
Step 2: Create a private endpoint in Azure
Create a private endpoint
Follow the Azure documentation to create a private endpoint.
Enter the connection alias
When prompted, select Connect to an Azure resource by resource ID or alias, and enter the connection alias you received from Cognite.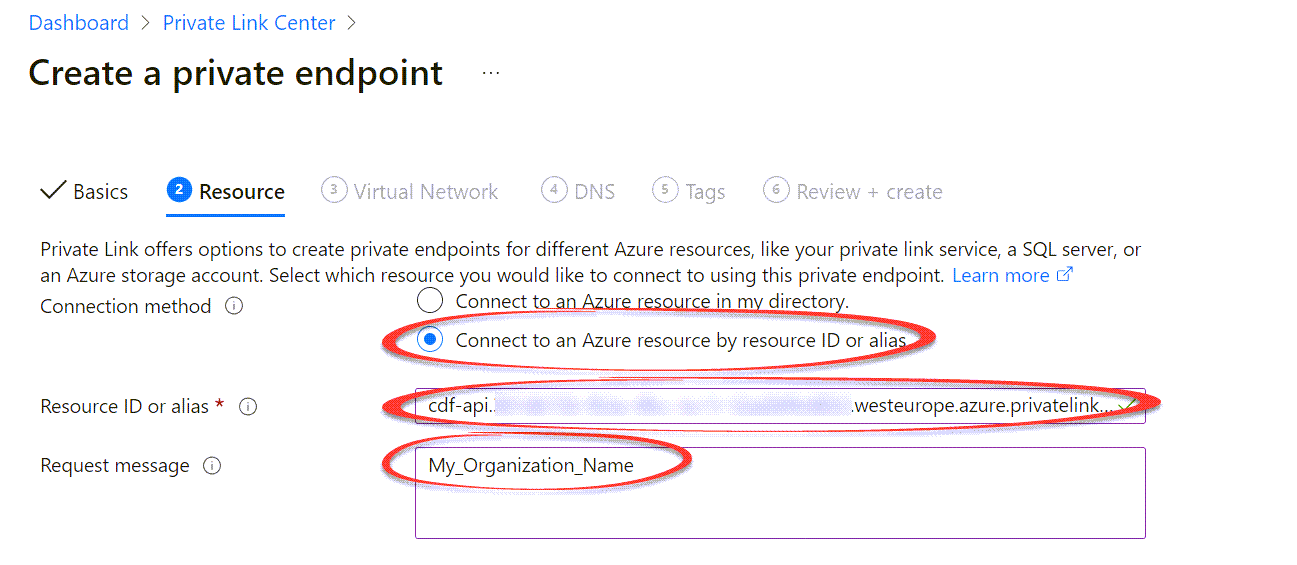
Step 3: Provide the private endpoint details to Cognite
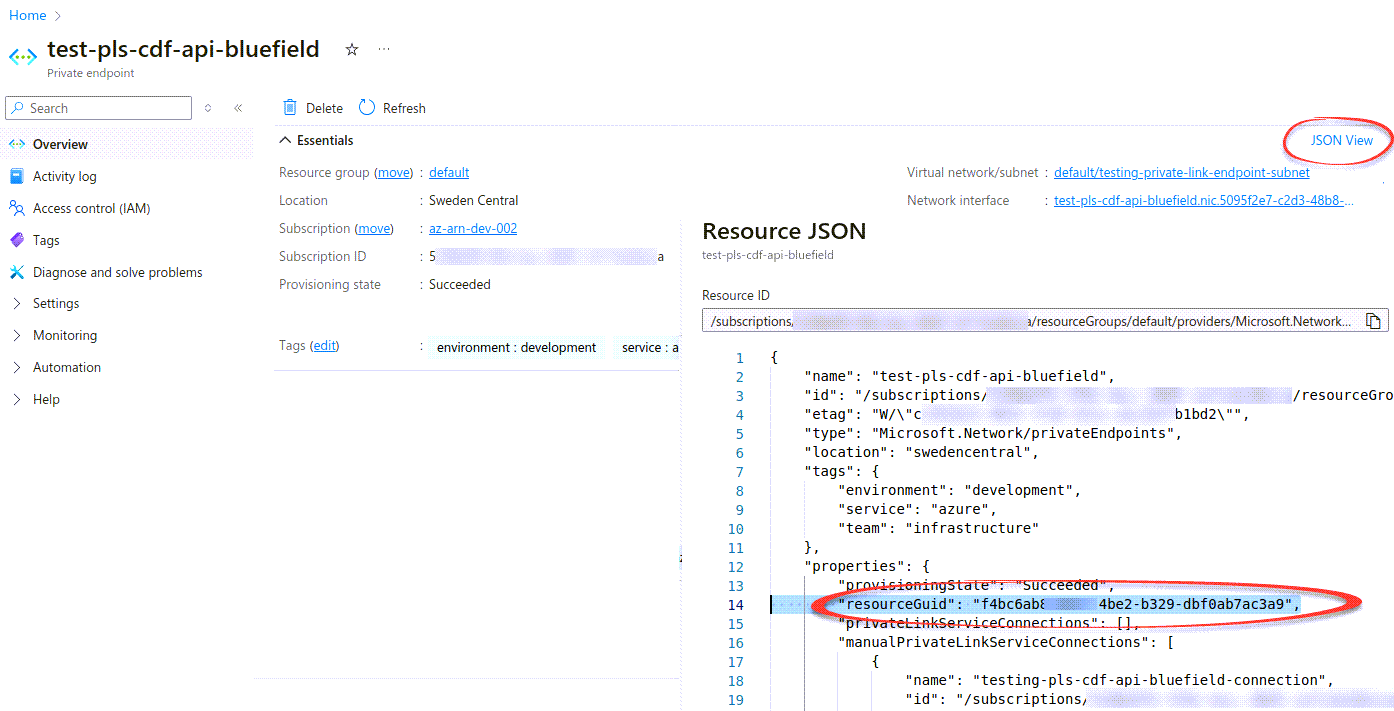
Contact Cognite customer support and provide the private endpoint details to configure your CDF projects:- The Resource GUID of the private endpoint:
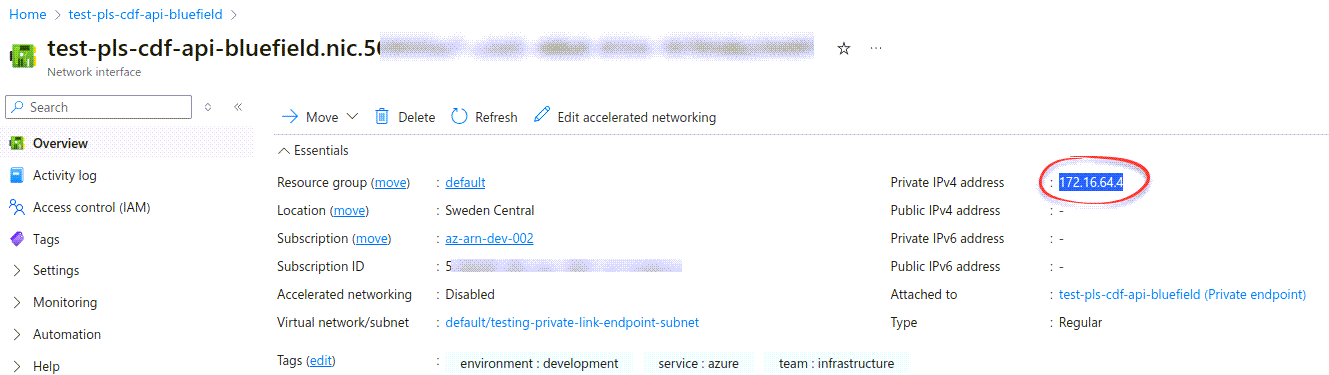
- The Private IPv4 address of the private endpoint network interface controller (NIC):
Step 4: Receive the base URL from Cognite
Copy the base URL
Make a note of the base URL you receive from Cognite. It’ll be in this format:
pNNN.plink.<cluster>.cognitedata.comRegister the Cognite API and applications
Use the base URL to register the Cognite API and applications and to register and configure other applications and components.