Register a custom web app
1
Sign in to the Azure portal
Sign in to the Azure portal as an admin.
2
Select a tenant
If you have access to multiple tenants, use the Directory + subscription filter in the top menu to select the tenant in which you want to register an application.
3
Select Microsoft Entra ID
Search for and select Microsoft Entra ID.
4
Navigate to New registrations
Under Manage, select App registrations > New registrations.
5
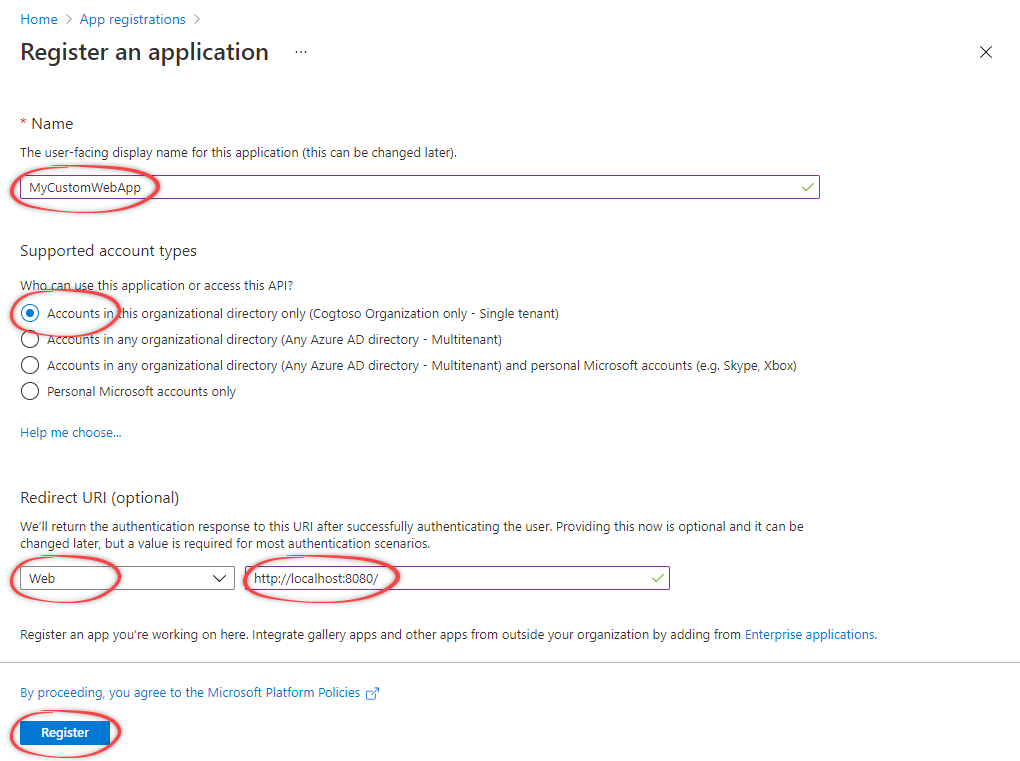
Select name and type
Specify the name and select an account type. Select the first option unless your organization’s preferences specify otherwise.
6
Select redirect URI
Under Redirect URI (optional), select Web and specify the redirect URI. Typically, this is the URL of your web app, or localhost for development. You can add more redirect URIs under Manage > Authentication.
7
Select Register
Create a client secret
1
Navigate to New client secret
Under Manage, select Certificates & secrets > New client secret.
2
Configure the client secret
Enter a description and how long the client secret will be valid. Then, select Add.
3
Copy the client secret
Copy and make a note of the client secret in the Value field.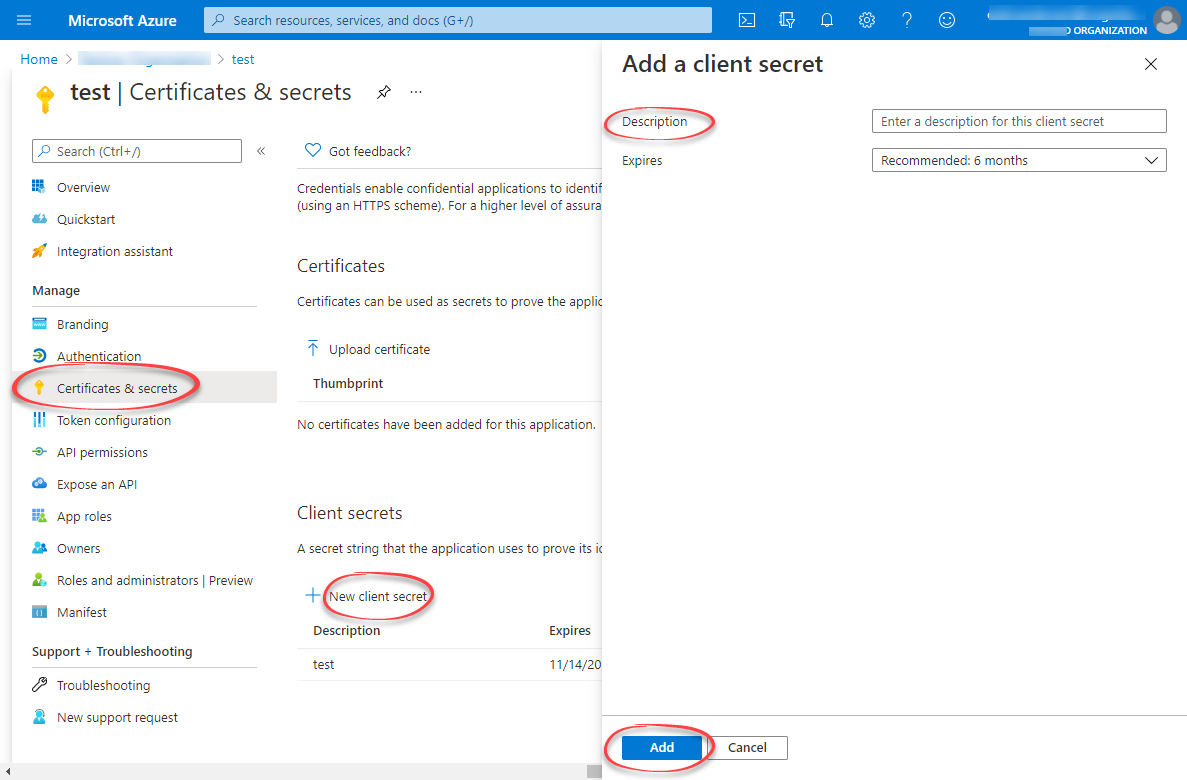
Make sure you copy this value now. This value will be hidden after you leave this page.
Configure API permissions
1
Navigate to API permissions
Under Manage, select API permissions. The Microsoft Graph
User.Read permissions should already be selected.2
Select the Cognite API
Select + Add a permission. In the side panel, open the APIs my organization uses tab, and select the Cognite API, for example
westeurope-1.3
Select application permissions
For Delegated permissions, select the required permissions for your application, for example
user_impersonation. The delegated permissions filter the permissions a user has based on group memberships, but don’t add any permissions.To use the token inspection endpoint, select IDENTITY.Learn more about the available permissions here.4
Add permissions
Select Add permissions. The API permissions should look similar to this: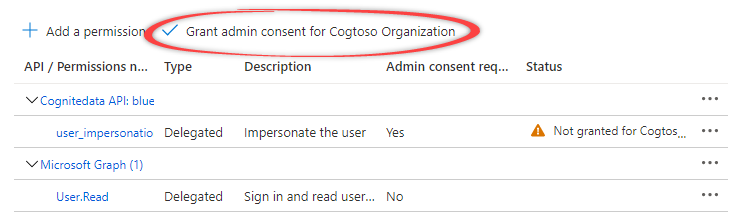
5
Grant admin consent
Select Grant admin consent for… and confirm that you want to make the new list of permissions active.