- Access to an Azure DevOps project with pipeline creation permissions
- A CDF project with authentication configured for the Cognite Toolkit
- The Cognite Toolkit installed and configured locally
- A Git repository connected to Azure DevOps
Add pipelines to your repository
Generate pipeline configuration files
In a terminal, run these commands and select Azure DevOps as the CI/CD provider to create a folder with example pipelines:The example pipelines are created in a
.devops folder in your repository.Customize and commit the pipelines
Adapt the pipelines to your needs, and then commit the changes to a new branch and push it to your repository:
Enable pull request validation (CI)
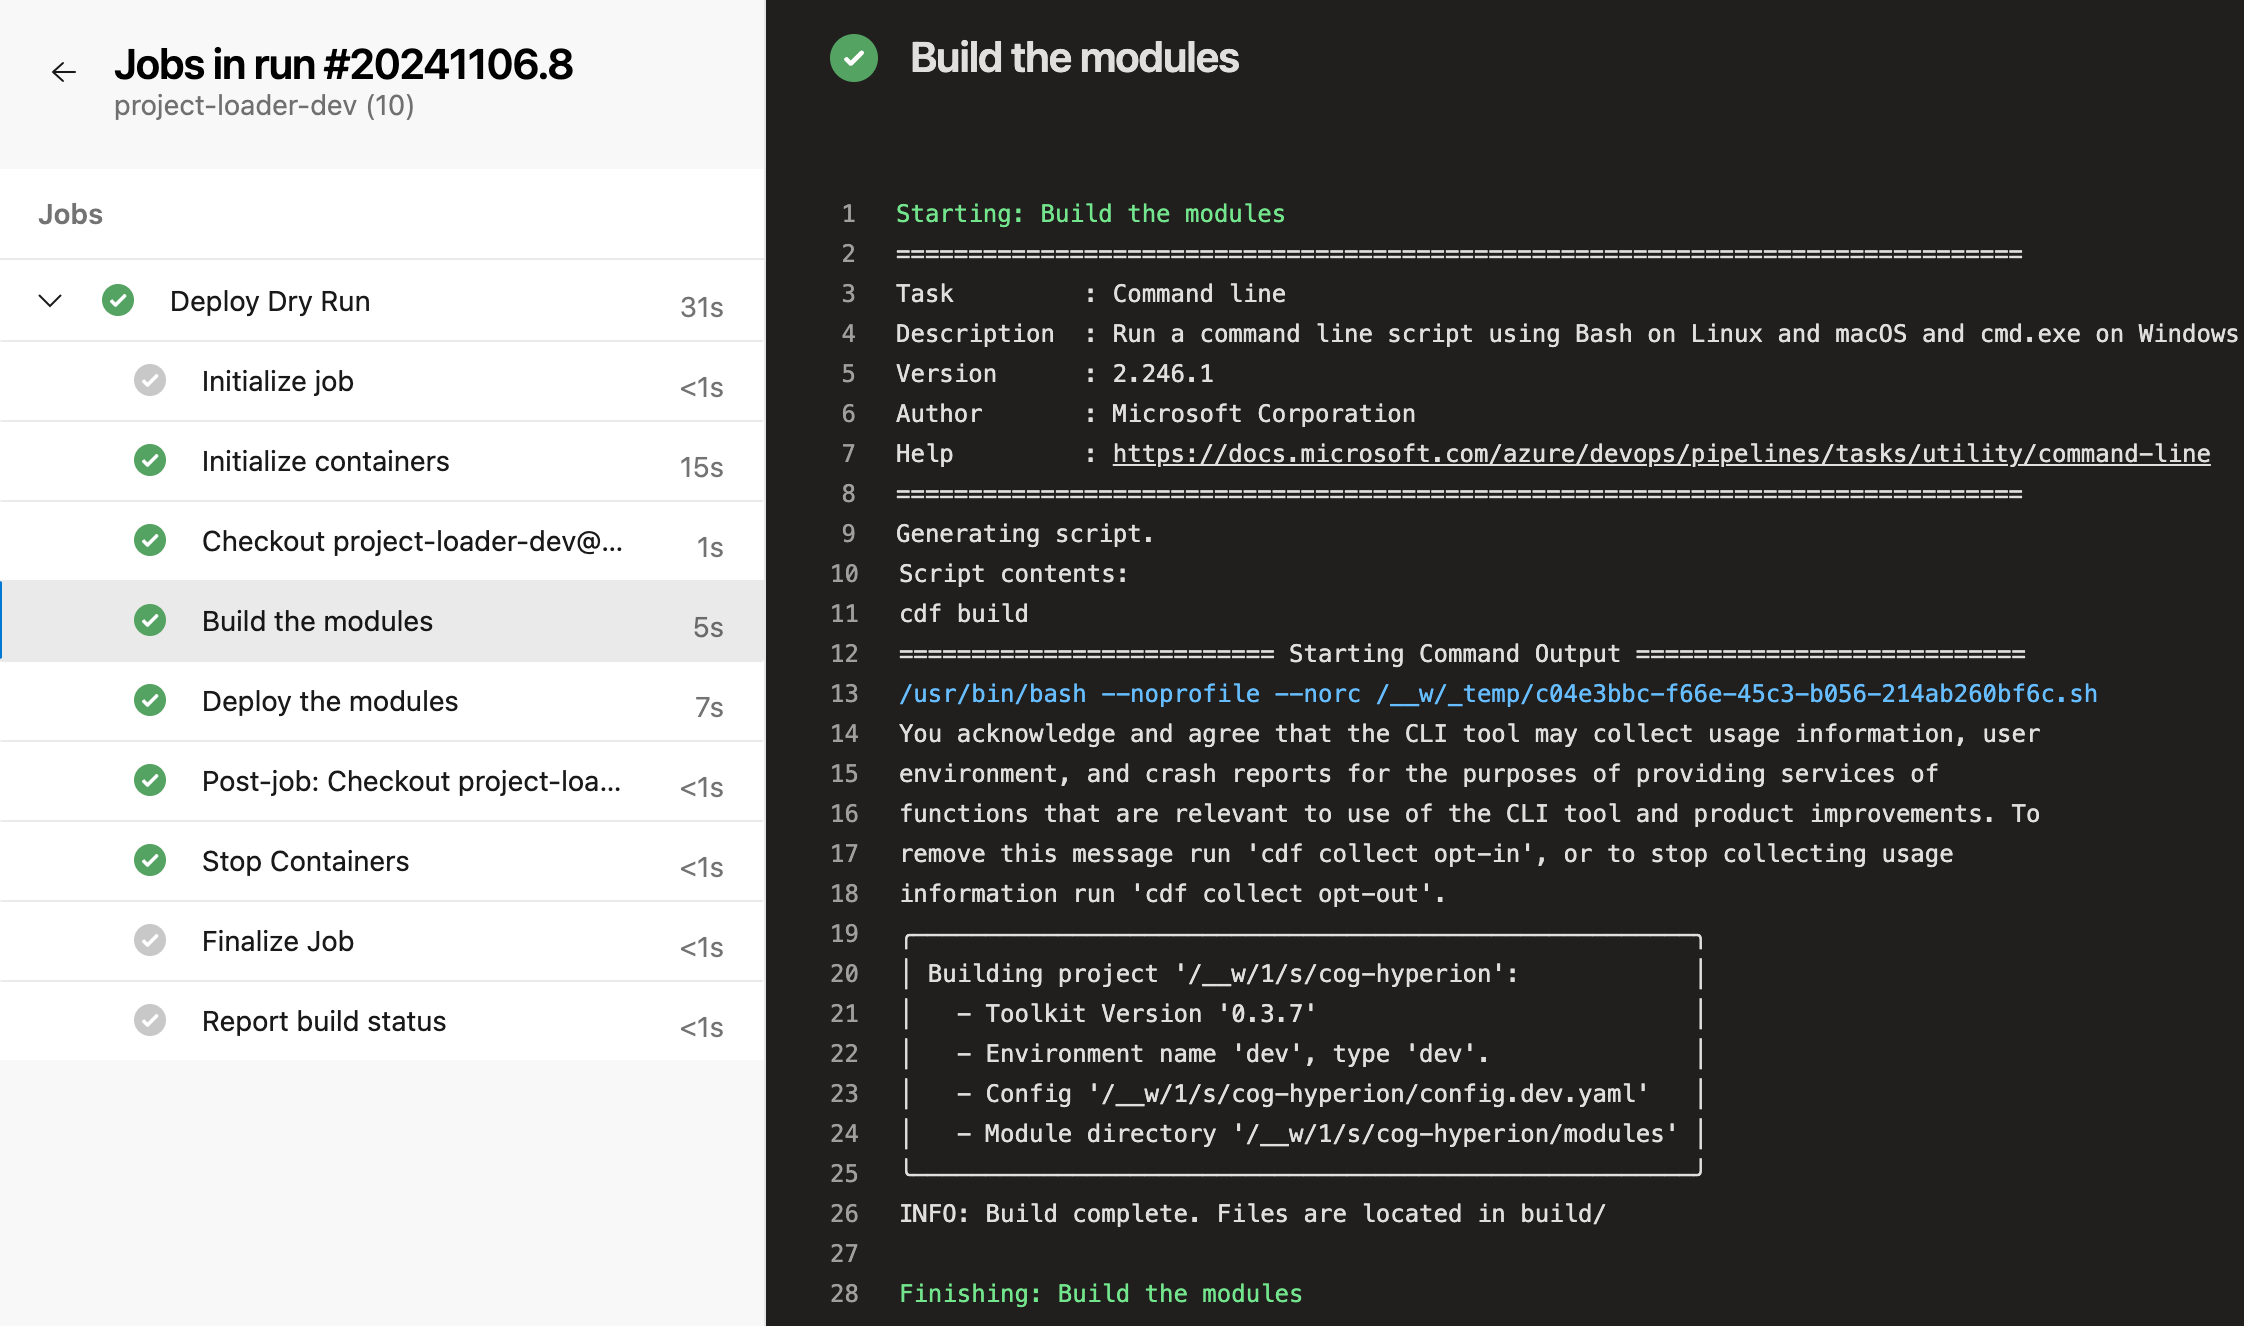
Automatic validation ensures that modules are valid before merging pull requests into the main branch.Create a dry-run pipeline
- In your DevOps project, navigate to Pipelines.
- Select New pipeline.
- Select the repository you pushed the changes to.
- Select Existing Azure Pipelines YAML file and specify:
- Branch: main
- Path:
./.devops/dry-run-pipeline.yml
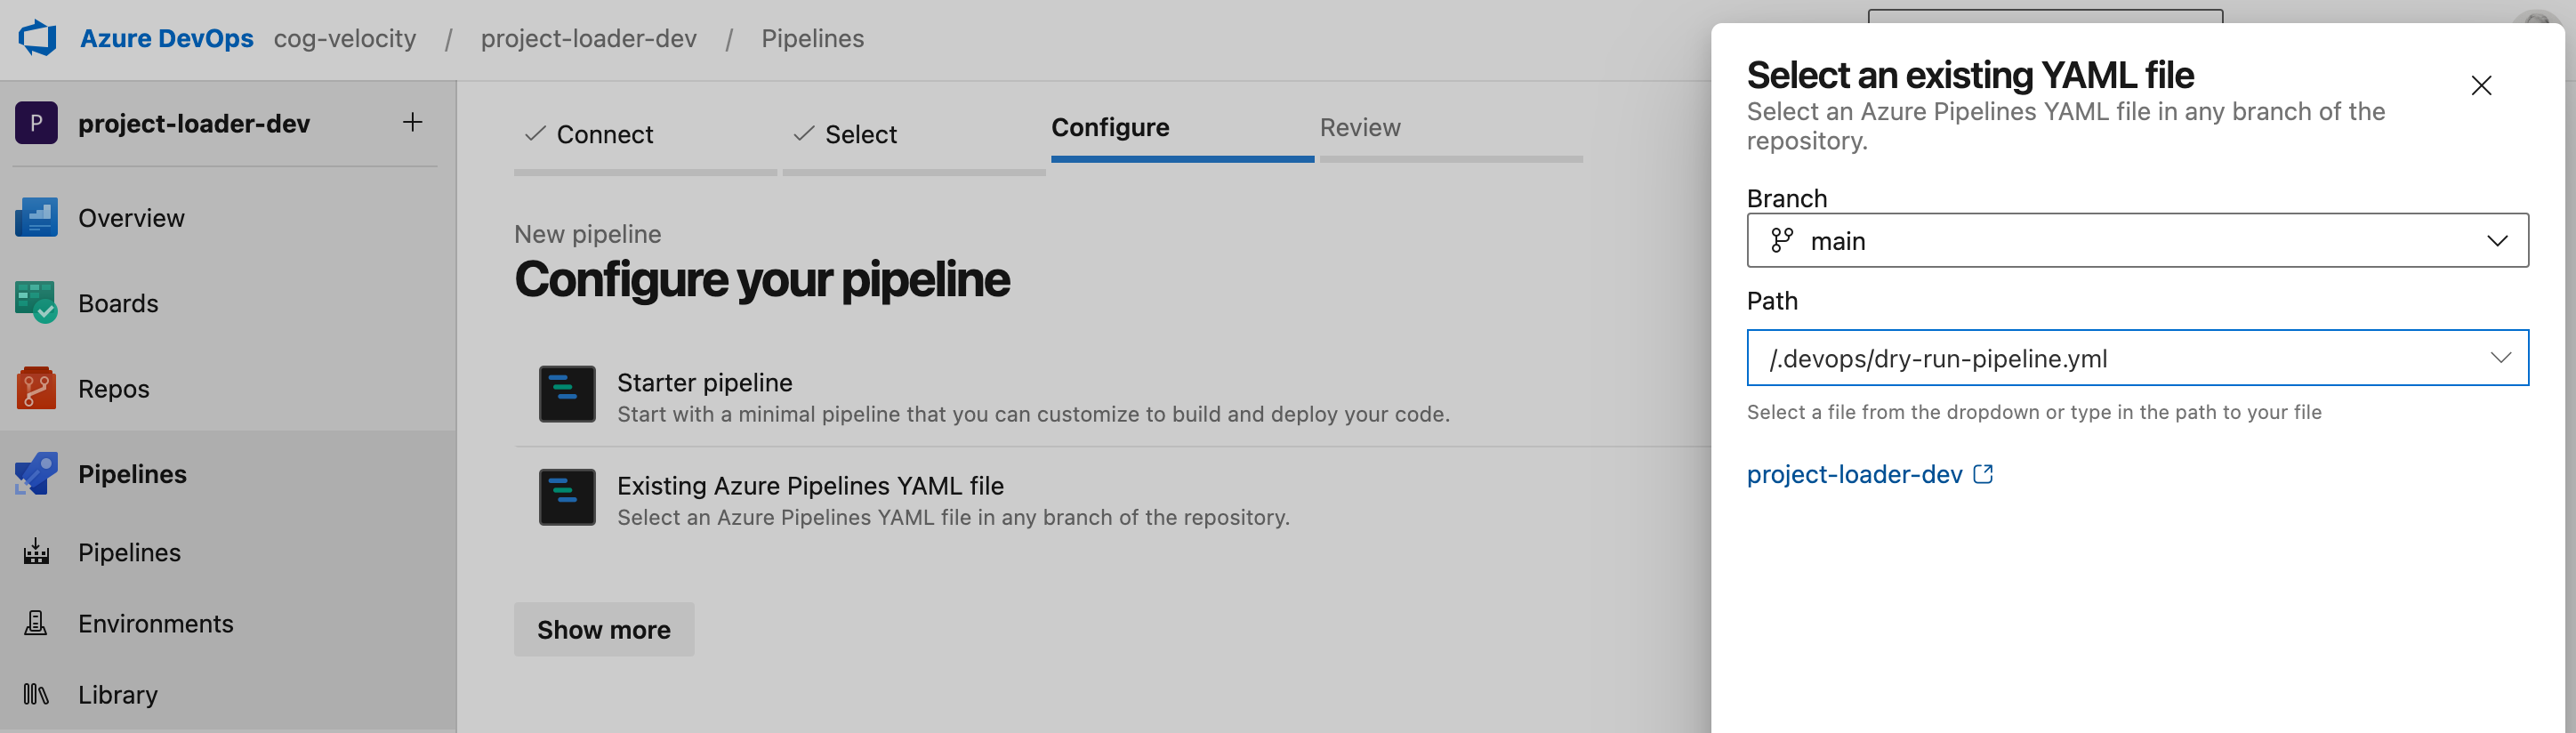
- Select Save (alternative to the Run button).
- In the pipeline overview, click the three dots and select Rename/move to set a descriptive name, for example “Pull request checks”.
Create variable groups for the dev environment
- In your DevOps project, navigate to Pipelines > Library.
- Select + Variable group.
-
Create a variable group with the name
dev-toolkit-credentials. - Select Pipeline permissions and grant access to the pipelines that should use these credentials.
-
Add these variables with the correct values for your environment:
CDF_CLUSTER- Your CDF cluster (e.g., westeurope-1)CDF_PROJECT- Your CDF project nameLOGIN_FLOW- Set toclient_credentialsIDP_CLIENT_ID- Your application client IDIDP_CLIENT_SECRET- Your client secret (important: mark as secret using the padlock icon)IDP_TOKEN_URL- Your token URL (if not using Entra ID)
Add the pipeline to branch policy
- In your DevOps project, navigate to Repos > Branches.
- Click the three dots next to the
mainbranch and select Branch policies. - Under Build Validation, click the
+button. - Select the dry-run pipeline you created.
- Set the minimum number of reviewers to 1.
All new pull requests now require a successful build and dry-run before merging.
Set up automatic deployment (CD)
Automatically deploy modules when changes are pushed to the main branch.Create a deployment pipeline
- In your DevOps project, navigate to Pipelines.
- Select New pipeline.
- Select your repository.
- Select Existing Azure Pipelines YAML file and specify:
- Branch: main
- Path:
./.devops/deploy-pipeline.yml
- Select Save (alternative to the Run button).
Create variable groups for the target environment
- In your DevOps project, navigate to Pipelines > Library.
- Select + Variable group.
-
Create a variable group with the name
<environment>-toolkit-credentials(e.g.,prod-toolkit-credentialsfor production). - Select Pipeline permissions and grant access to the deployment pipeline.
-
Add these variables with the correct values for your target environment:
CDF_CLUSTER- Your CDF clusterCDF_PROJECT- Your CDF project nameLOGIN_FLOW- Set toclient_credentialsIDP_CLIENT_ID- Your application client IDIDP_CLIENT_SECRET- Your client secret (important: mark as secret using the padlock icon)IDP_TOKEN_URL- Your token URL (if not using Entra ID)
The pipeline now automatically deploys modules when changes are pushed to the main branch.
Troubleshooting
OAuth 2 MUST utilize https error
Error message:IDP_TOKEN_URL which must use HTTPS.