

/speckit.specify, /speckit.clarify, and /speckit.plan — to plan a realistic Production Accounting dashboard. You will end with a spec.md that captures your intent, a Clarifications section that resolves every ambiguity, and a plan.md your agent can act on.
The last two commands, /speckit.tasks and /speckit.implement, are not covered. See Spec-driven development for the full flow.
The spec you write in this walkthrough drives toward a finished app like the one below — a KPI bar and a Balance Reconciliation Tree with quality badges, running as a Flows app in development mode:
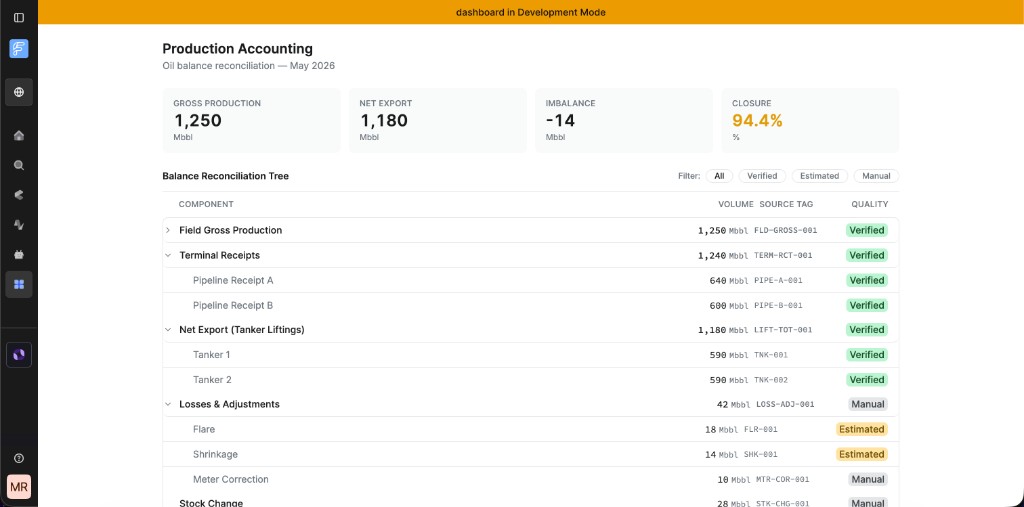
The Production Accounting dashboard this walkthrough plans toward: a KPI bar and a quality-flagged Balance Reconciliation Tree.
Prerequisites
You need a Flows custom app with spec-kit enabled. If you don’t have one yet:- Follow Getting started with Flows custom apps to create your app.
- When prompted Enable spec-driven development, choose Yes, then choose Yes again when prompted to enable spec-kit.
.cursor/commands/ and .claude/commands/.
Step 1: Specify your feature
Start with a short description of the app, then let spec-kit expand it into a structured spec.1
Run /speckit.specify with a one-liner description
Give spec-kit a short description of what you want to build. You don’t need to fill in every detail — the template will prompt you for the rest:The command creates
specs/001-production-accounting/spec.md pre-populated with the spec-kit template.2
Review and complete spec.md
Open Fill in any sections the template left as placeholders, especially Data Models & CDF Integration and Success Criteria.
specs/001-production-accounting/spec.md. The template has generated User Stories, acceptance scenarios, and placeholder Functional Requirements from your description. An example of the populated output (trimmed):Step 2: Clarify ambiguities
Resolve the open questions in the spec before you plan, so the implementation rests on explicit decisions.1
Run /speckit.clarify
2
Answer each question
For each question, your agent presents a recommendation and an options table. The following example is from the Production Accounting spec:Reply with the option letter or accept the recommendation. Your agent writes the answer directly back into the
spec.md Clarifications section:3
Review the clarification-complete report
When all questions are resolved, your agent outputs a summary:At this point,
spec.md is complete and ready for planning. Commit it before moving on so the decisions are in git history.Step 3: Generate the implementation plan
Turn the clarified spec into a concrete, reviewable plan your agent can act on.1
Run /speckit.plan
specs/001-production-accounting/plan.md. For the Production Accounting dashboard, the output included the following sections (trimmed):AGENTS.md, such as using @cognite/aura/components before raw HTML, following the ViewModel pattern, and writing tests for every hook and component that contains logic.2
Review and commit plan.md
Review
plan.md with your team before starting implementation. If anything looks off, update spec.md and re-run /speckit.plan. Commit both files together.You don’t have to use
/speckit.plan to generate this file. You can write plan.md yourself or produce it through your agent’s in-session plan mode — as long as the steps are numbered and ordered clearly enough for /speckit.tasks to split into a task list.Troubleshooting
The /speckit commands don't appear in my editor
The /speckit commands don't appear in my editor
The slash commands ship only when you enable spec-kit during
apps create. Confirm that .cursor/commands/ and .claude/commands/ contain speckit.* files. If they’re missing, you created the app without spec-kit — there is no retrofit command, so re-scaffold the app and choose Yes at the spec-kit prompt, or manually copy the spec-kit files into your app. See Spec-driven development./speckit.clarify asks no questions or stops early
/speckit.clarify asks no questions or stops early
The command asks only about ambiguities it finds, up to five. If your
spec.md is already specific, it may ask fewer questions or none. Review the coverage report it prints. If a category you care about is marked resolved but you disagree, add detail to spec.md and run /speckit.clarify again./speckit.plan output doesn't match my spec
/speckit.plan output doesn't match my spec
The plan is only as good as the clarified spec. Update
spec.md — especially the Functional Requirements and the Data Models & CDF Integration section — then re-run /speckit.plan. Running the command again regenerates the plan from the current spec.What’s next
You’ve run specify, clarify, and plan on a real feature and committed aspec.md and plan.md to your repository. Your agent now has the context it needs to implement the Production Accounting dashboard.
The next two spec-kit commands decompose the plan into executable tasks and run them in order:
/speckit.tasks— writes an orderedtasks.mdwhere each task maps back to a functional requirement./speckit.implement— runs the tasks in sequence, stopping at each one to confirm before continuing.