> ## Documentation Index
> Fetch the complete documentation index at: https://docs.cognite.com/llms.txt
> Use this file to discover all available pages before exploring further.
# Ingest data into CDF RAW
> Use the PostgreSQL gateway to ingest data from ETL tools into CDF RAW tables.
You need to define the table structure in the PostgreSQL gateway before setting up the sink/destination in your ETL tool.
This documentation requires that you have completed [Step 3: Set PostgreSQL gateway as sink](/cdf/integration/guides/interfaces/postgres_gateway/setup_data_factory#set-postgresql-gateway-as-sink).
## Step 1: Manage tables in PostgreSQL gateway APIs
The [Cognite API](/api-reference/concepts/20230101/api-description) will help create, retrieve, alter, and delete tables in the PostgreSQL gateway for a table in CDF RAW.
### Create a table
Sign in to [Postman](https://www.getpostman.com). You can also use the web version of Postman if you haven't downloaded the tool.
In your workspace, create a new request and enter the request name **Create table**.
Select the request type as **POST** and enter your request URL - `https://{cluster}.cognitedata.com/api/v1/projects/{project}/postgresgateway/tables/{username}`. See [Setting up PostgreSQL gateway](/cdf/integration/guides/interfaces/postgres_gateway#step-4-create-user-credentials-for-the-postgresql-gateway) for more information.
Where:
* `cluster` is where your CDF instance exists. If you don't know the cluster name, contact [Cognite support](https://cognite.zendesk.com/hc/en-us/requests/new).
* `project` is the organization name of your CDF instance.
* `username` with the username credentials
On the **Authorization** tab, select **OAuth 2.0** as the type of Authorization. To get your access token, see [setting up PostgreSQL gateway](/cdf/integration/guides/interfaces/postgres_gateway#step-4-create-user-credentials-for-the-postgresql-gateway).
The **Body** tab allows you to specify the data you need to send with a request for every POST request. Inside the Body tab, select **raw** as the data model and select **JSON** from the dropdown as the data format and enter the below JSON:
```json theme={"languages":{"custom":["/_languages/kuiper.json","../_languages/kuiper.json"]}}
{
"items": [
{
"type": "raw_rows",
"tablename": "tablename",
"options": {
"database": "my_database", /* my_database is your database name in CDF */
"table": "my_table", /* my_table is your table name in CDF */
"primaryKey": "title"
},
"columns": {
"title": {"type": "TEXT"},
"year": {"type":"TIMESTAMPTZ"}
}
}
]
}
```
`tablename` cannot be any of these built-in table names:
assets, double\_datapoints, events, extraction\_pipeline\_runs, extraction\_pipelines, files, labels, raw\_rows, raw\_tables, relationships, sequence\_rows, sequences, string\_datapoints, time\_series, data\_models, views, containers, units, unit\_systems
Select **Send** to fetch a response.
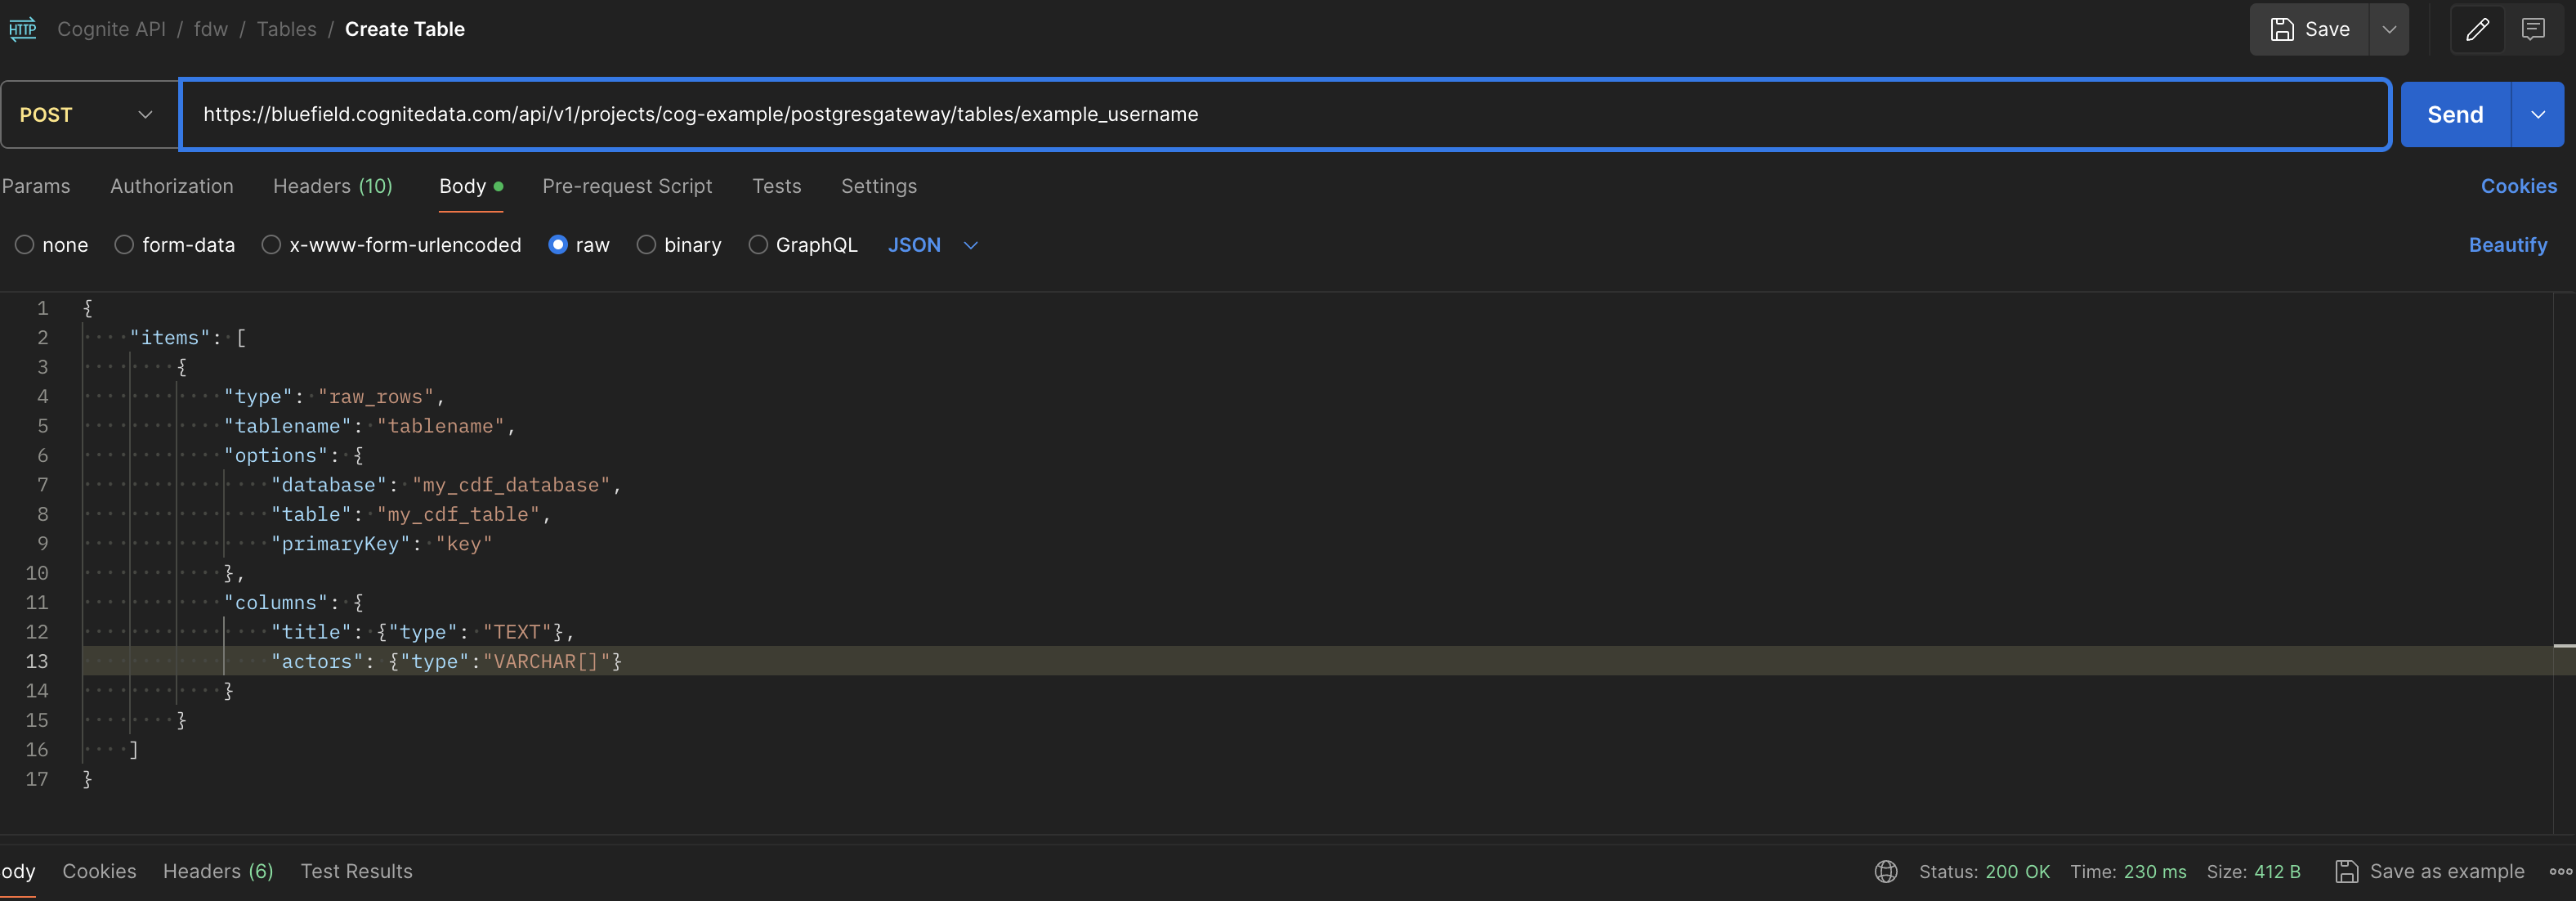 You have successfully created a new table.
When you've created a table in the PostgreSQL gateway, the corresponding table in CDF RAW is created when the first row is ingested using the PostgreSQL gateway.
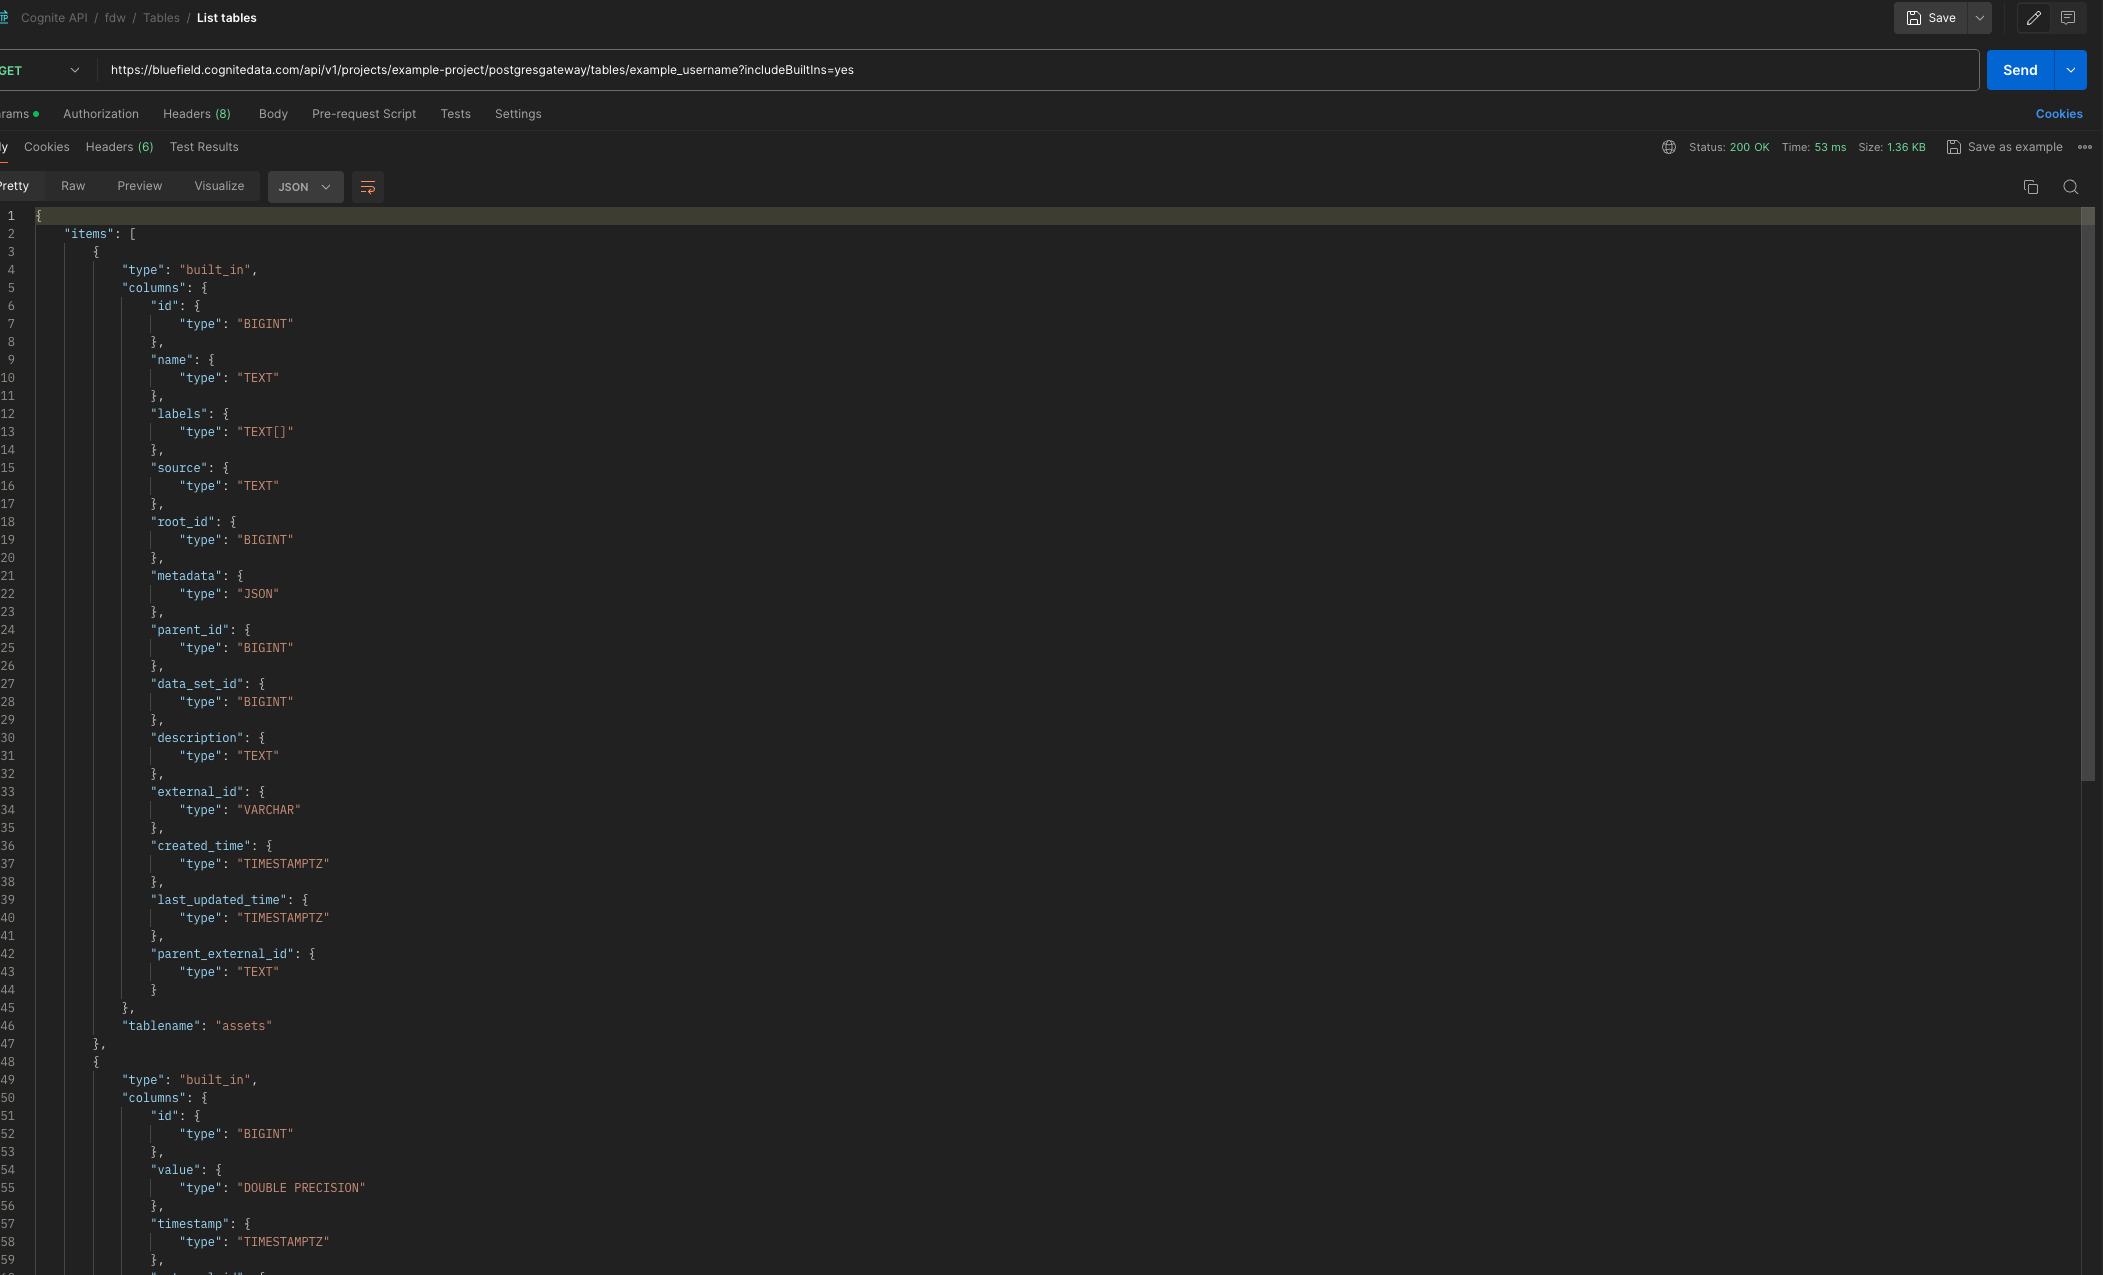
### List tables
Create a new request and enter the request name **List tables**.
Select the request type as **GET** and enter your request URL as
`https://{cluster}.cognitedata.com/api/v1/projects/{project}/postgresgateway/tables/{username}`
Select Authorization type as **OAuth2.0**.
Select **Send** to fetch the response.
You have successfully created a new table.
When you've created a table in the PostgreSQL gateway, the corresponding table in CDF RAW is created when the first row is ingested using the PostgreSQL gateway.
### List tables
Create a new request and enter the request name **List tables**.
Select the request type as **GET** and enter your request URL as
`https://{cluster}.cognitedata.com/api/v1/projects/{project}/postgresgateway/tables/{username}`
Select Authorization type as **OAuth2.0**.
Select **Send** to fetch the response.
 ### Delete a table
Create a new request and enter the request name **Delete table**.
Select the request type as **POST** and enter your request URL as
`https://{cluster}.cognitedata.com/api/v1/projects/{project}/postgresgateway/tables/{username}/delete`
Select Authorization type as **OAuth2.0**.
Inside the **Body** tab, select **raw** as the data model and select **JSON** as the data format.
Enter this JSON:
```json theme={"languages":{"custom":["/_languages/kuiper.json","../_languages/kuiper.json"]}}
{
"items": [{ "tablename": "" }]
}
```
Only custom tables created with the examples above can be deleted.
Select **Send** to fetch the response.
### Delete a table
Create a new request and enter the request name **Delete table**.
Select the request type as **POST** and enter your request URL as
`https://{cluster}.cognitedata.com/api/v1/projects/{project}/postgresgateway/tables/{username}/delete`
Select Authorization type as **OAuth2.0**.
Inside the **Body** tab, select **raw** as the data model and select **JSON** as the data format.
Enter this JSON:
```json theme={"languages":{"custom":["/_languages/kuiper.json","../_languages/kuiper.json"]}}
{
"items": [{ "tablename": "" }]
}
```
Only custom tables created with the examples above can be deleted.
Select **Send** to fetch the response.
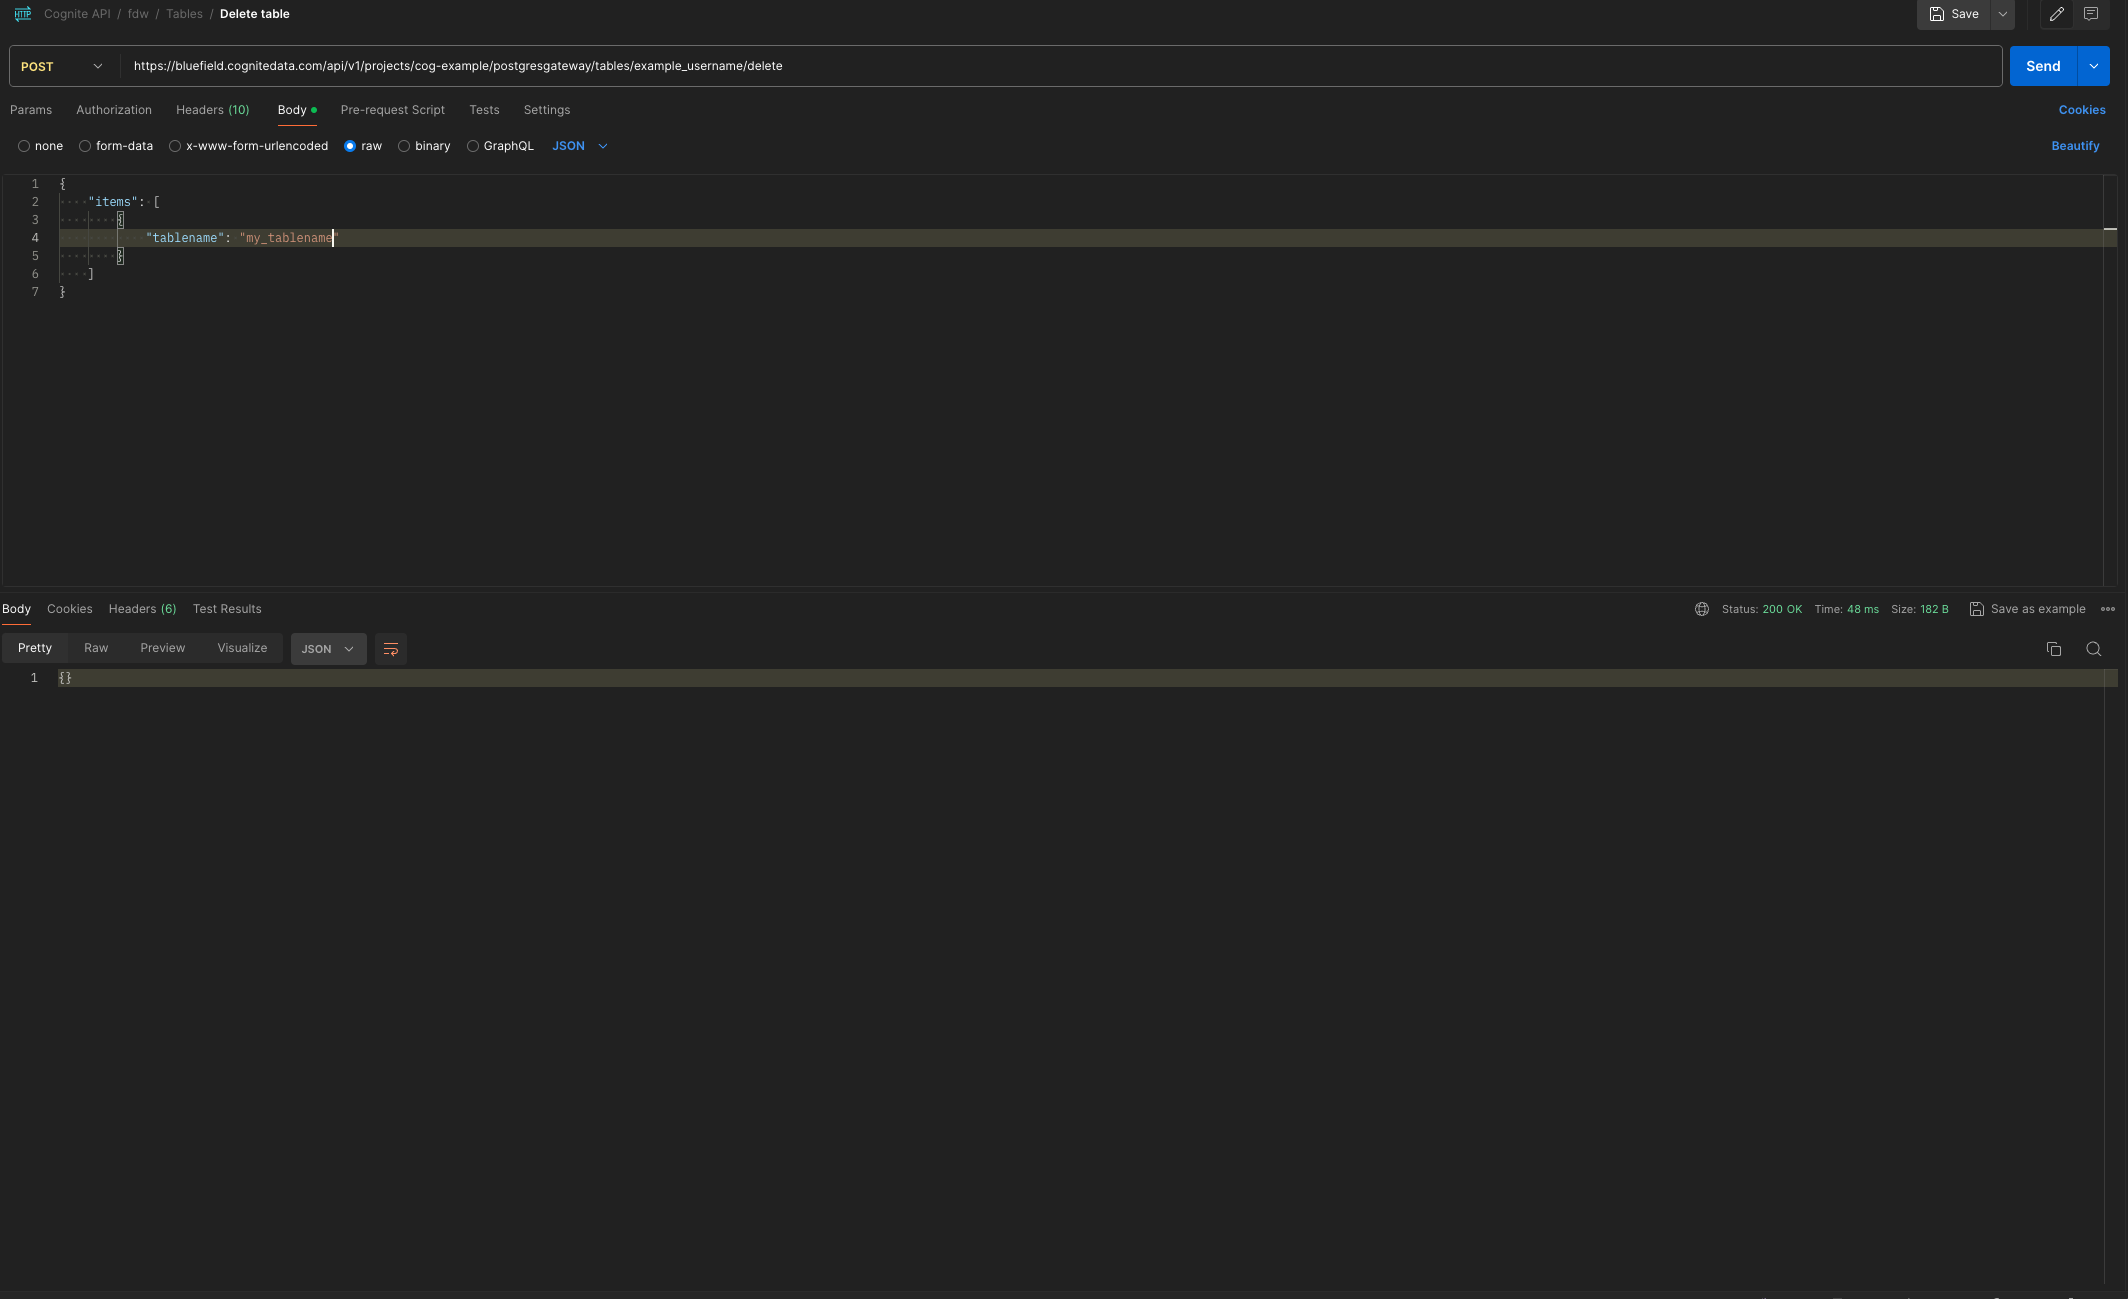 `{}` in the response indicates you have successfully deleted the table.
When you delete a table, it's also deleted in the PostgreSQL gateway, but not from CDF RAW.
## Step 2: Complete the connection in ETL
Verify that the table you created above is available as a foreign table in your ETL tool.
Configure your ETL pipeline between the source system and CDF RAW.
`{}` in the response indicates you have successfully deleted the table.
When you delete a table, it's also deleted in the PostgreSQL gateway, but not from CDF RAW.
## Step 2: Complete the connection in ETL
Verify that the table you created above is available as a foreign table in your ETL tool.
Configure your ETL pipeline between the source system and CDF RAW.