The configuration is subject to change depending on permissions, restricted access on the SharePoint level, etc.
Register an application
1
Register the application
Follow the steps to register an application that the Cognite File extractor will use to connect to SharePoint Online.
2
Set up groups (optional)
3
Assign API permissions
Assign relevant API permissions to use Microsoft Graph API. The example has the minimal setup for the File extractor to read all SharePoint Online sites.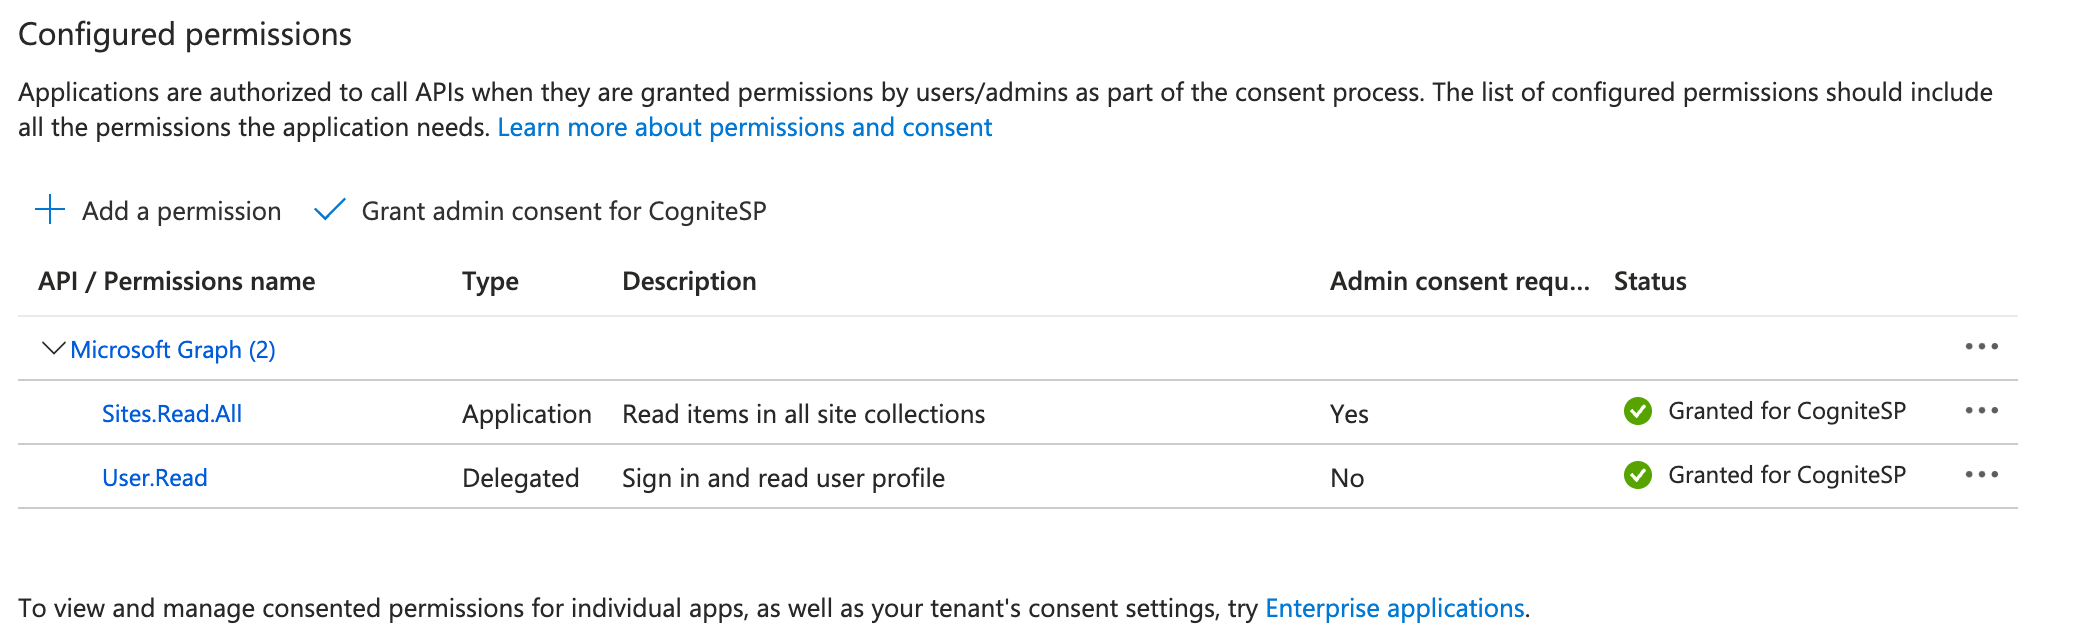
SharePoint app permissions
After creating the App Registration, add its details to the SharePoint administration app registration.1
Create SharePoint app permission
To create a new SharePoint app permission, go to this URL https://YOUR-SHAREPOINT-NAME-admin.sharepoint.com/_layouts/15/AppInv.aspx, where
YOUR-SHAREPOINT-NAME should be changed. Make sure to use your Microsoft 365 admin account.2
Enter Application ID
Enter your Application (client) ID in the App Id field and select Lookup. You should see the App registration details filled out.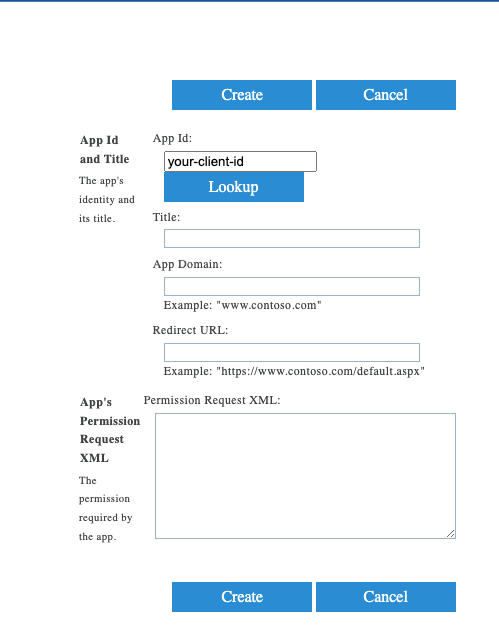
3
Configure App Domain and Redirect URL
Enter App Domain and Redirect URL of your App registration. For a local execution of the File extractor, enter the values of a localhost domain:
4
Add Permission Request XML
Add the App’s Permission Request XML to configure the SharePoint permission level. This may vary from every configuration scenario. The example gives the minimal XML with the
Read permissions to all SharePoint sites.The configuration is subject to change depending on permissions, restrict access on the SharePoint level, etc.
5
Confirm trust
Select Create and then confirm that you trust SharePoint.
Run extractor
Once you register the application and add the SharePoint app permissions, you can extract files from SharePoint Online.1
Download the extractor
Go to Data fusion > Integrate > Extractors > Cognite File extractor > Download extractor.
2
Configure the extractor
In the downloaded folder, find and edit the
example-sharepoint.yaml configuration template by setting the App registration information and the related SharePoint configuration parameters.3
Run the extractor
Run the extractor. The example has a successful execution log.
4
Verify extraction
Check the extracted files in Data fusion > Data explorer.
Find the right paths in SharePoint Online
You can configure the File extractor to extract data from various paths in SharePoint Online. It’s possible to provide paths to sites, document libraries, folders, and individual files.Paths to sites
You can get the paths to sites from the address bar in your browser. Go to your SharePoint Online site, copy the URL from the address bar, and paste it into your configuration. For example, https://cogsp.sharepoint.com/sites/MySite.URLs with
/teams/ instead of /sites/ are also valid.Paths to document libraries
Sites in SharePoint Online can contain one or more document libraries where you store your files. New sites generally have only a document library calledDocuments, but you can create any number of document libraries.
To extract a single document library from a site, you need to find this document library URL.
1
Navigate to the document library
Go to the document library you want to extract.
2
Copy the URL
Copy the beginning of the URL until
/Forms/AllItems.aspx, for example, https://cogsp.sharepoint.com/sites/MySite/Shared%20Documents.Paths to files and folders
To find paths to files and folders:1
Select the file or folder
In SharePoint Online, go to Documents and select the file or the folder you want to extract.
2
Open details
Select More actions (…) > Details.
3
Copy the direct link
Scroll down to Paths and select Copy direct link to copy the URL to your clipboard, for example, https://cogsp.sharepoint.com/sites/MySite/Shared%20Documents/my%20folder/test.doc.The copied URL matches the document library URL with the file or folder path added.