> ## Documentation Index
> Fetch the complete documentation index at: https://docs.cognite.com/llms.txt
> Use this file to discover all available pages before exploring further.
# Configure InField
> Plan and configure the source data and the Cognite Data Fusion project that will power the InField application and set up assets and visualize data.
This documentation is preserved for reference only for existing customers who have already implemented InField using the APM configuration. For all new InField implementations, follow the [InField configuration documentation using data models](/cdf/infield/guides/config_idm).
Proper planning is crucial to setting up the InField application. This section helps you plan and configure the source data and the Cognite Data Fusion (CDF) project that will power the application and describes how to set up assets and visualize data in InField.
You can also use the [Cognite Toolkit](/cdf/deploy/cdf_toolkit/guides/set_up_infield) to use pre-built configurations to set up InField.
## Before you start
Make sure you have the following:
* A project registered in [CDF](https://fusion.cognite.com).
* [The Cognite API and the CDF application registered in Microsoft Entra ID](/cdf/access/entra/guides/configure_cdf_azure_oidc) and [Microsoft Entra ID and CDF groups set up to control access to CDF data](/cdf/access/entra/guides/create_groups_oidc).
* Data in the CDF project, an asset-centric data model must be in place.
* [URLs](/cdf/admin/allowlist) in your allowlist.
[Set up locations in InField](#configure-a-root-location) even if you have these set up in CDF. At the moment, CDF and InField use different location concepts.
## Set up access
You can use your existing identity provider (IdP) framework to manage access to InField and choose admin users. We currently support Microsoft Entra ID, Microsoft's cloud-based identity and access management service. By creating groups, you can assign different sets of capabilities to users and thus give different access rights to each group.
### Create an admin group
Create a group of users who can configure the InField application across all locations.
Go to [CDF](https://fusion.cognite.com) > Manage > Manage access.
Create a group and name it `applications-configuration`.
Give `read` and `write` access to all capabilities with the scope `All`, or have the minimum set of capabilities.
| Capability type | Action | Scope | Description |
| -------------------- | ------------------------------ | -------------------------------- | ------------------------------------------------------------------------- |
| Assets | `assets: read` | All | View asset data from the CDF project that InField runs on top of. |
| Groups | `groups: read`, `groups: list` | All | For InField administrators to grant access to users. |
| 3D | `3D: read` | All | Upload 3D models to display in InField. |
| Data sets | `datasets: read` | All | Get data from work order management system, such as SAP, and work orders. |
| Data models | `dataModel: read` | All | Organize and structure data. |
| Data model instances | `dataModelInstance:read` | All | Access data organized in data models. |
| Data model instances | `dataModelInstance:write` | `cognite_app_data`, `APM_Config` | Access and edit data organized in data models and spaces. |
### Create standard user groups
Create groups of users who can view checklists, administer checklists and templates, and work with checklists in the field. You can create similar groups for different locations. The groups can have the same capabilities but different access based on the group name.
Group names are suggestions and can differ from user to user.
#### Read only access
Create a group of users who can view but not edit checklists. You can name the group `infield_dev_location_viewers`, where `dev` is the InField environment, and `location` is the location that the group will have access to.
| Capability type | Action | Scope | Description |
| -------------------- | ------------------------------ | ------------------------------------------------------------------------------------------------------------------------------------------------------ | --------------------------------------------------------- |
| Groups | `groups: read`, `groups: list` | All | View user groups. |
| Assets | `assets: read` | `asset_datasets` | View and analyze asset details. |
| 3D | `3D: read` | `threed_datasets` | View and analyze 3D models. |
| Files | `files: read` | `files_datasets, infield_app_data_dataset` | View and analyze images and files. |
| Relationships | `relationships: read` | `relationship_datasets` | View relationships between assets. |
| Time series | `timeseries: read` | `timeseries_datasets, infield_app_data_dataset` | View and analyze time series data. |
| Data models | `dataModel: read` | `APM_Config , cdf_apm , cdf_infield , cdf_core , cdf_apps_shared , apm_source_datamodel_space`- the space where the `APM_SourceData` model is defined | View and analyze the data created in InField. |
| Data model instances | `dataModelInstance:read` | `APM_Config , cdf_apm , cognite_app_data , location_app_data_space , location_source_data_space` | View and analyze the data created in InField. |
| Data model instances | `dataModelInstance:write` | `cognite_app_data` | Access and edit data organized in data models and spaces. |
#### Read and write access
Create a group of users who can administer checklists and templates and work with checklists in the field. This can be a single group for all users or 3 different groups. If you create 3 separate groups, you can use the following naming suggestions.
| Name | Description |
| --------------------------------------- | -------------------------------------------------------------------------------------------------------------------------------------------------------------------------------------------------------- |
| `infield_dev_location_checklist_admins` | Users in this group can create, update, delete, and approve checklists in the specified location (`location`) and environment (`dev`). |
| `infield_dev_location_template_admins` | Users in this group can create, update, and delete templates in the specified location (`location`) and environment (`dev`). They can also create, update, and delete observations and send them to SAP. |
| `infield_dev_location_checklist_users` | Users in this group can work with checklists and create observations in the specified location (`location`) and environment (`dev`). |
To create a group of users who can view and edit checklists, add the following capabilities:
* [Read only](#read-only-access) capabilities.
* The following write capabilities:
| Capability type | Action | Scope | Description |
| -------------------- | ------------------------- | ----------------------------------------------- | ------------------------------------------------------------------- |
| Files | `files: write` | `infield_app_data_dataset` | View and edit documents and files. |
| Relationships | `relationships: write` | `infield_app_data_dataset` | Relationships represent connections between pairs of CDF resources. |
| Data model instances | `dataModelInstance:write` | `location_app_data_space` | Access and edit data organized in data models and spaces. |
| Time series | `timeseries: write` | `timeseries_datasets, infield_app_data_dataset` | View, create, and edit time series data. |
To add checklist and template admins to your root location:
In [InField](https://cognite-infield.cogniteapp.com), go to Application configuration > Root Location > Edit location > Template/checklist admins.
Select the corresponding group for each dropdown and save the configuration.
Assigned admin user groups and their access capabilities apply to InField only.
#### SAP writeback (optional)
Assign the **SAP writeback** capability to the standard user groups to let them send observations to SAP.
| Capability type | Action | Scope | Description |
| ---------------------- | ----------------------------------------------------------- | ----- | ------------------------------------------------------------------------------------ |
| SAP writeback requests | `sapwritebackrequests: write`, `sapwritebackrequests: list` | All | Create requests to send data, such as work orders, assets, and observations, to SAP. |
See [SAP writeback service](/cdf/integration/guides/interfaces/sap_writeback) for more information.
## Create data modeling spaces
InField has two ways of storing assets: classic asset hierarchy and asset data modeling. You need to create at least 5 spaces to store your data and data models.
| Space name | Description |
| ------------------------------ | ------------------------------------------------------------------------------------------------------------------------------------------------------------------ |
| `cognite_app_data` | This space holds user data, such as user profiles. |
| `APM_Config` | This space holds configurations in Asset Performance Management (APM). |
| `APM_SourceData` | This space holds the schemas/data models for the data types that should be stored in the `yourRootLocation_source_data` space. |
| `yourRootLocation_source_data` | This space holds space data (data coming from a customer source system, such as SAP) for a particular location. |
| `yourRootLocation_app_data` | This space holds data coming from InField (from checklists and templates) for a particular location. |
| `ApmAppData` | You don't need to set up or change this space. `ApmAppData` is a system data model that's present in all projects by default. The data model has the `System` tag. |
Create new `yourRootLocation_source_data` and `yourRootLocation_app_data` spaces for each root location you have.
You can create spaces in the following ways:
* All 5 spaces with the [Cognite Python SDK](#spaces-created-with-sdk).
* 3 spaces with the [Cognite API and 2 spaces manually](#spaces-created-with-api) in the Cognite Data Fusion (CDF) or automatically by using the script.
### Spaces created with SDK
You can create all 5 spaces using [Cognite Python SDK](https://cognite-sdk-python.readthedocs-hosted.com/en/latest/index.html). Use the following Python code and replace `yourRootLocation` with your root location/asset name in `yourRootLocation_source_data`, `yourRootLocation_app_data`.
```python theme={"languages":{"custom":["/_languages/kuiper.json","../_languages/kuiper.json"]}}
from cognite.client.data_classes.data_modeling import SpaceApply
# List of spaces to create
spaces_to_create = ["yourRootLocation_source_data", "yourRootLocation_app_data", "APM_SourceData", "APM_Config", "cognite_app_data"]
# Apply spaces
for space_name in spaces_to_create:
client.data_modeling.spaces.apply(SpaceApply(space=space_name))
```
### Spaces created with API
Create the following 3 spaces using the [API endpoint](/api-reference/concepts/20230101/spaces):
* `cognite_app_data`
* `yourRootLocation_source_data`
* `yourRootLocation_app_data`
Use the same names for the `space` and `name` attributes. The `space` attribute is also the space ID.
Replace `yourRootLocation` with your root location/asset name in `yourRootLocation_source_data`, `yourRootLocation_app_data`.
`APM_Config` and `APM_SourceData` are the spaces that you can create manually in CDF or automatically by running the script. You create these spaces by creating corresponding data models.
**To create the spaces manually:**
Go to [CDF](https://fusion.cognite.com) > Data fusion > Data models > Create data model.
Name the data model `APM_Config` and add a description if needed.
Select From scratch > Space name > + Create new space.
Name the space `APM_Config`.
Follow the same steps to create the `APM_SourceData` data model and space.
**To create the spaces automatically:**
1. [Run the scripts in the repository](https://github.com/cognitedata/apm_datamodels) for `APM_Config` and `APM_SourceData` to automatically deploy these data models for your project.
## Add a scheduling function
With the scheduling function, users can create checklists from template tasks based on the schedule.
**To add the scheduling function:**
1. Go to the GitHub repository and follow the [manual deployment process](https://github.com/cognitedata/infield-functions?tab=readme-ov-file#manual-deployment-process) instructions.
The scheduling functionality in InField follows Google Calendar behavior with a few exceptions. See how to schedule checklists from template tasks in the InField application.
## AWS cluster
If you are on the AWS cluster and you want to enable file upload to it, add your project to the [feature flag](https://unleash-apps.cogniteapp.com/projects/default/features/INFIELD_IS_AWS_PROJECT).
## Configure `APM_Config` in CDF
A data model is an abstract model that organizes data elements and standardizes how they relate to one another and the properties of real-world entities. The CDF data model collects industrial data by [resource types](/dev/concepts/resource_types) that let you define the data elements, specify their attributes, and model the relationships between them. The different resource types are used to both store and organize data.
To create the `APM_Config` model and the corresponding space:
Go to [CDF](https://fusion.cognite.com) > Data fusion > Explore > Model your data > APM\_Config.
In the Editor, delete the existing code snippet and paste the `APM_Config` model data code snippet.
```python theme={"languages":{"custom":["/_languages/kuiper.json","../_languages/kuiper.json"]}}
type APM_Config @view (version: "1"){
name: String
appDataSpaceId: String
appDataSpaceVersion: String
customerDataSpaceId: String
customerDataSpaceVersion: String
featureConfiguration: JSONObject
fieldConfiguration: JSONObject
rootLocationsConfiguration: JSONObject
isDefault: Boolean
}
```
Populate the `APM_SourceData` model only after you've set up your root location in the InField application.
## Create transformations
Populate your locations with asset data. As you already have a classic asset hierarchy in place, you can use transformations to convert this data into assets in data modeling.
Read about [data transformation](/cdf/integration/concepts/transformation) and how to [transform data in CDF](/cdf/integration/guides/transformation/transformations).
First, create a transformation via the [API](/20230101/transformations/create-transformations) or SDK since certain functionality is unavailable in CDF.
For the code snippets, change the key for the `instanceSpace` attribute to `yourRootLocation_source_data` you created earlier. Ensure the parameters in the `view` object remain unchanged.
If you're using Postman, replace `{cluster}` and `{your_project}` with the actual project name.
```json theme={"languages":{"custom":["/_languages/kuiper.json","../_languages/kuiper.json"]}}
{
"items": [
{
"name": "migrate-classic-asset-to-core-asset",
"query": "/* MAPPING_MODE_ENABLED: false */\n/* {\"version\":1,\"sourceType\":\"clean\",\"mappings\":[{\"from\":\"externalId\",\"to\":\"externalId\",\"asType\":\"STRING\"},{\"from\":\"\",\"to\":\"parent\",\"asType\":\"STRUCT<`space`:STRING, `externalId`:STRING>\"},{\"from\":\"\",\"to\":\"source\",\"asType\":\"STRING\"},{\"from\":\"\",\"to\":\"root\",\"asType\":\"STRUCT<`space`:STRING, `externalId`:STRING>\"},{\"from\":\"\",\"to\":\"description\",\"asType\":\"STRING\"},{\"from\":\"\",\"to\":\"labels\",\"asType\":\"ARRAY\"},{\"from\":\"\",\"to\":\"title\",\"asType\":\"STRING\"},{\"from\":\"\",\"to\":\"sourceId\",\"asType\":\"STRING\"}],\"sourceLevel1\":\"_cdf\",\"sourceLevel2\":\"assets\"} */\nselect\n cast(asset.externalId as STRING) as externalId,\n \n (case \n when isnull(asset.parentExternalId) then null\n else node_reference('location_source_data_instance_space', asset.parentExternalId)\n end )as parent,\n cast(\"CDF Classic\" as STRING) as source,\n node_reference('location_source_data_instance_space', cast(rootAsset.externalId as STRING)) as root,\n cast(asset.description as STRING) as description,\n cast(asset.name as STRING) as title,\n cast(asset.externalId as STRING) as sourceId\nfrom\n cdf_assetSubtree('configured_location_externalId') as asset \n inner join cdf_assetSubtree('configured_location_externalId') as rootAsset on asset.rootId = rootAsset.id ",
"destination": {
"view": {
"space": "cdf_core",
"externalId": "Asset",
"version": "v1"
},
"instanceSpace": "location_source_data_instance_space",
"type": "nodes"
},
"conflictMode": "upsert",
"isPublic": true,
"externalId": "tr-migrate-classic-asset-to-core-asset",
"ignoreNullFields": true
}
]
}
```
```json theme={"languages":{"custom":["/_languages/kuiper.json","../_languages/kuiper.json"]}}
import json
_body = {
"items": [
{
"name": "migrate-classic-asset-to-core-asset",
"query": "/* MAPPING_MODE_ENABLED: false */\n/* {\"version\":1,\"sourceType\":\"clean\",\"mappings\":[{\"from\":\"externalId\",\"to\":\"externalId\",\"asType\":\"STRING\"},{\"from\":\"\",\"to\":\"parent\",\"asType\":\"STRUCT<`space`:STRING, `externalId`:STRING>\"},{\"from\":\"\",\"to\":\"source\",\"asType\":\"STRING\"},{\"from\":\"\",\"to\":\"root\",\"asType\":\"STRUCT<`space`:STRING, `externalId`:STRING>\"},{\"from\":\"\",\"to\":\"description\",\"asType\":\"STRING\"},{\"from\":\"\",\"to\":\"labels\",\"asType\":\"ARRAY\"},{\"from\":\"\",\"to\":\"title\",\"asType\":\"STRING\"},{\"from\":\"\",\"to\":\"sourceId\",\"asType\":\"STRING\"}],\"sourceLevel1\":\"_cdf\",\"sourceLevel2\":\"assets\"} */\nselect\n cast(asset.externalId as STRING) as externalId,\n \n (case \n when isnull(asset.parentExternalId) then null\n else node_reference('location_source_data_instance_space', asset.parentExternalId)\n end )as parent,\n cast(\"CDF Classic\" as STRING) as source,\n node_reference('location_source_data_instance_space', cast(rootAsset.externalId as STRING)) as root,\n cast(asset.description as STRING) as description,\n cast(asset.name as STRING) as title,\n cast(asset.externalId as STRING) as sourceId\nfrom\n cdf_assetSubtree('configured_location_externalId') as asset \n inner join cdf_assetSubtree('configured_location_externalId') as rootAsset on asset.rootId = rootAsset.id ",
"destination": {
"view": {
"space": "cdf_core",
"externalId": "Asset",
"version": "v1"
},
"instanceSpace": "location_source_data_instance_space",
"type": "nodes"
},
"conflictMode": "upsert",
"isPublic": True,
"externalId": "tr-2-migrate-classic-asset-to-core-asset",
"ignoreNullFields": True
}
]
}
body = json.dumps(_body, ensure_ascii=False, indent=2)
print(body)
client.post("/api/v1/projects/{sdf-project}/transformations", json=_body)
```
Once you've created the transformation, do the following:
In [CDF](https://fusion.cognite.com), go to Integrate > Transform data, and then select the `migrate-classic-asset-to-core-asset` transformation.
In the SQL editor, you need to switch the `location_source_data_instance_space` with your `location_space` (the space you created via the API in the beginning), and the `configured_location_externalId` with the `externalId` of your root asset.
Select Preview to test the transformation.
Comment out parent and root direct relation since you don't have assets yet to create relations.
Select Run when the populated table looks correct.
Include parent and root direct relation and run the transformation again.
When you run a transformation, make sure you create parents before children. It's also possible to create two transformations, one that creates the assets without direct relationships and then a second transformation that just updates the assets with these relationships.
## Configure a root location
The users need to have admin rights to be able to work with the root location configuration.
Root location is a root asset that's at the top of the [asset hierarchy](/api-reference/concepts/20230101/assets). The root asset is a digital representation of a site, such as an oil platform, a plant, or an installation. Each site in InField should have a root location. For each location you want to be available in InField, complete the detailed configuration to visualize the data in the InField application.
Sign in to [InField](https://cognite-infield.cogniteapp.com), select Application configuration (⚙) > Root Location > Add Root Location.
Select the root asset name or enter the location external ID and select Add.
Select Edit asset to set up some asset cards for the asset overview page and complete location configuration.
 ### Features
Configure what features your users can access and what asset details they can see in the asset explorer.
In the Features section, select what features to show in the application for the users in each location. Turn the features on or off to show or hide them. By default, the users can access all features except Observations.
| Feature | Description |
| ------------------------ | --------------------------------------------------------------------------------------------------------------------------------------------------------------------------------------------------------------------------------------------------------------------------------------------------------------------------------------------------------------------------------------------- |
| Templates and checklists | Create templates, create checklists out of a template or its tasks, assign checklists to disciplines, view and analyze the collected data on the Overview page. |
| Work orders | Create checklists from a work order or its tasks that come from a work management system and view and analyze the collected data on the Overview page. |
| Observations | Create observations on malfunctioning equipment or record other issues. When this feature is turned on, you can customize the fields on the observation form on the Observations tab.
### Features
Configure what features your users can access and what asset details they can see in the asset explorer.
In the Features section, select what features to show in the application for the users in each location. Turn the features on or off to show or hide them. By default, the users can access all features except Observations.
| Feature | Description |
| ------------------------ | --------------------------------------------------------------------------------------------------------------------------------------------------------------------------------------------------------------------------------------------------------------------------------------------------------------------------------------------------------------------------------------------- |
| Templates and checklists | Create templates, create checklists out of a template or its tasks, assign checklists to disciplines, view and analyze the collected data on the Overview page. |
| Work orders | Create checklists from a work order or its tasks that come from a work management system and view and analyze the collected data on the Overview page. |
| Observations | Create observations on malfunctioning equipment or record other issues. When this feature is turned on, you can customize the fields on the observation form on the Observations tab.
Provide external IDs for the Notifications and Attachments endpoints. You'll have these IDs when you create an SAP instance in the new write-back service. |
| Write-back to SAP | Send an observation copy as a Notification to SAP. Make sure that you provide external IDs for the Notifications and Attachments endpoints. |
In the Asset explorer section, select what cards to show for the assets in each location. Turn the cards on or off to show or hide them for the users.
Save configuration.
### 3D
Set up [3D models](/cdf/3d) for your location to view them on the 3D card on the asset overview page.
To display a 3D model on the 3D card:
1. Under Full weight model, select Add 3d model. The 3D model must already exist in CDF.
If your 3D model has [asset mappings](/api-reference/concepts/20230101/3d-asset-mapping), the 3D viewer will automatically display the selected asset.
You can add several 3D models per root location. The 3D viewer only shows models with asset mappings containing the current asset. If several models are available, the user can select which model to open.
The lightweight model is a low-resolution 3D model shown on the 3D card, which can be used to locate the current asset. Configuring such models isn't recommended since they require manual creation and provide limited value.
### Data set
Add the data set ID from a previously created data set that stores data (time series and files) created in InField. The time series created in InField gets a metadata field (`source`=`APP`) to identify its origin.
When adding a numerical reading, you can connect it to the time series created directly in InField and the time series stored in the data set for the selected location.
### Checklist and template admins (optional)
Specify groups of users who can create and edit templates (template admins) and who can view and approve checklists (checklist admins). If you don't select any group, all users will have the same access.
### AppData Instance Space
Enter the name of the space you created (`yourRootLocation_app_data`) to hold data on templates, checklists, and observations created in the application.
### SourceData Instance Space
Enter the name of the space you created (`yourRootLocation_source_data`) to hold data on assets, work orders, notifications, and other APM-related types.
To display work orders on the **Work orders** card:
1. Upload the work orders into the configured space. Make sure that:
* `assetExternalId` is set to the correct asset
* `cloneOf` = `null`
* `source` is NOT `APP`
* `space` = `yourRootLocation_source_data`
You can also configure how users see work orders data on the Work orders card on the asset overview page.
Return to the Application configuration page and select Activities.
Add fields to filter on and add accepted values. The work orders on the card will be filtered based on the values provided. For example, if you set the filter to show work orders based on their status with values *RDEX* or *VARX*, then the work order card will show work orders with the *RDEX* or *VARX* status. To view all work orders, select Open.
### Configure custom data filters
Custom data filtering lets you configure locations to see data from several asset subtrees and root assets in asset hierarchy and from data modeling service. You can filter on general data that includes all data types. You can also filter individually on assets, time series, and files.
To get access to data filtering:
In InField, go to Application configuration > Root location > Edit asset > Custom data filtering.
Copy the external ID **APP\_CONFIG\_V2** for a new version of the `APM_Config` model and select Create. This will create a copy of the existing model and add new fields to allow custom data filtering. All data configured in **APM\_Config** will be available in the new instance.
Make sure to copy the external ID **APP\_CONFIG\_V2**. You'll need this ID to delete the new configuration from CDF if something goes wrong. When you delete the new configuration, the original configuration will automatically revert all changes.
To add assets to filter data in asset hierarchy:
Under General, add external IDs of the assets you want to filter on in addition to your root location. Make sure your root location ID is included in the comma-separated list. Assets, time series, and files will inherit the provided IDs.
Under Assets, add prefixes of the external IDs of the assets that will be used to filter assets.
Under Time series, add prefixes of the external IDs of the assets that will be used to filter time series.
In the Data set IDs field, provide the data set ID that holds time series and files created in InField and add more data set IDs to filter time series. If you don't want to filter on data sets, leave the field empty.
Under Files, add prefixes of the external IDs of the assets that will be used to filter files.
In the Data set IDs field, provide the data set ID that holds time series and files created in InField and add more data set IDs to filter time series. If you don't want to filter on data sets, leave the field empty.
To add assets to filter data in data modeling service:
1. Under General, add external IDs of the assets you want to filter on in addition to your default root location. Make sure your root location and the root locations that you add belong to the same space.
### Observations
Once you turn on the Observations feature, you can customize the observation form fields for your users to collect the most relevant data on malfunctioning equipment. Go to Application configuration > Root location > Edit asset > Observations. Here, you'll have a default list of fields the users will need to fill out when creating an observation. You can change these fields according to your needs and make them required or not.
Use the preferred language for each location when changing titles and descriptions of the fields.
| Section name | Description |
| --------------- | --------------------------------------------------------------------------------------------- |
| Media | Users can attach a video or an image in this field. The maximum file size to upload is 50 MB. |
| Description | Users can give details about what happened and where. |
| Asset | Users can select an asset that's faulty or needs attention. |
| Priority | Users can select how critical the issue is and how quickly it must be resolved. |
| Type | Users can select the type of observation. |
| Troubleshooting | Users can describe the actions they've taken to resolve the issue. |
The Priority and Type fields have a list of options to choose from. You can add and remove options.
* The left-hand options **aren't visible** to users. These options should match those in your work management system (write-back service), and they'll be stored in CDF. If you've turned on the write-back to SAP, it will be also sent as a Notification to SAP.
* The right-hand options **are visible** to users. You can customize these options and use the preferred language for each location.
## Configure `APM_SourceData` in CDF
`APM_SourceData` holds the schema for the data that comes from the customer source systems, such as SAP.
Populate this model after you've set up your root location in the InField application.
InField uses the following data model entities:
| Data entity | View | Description |
| ------------------------------------------- | --------------------------------------- | ----------------------------------------------------------------------------------------- |
| Asset | cdf\_core.Asset | Preconfigured and can't be modified. |
| Maintenance orders (work orders/activities) | Apm\_SourceData.CogniteMaintenanceOrder | Must be populated and can be modified. See [Populate data models](#populate-data-models). |
| Operations | Apm\_SourceData.Operations | Must be populated and can be modified. See [Populate data models](#populate-data-models). |
| Notifications | Apm\_SourceData.Notification | Must be populated and can be modified. See [Populate data models](#populate-data-models). |
| Files (P\&IDs) | cdf\_core.File | Preconfigured and can't be modified. |
| Annotations (file contextualization) | cdf\_core.DiagramAnnotation (edge) | Preconfigured and can't be modified. |
| 3D | Ingested through 3D APIs | Preconfigured and can't be modified. |
### Populate data models
Populate the data model:
Go to [CDF](https://fusion.cognite.com) > Data fusion > Explore > Model your data > APM\_SourceData.
In the Editor on the left, delete the existing code snippet and paste the data types code snippet of the `APM_Activity`, `APM_Notification`, and `APM_Operation` types.
```python theme={"languages":{"custom":["/_languages/kuiper.json","../_languages/kuiper.json"]}}
type APM_Activity
@container(
indexes: [
{
identifier: "apm-activity-startTime-cursorable"
indexType: BTREE
cursorable: true
fields: ["startTime"]
}
{
identifier: "apm-activity-endTime-cursorable"
indexType: BTREE
cursorable: true
fields: ["endTime"]
}
{
identifier: "apm-activity-startTime"
indexType: BTREE
fields: ["startTime"]
}
{
identifier: "apm-activity-endTime"
indexType: BTREE
fields: ["endTime"]
}
{ identifier: "assetExternalId", fields: ["assetExternalId"] }
]
)
@view(version: "1") {
"Basic details"
id: String
title: String
description: String
source: String # e.g. SAP, COMOS, APP
"Scheduling"
startTime: Timestamp
endTime: Timestamp
"Contextualisation"
assetExternalIds: [String]
assetExternalId: String
functionalLocation: String
rootLocation: String
notifications: [APM_Notification]
assignedTo: [String]
subActivities: [String]
"Standard Activity Details"
resource: String
type: String # e.g. Corrective, Preventive
status: String
"System data"
isArchived: Boolean
isInApp: Boolean # In order to show this activity in the app, this must be TRUE.
createdAt: Timestamp
createdBy: String
lastUpdatedDate: Timestamp
mutatedBy: String
cloneOf: String
mutatedFields: [String]
isMutated: Boolean
}
type APM_Operation
@container(
indexes: [{ identifier: "assetExternalId", fields: ["assetExternalId"] }]
)
@view(version: "1") {
"Basic details"
id: String
title: String
description: String
source: String # e.g. SAP, COMOS, APP
parentActivityId: String
labels: [String]
"Scheduling"
startTime: Timestamp
endTime: Timestamp
"Contextualisation"
assetExternalId: String
files: [String]
assignedTo: [String]
"Standard operation data"
mainResource: String
personHours: Int
numberOfMainResource: Int
order: Int
type: String
status: String
subOrder: Int
"System data"
isInApp: Boolean # In order to show this activity in the app, this must be TRUE.
createdAt: Timestamp
createdBy: String
lastUpdatedDate: Timestamp
cloneOf: String
mutatedBy: String
mutatedFields: [String]
isMutated: Boolean
}
type APM_Notification
@container(
indexes: [{ identifier: "assetExternalId", fields: ["assetExternalId"] }]
)
@view(version: "1") {
"Basic details"
sourceId: String
title: String
description: String
source: String # e.g. SAP, COMOS, APP
"Contextualisation"
assetExternalId: String
rootLocationExternalId: String
"Standard Notification Details"
status: String
type: String # M5, M1
priority: String # Heigh, Medium, Low
createdDate: Timestamp
}
```
Make sure the `view` version always matches the data model version. Otherwise, the table on the Overview page won't work correctly.
### Add custom columns
The `APM_Activity` data type has a default set of columns with sorting and filtering. You can also add custom columns that will be fetched dynamically.
To add custom columns along with their filtering and sorting:
In the `APM_SourceData`data model, find the `APM_Activity` data type.
Add the column name as the parameter key to the `APM_Activity` type, for example, `ID:`. The names provided aren't translated.
Filtering and sorting is available with certain data types.
* Use the `Date` data type for sorting, for example, `ID: Date`. Index these fields to ensure efficient sorting, specifically with large data sets.
* Use the `String` or `[String]` data types for filtering, for example, `ID: String` or `ID:[String]`. Index these fields to ensure efficient filtering, specifically with large data sets.
Publish the updates once you've added the columns.
Users can apply aggregated options provided for filtering per their requirements. If aggregated options exceed 1000, only the top 1000 options will be displayed for filtering purposes.
### Run transformations
Once you've populated the `APM_SourceData` model, you can run a transformation for each data type.
If you want to separate the data into spaces based on location, run each transformation as many times as you have locations.
Go to **Integrate** > **Transform data** > **+ Create**.
Select `APM_SourceData` as your target data model.
Select `yourRootLocation_source_data` as your target space.
Select `APM_Activity` as your target type.
In the SQL editor, enter the transformation values.
```python theme={"languages":{"custom":["/_languages/kuiper.json","../_languages/kuiper.json"]}}
With
root_asset AS (
SELECT
id,
externalId,
name
FROM
`_cdf`.`assets`
WHERE
isnull(parentId)
and dataSetId = dataset_id("dataset:aveva-net-assets")
),
relationship AS (
select
rel.sourceExternalId,
rel.targetExternalId,
ave.rootId
from
_cdf.relationships rel,
_cdf.assets ave
where
rel.dataSetId = dataset_id("dataset:e2e-maintenance-sap")
and array_contains(rel.labels, "label:sap-functional-location-mounted-to-aveva-asset")
and ave.dataSetId = dataset_id("dataset:aveva-net-assets")
and ave.externalId = rel.targetExternalId
and ave.metadata["WORKFLOW STATUS"] not in ("Void", "Removed")
and rel.targetExternalId not like '% - %'
)
SELECT
-- Mandatory fields
wo_event.externalId AS externalId,
wo_event.metadata['woOrder'] AS id,
wo_event.description AS title,
wo_event.metadata['woLongText'] AS description,
wo_event.source AS source,
wo_event.startTime AS startTime,
wo_event.endTime AS endTime,
rel.targetExternalId as assetExternalId,
wo_event.metadata['referenceFunctionalLocation'] AS functionalLocation,
root.externalId as rootLocation,
wo_event.metadata["woMainWorkCenter"] AS resource,
wo_event.metadata['woType'] as type,
wo_event.metadata['woUserStatus'] AS status,
array("") AS assignedTo,
true AS isInApp
-- Custom fields
-- wo_event.metadata['woSystemStatus'] AS systemStatus
FROM
_cdf.events AS wo_event,
relationship AS rel,
root_asset AS root
WHERE
wo_event.type = 'work_order'
AND wo_event.dataSetId = dataset_id("dataset:e2e-maintenance-sap")
AND CONCAT('sap_apim_floc_', wo_event.metadata['referenceFunctionalLocation']) = rel.sourceExternalId
AND root.id = rel.rootId
```
The transformations provided are only examples and can vary depending on the SAP structure.
Repeat the same steps for the `APM_Notification` and `APM_Operation` types.
```python theme={"languages":{"custom":["/_languages/kuiper.json","../_languages/kuiper.json"]}}
With
relationship AS (
select
sourceExternalId,
targetExternalId
from
_cdf.relationships
where
dataSetId = dataset_id("dataset:e2e-maintenance-sap")
and array_contains(labels, "label:sap-functional-location-mounted-to-aveva-asset")
)
Select
concat(wo_notif.externalId, ".", COALESCE(rel.targetExternalId, "")) as externalId,
wo_notif.metadata["notNotificationPriority"] as priority,
wo_notif.source as source,
rel.targetExternalId as assetExternalId,
wo_notif.metadata["mainFunctionalLocation"] as rootLocationExternalId,
wo_notif.metadata["notLongText"] as description,
wo_notif.metadata["woUserStatus"] as status,
wo_notif.metadata["notNotification"] as sourceId,
wo_notif.description AS title,
wo_notif.metadata["notNotificationType"] as type,
true as isInApp
from
_cdf.events AS wo_notif,
_cdf.assets as asset
INNER JOIN _cdf.events AS wo_event
ON wo_event.type = "work_order"
AND wo_event.metadata.woOrder = wo_notif.metadata.woOrder
LEFT JOIN relationship AS rel
ON rel.sourceExternalId = asset.externalId
where
wo_notif.type = 'notification'
AND wo_notif.dataSetId = dataset_id("dataset:e2e-maintenance-sap")
AND asset.id = wo_notif.assetIds[0]
```
```python theme={"languages":{"custom":["/_languages/kuiper.json","../_languages/kuiper.json"]}}
With
relationship AS (
select
sourceExternalId,
targetExternalId
from
_cdf.relationships
where
dataSetId = dataset_id("dataset:e2e-maintenance-sap")
and array_contains(labels, "label:sap-functional-location-mounted-to-aveva-asset")
),
op_events as (
select
externalId,
description,
source,
metadata,
startTime,
endTime,
explode(events.assetIds) as assetIds,
type,
dataSetId
from
_cdf.events as events
where
events.type = 'work_order_operation'
AND events.dataSetId = dataset_id("dataset:e2e-maintenance-sap")
)
Select
concat(wo_op_event.externalId, ".", COALESCE(rel.targetExternalId, concat(".", asset.externalId))) as externalId,
wo_op_event.metadata['opUniqueOperation'] AS id,
wo_op_event.description AS title,
wo_op_event.description AS description,
wo_op_event.source AS source,
node_reference("APM_SourceData", wo_event.externalId) AS parentActivity,
wo_event.externalId as parentActivityId,
array("") AS labels,
wo_op_event.startTime AS startTime,
wo_op_event.endTime AS endTime,
COALESCE(rel.targetExternalId, asset.externalId) as assetExternalId,
array("") AS files,
wo_op_event.metadata['opWorkCenter'] as mainResource,
cast(wo_op_event.metadata['opDurationHours'] as double) as personHours,
cast(NULL AS integer) AS numberOfMainResource,
cast(wo_op_event.metadata['opOperationCounter'] as integer) as order,
wo_op_event.metadata.woType AS type,
wo_op_event.metadata['opSystemStatus'] as status,
array("") AS assignedTo,
true AS isInApp
From
op_events AS wo_op_event,
_cdf.assets AS asset
INNER JOIN _cdf.events AS wo_event
ON wo_event.type = "work_order"
AND wo_event.metadata.woOrder = wo_op_event.metadata.woOrder
LEFT JOIN relationship AS rel
ON rel.sourceExternalId = asset.externalId
WHERE
wo_op_event.assetIds = asset.id
AND wo_op_event.type = 'work_order_operation'
AND wo_op_event.dataSetId = dataset_id("dataset:e2e-maintenance-sap")
-- AND array_contains(wo_op_event.assetIds, asset.id)
```
Once you've run these transformations, go to the [InField application](https://cognite-infield.cogniteapp.com) > Application configuration (⚙) > FDM, and select the latest version for the `APM_SourceData` space.
## Configure an asset overview page
To see the asset overview page, select the asset you're interested in. The page has several cards that contain data on the selected asset. Two of the cards you've configured when configuring the root location settings are 3D and Work orders. Configure the remaining cards to view the relevant data.
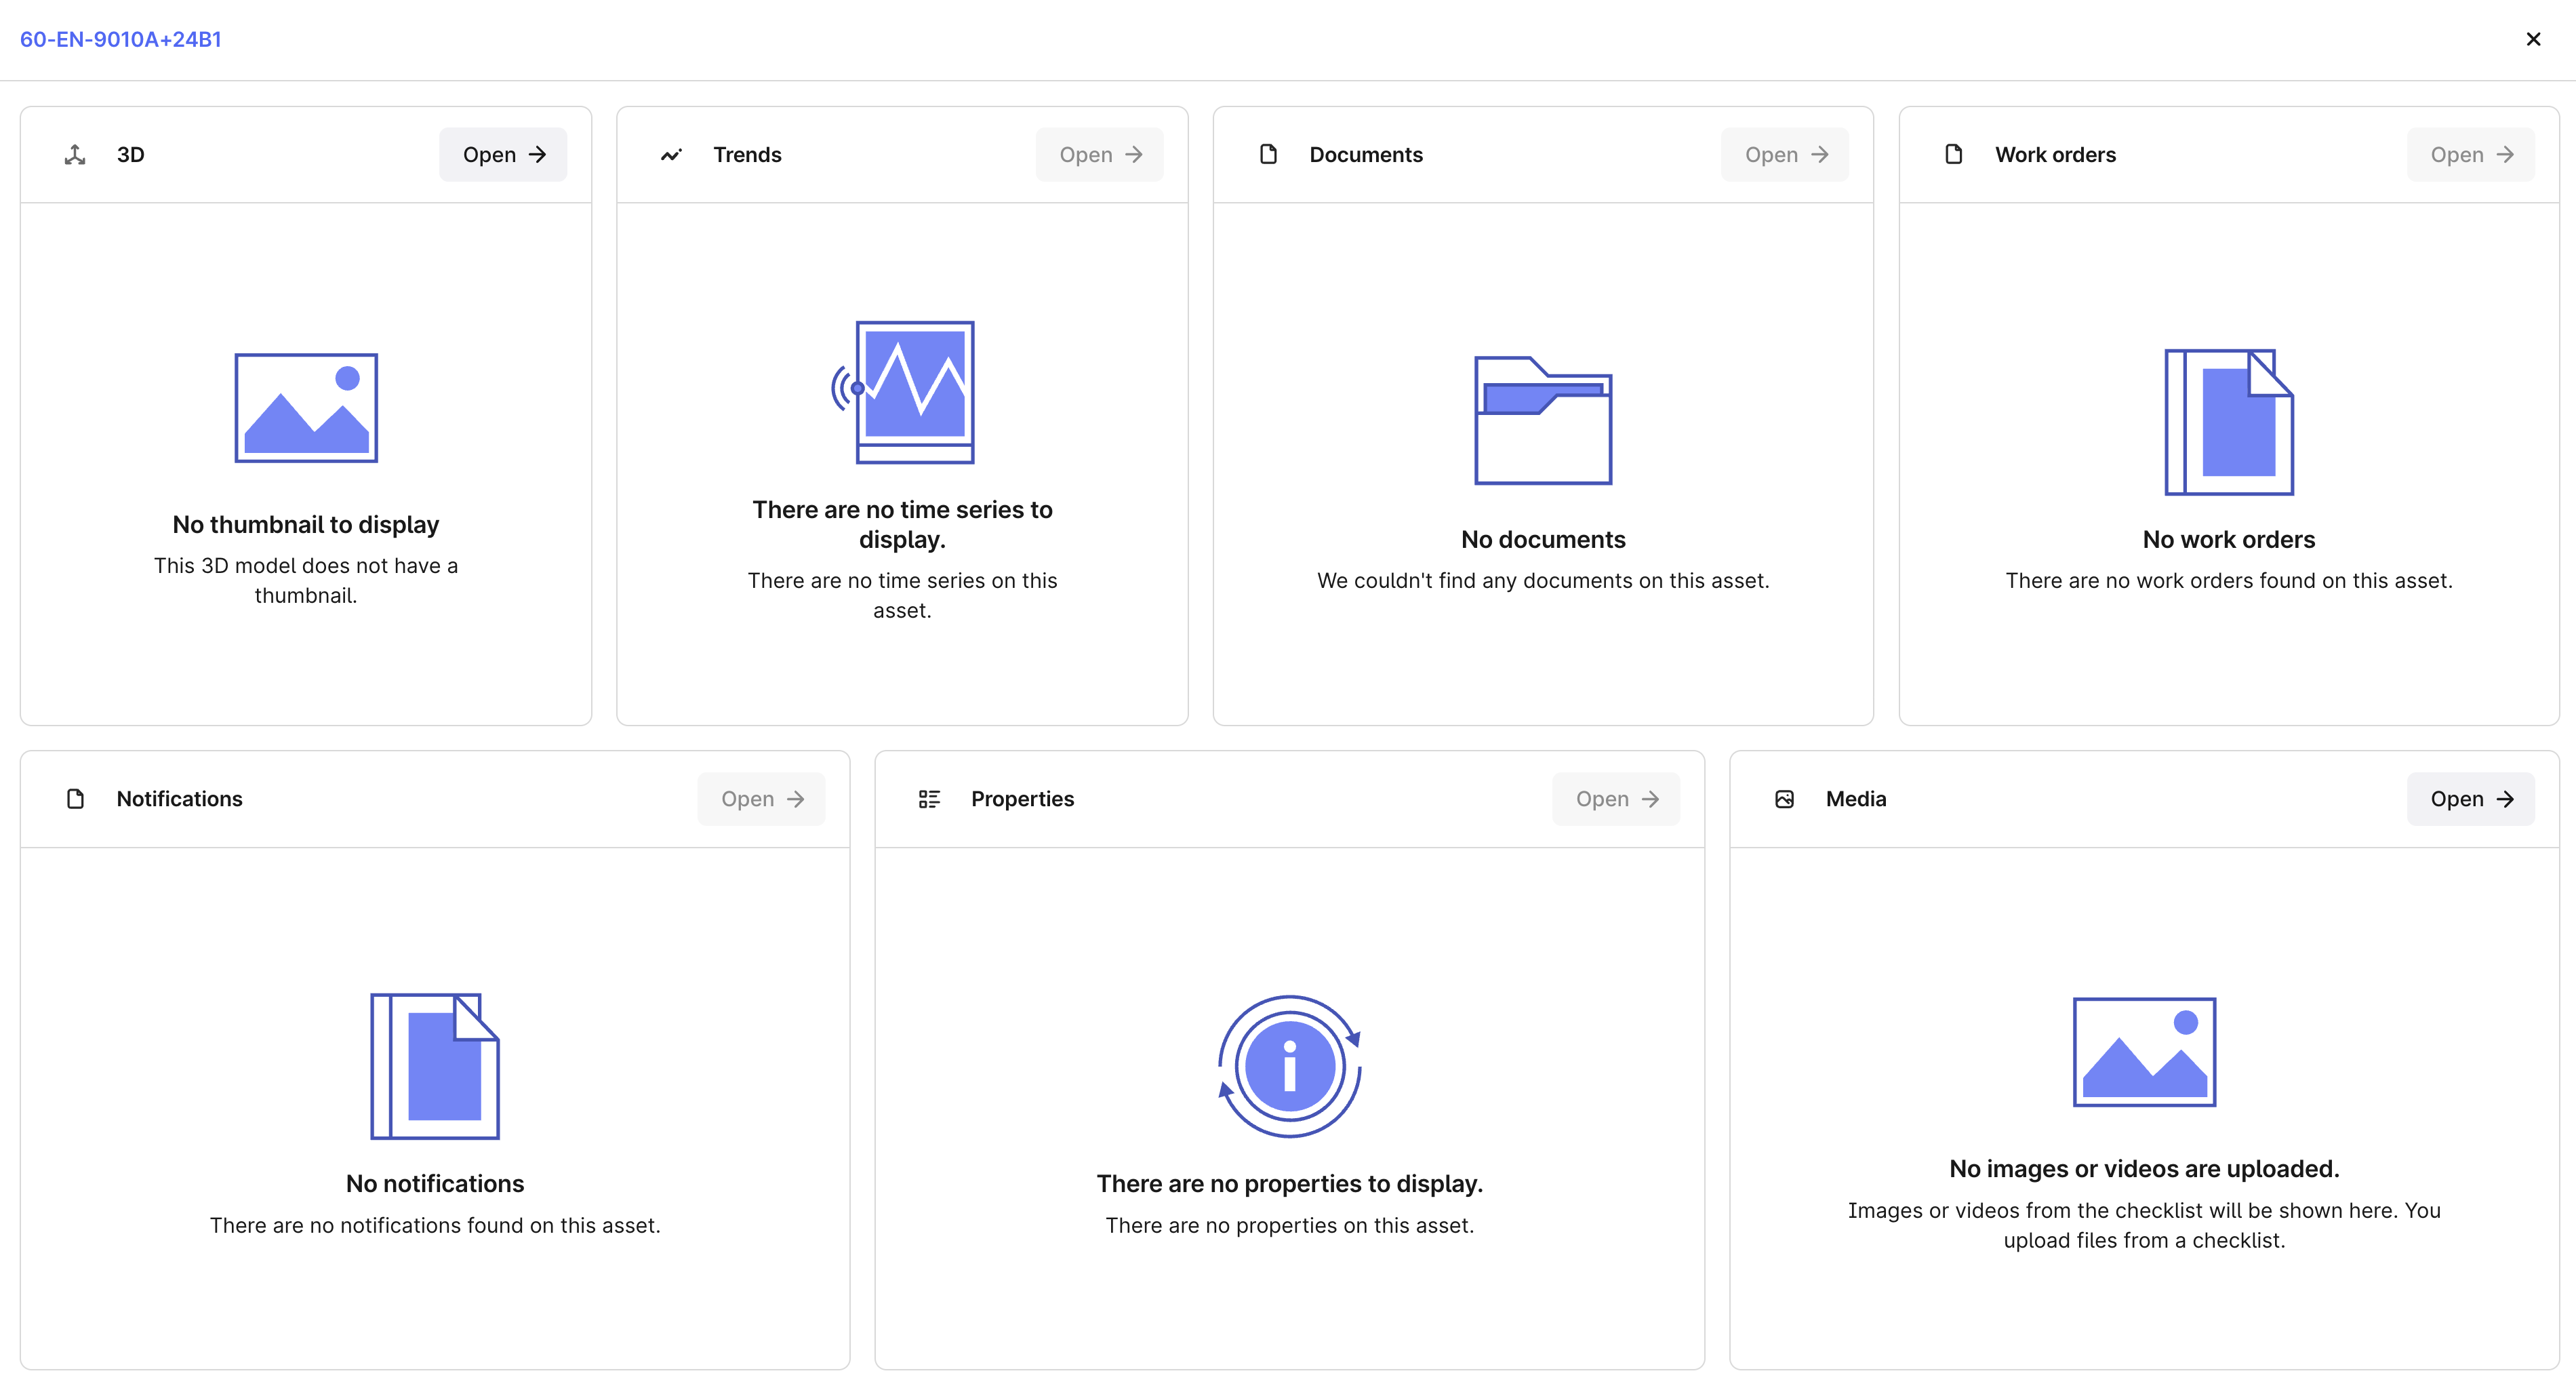 You can find cards configuration on the Application configuration page.
 ### Documents
Select Documents for the Documents card to display a list of documents that are contextualized to the current asset.
InField supports the following MIME (Multimedia Internet Mail Extensions) types:
* 'text/plain'
* 'text/csv'
* 'application/json'
* 'application/pdf'
* 'image/svg+xml'
In InField, you can view only the files directly linked to the current asset. CDF Data explorer also displays files linked to child assets.
Fill out the obligatory **Title** and **Description** fields and the optional **Type** field. You need to decide which properties you will use in these fields. You receive the file properties from the [File API](/20230101/files/filter-files) request. Property names are case-sensitive and are written in `camelCase`.
Type is a metadata field. All documents are grouped by this field. If you leave the field empty, the group for the documents will be **Unknown Document Type**.
### Notifications
Select Notifications to configure how users see notifications data on the Notifications card.
Add fields to filter on and add accepted values. Fields are configured by their CDF field names, for example, **ID**, **Name**, or **metadata.title**.
### Properties
Select Asset to configure which properties are clickable and highlighted on the Properties card on the asset overview page.
Fill out the Highlighted properties and Linkable asset keys fields.
Highlighted properties has a comma-separated list of metadata fields (case-sensitive) that will be visible on the card.
Linkable asset keys has a list of comma-separated metadata fields with the `externalId` of a related asset, for example, a parent or a child asset. Adding them to this list will make them clickable and linked to that asset's overview page.
The card shows just a few of the configured properties. Expand the card to see the full list of properties.
### Media
InField supports the following MIME types (Multimedia Internet Mail Extensions) with a maximum of 100 files per type:
* 'image/png'
* 'image/jpeg'
* 'video/quicktime'
* 'video/mp4'
Make sure to contextualize the files to the current asset to see them on the card.
**`ChecklistItem` view**
You can query all media added to a checklist. Adding and removing media displays in the `ChecklistItem` view in the `ApmAppData` model. When you query this view, you can receive one of the following values for the `files` attribute:
* `files: None` - nothing has been populated for the property.
* `files: []` - an explicitly empty list has been populated.
* `files: [None]` - a list of a single file that was populated once, and that file has since been deleted.
### Trends
The trends card displays time series data relevant to the current asset.
There are 2 ways of contextualizing a time series; using the first one is recommended:
Set the `assetId` field of the time series.
Create a relationship where the source is the time series, and the target is the `assetExternalId`.
InField supports time series with numerical values only, not string values.
To highlight a time series (display it on the card), set the `timeSeries.metadata.is_highlighted` to `true`. Only one time series is displayed on the Trends card at a time. Data for the highlighted time series is automatically refreshed every 2 seconds to provide the most recent data.
## Additional configurations
Complete the application configuration.
### Disciplines
Add disciplines to make sure you assign work orders and checklists to field workers who are experts on the particular tasks.
### AI
Use AI to find information about an asset in the attached documents. Remember that using AI doesn't guarantee that the answers are always accurate. To make sure the information you receive is accurate:
* Make sure the documents are formatted and structured, as AI relies on processed information to search and suggest content.
* Use clear instructions and ask about one thing per question.
* Verify the source of the answers to make sure they're correct.
To learn how using AI complies with the existing privacy, security and compliance commitments, refer to the [Trust and security](/cdf/trust/index#cognite-ai) article.
## Overview: Work orders
A work order can consist of one or several operations. Operations are individual steps in an order or individual tasks in a checklist. Some operations from the work management system, such as SAP, have an order or an operation number. Several operations have the same order/operation number and the same work order number (parentActivityId), which is why one operation in a work order can generate several tasks in a checklist.
For example, you have a work order with 2 operations: operation A and operation B. Operation A doesn't have an order/operation number, and operation B has an order/operation number 10. In your work management system, you have 3 operations with the same order/operation number that belong to the same work order number (parentActivityId). This means that instead of having 1 operation B, that is shown in your work order, you'll get 3 operations/tasks when you create a checklist from this operation.
You can create checklists from work orders only if they have at least one operation.
You can find and filter on the order number:
* In CDF, Data fusion > Data models > APM\_SourceData > APM\_Operation.
* In InField, Overview > expand work orders to see what operation number operations have. To check if there's more than one operation with the same order/operation number, select the work order > Operations.
### Documents
Select Documents for the Documents card to display a list of documents that are contextualized to the current asset.
InField supports the following MIME (Multimedia Internet Mail Extensions) types:
* 'text/plain'
* 'text/csv'
* 'application/json'
* 'application/pdf'
* 'image/svg+xml'
In InField, you can view only the files directly linked to the current asset. CDF Data explorer also displays files linked to child assets.
Fill out the obligatory **Title** and **Description** fields and the optional **Type** field. You need to decide which properties you will use in these fields. You receive the file properties from the [File API](/20230101/files/filter-files) request. Property names are case-sensitive and are written in `camelCase`.
Type is a metadata field. All documents are grouped by this field. If you leave the field empty, the group for the documents will be **Unknown Document Type**.
### Notifications
Select Notifications to configure how users see notifications data on the Notifications card.
Add fields to filter on and add accepted values. Fields are configured by their CDF field names, for example, **ID**, **Name**, or **metadata.title**.
### Properties
Select Asset to configure which properties are clickable and highlighted on the Properties card on the asset overview page.
Fill out the Highlighted properties and Linkable asset keys fields.
Highlighted properties has a comma-separated list of metadata fields (case-sensitive) that will be visible on the card.
Linkable asset keys has a list of comma-separated metadata fields with the `externalId` of a related asset, for example, a parent or a child asset. Adding them to this list will make them clickable and linked to that asset's overview page.
The card shows just a few of the configured properties. Expand the card to see the full list of properties.
### Media
InField supports the following MIME types (Multimedia Internet Mail Extensions) with a maximum of 100 files per type:
* 'image/png'
* 'image/jpeg'
* 'video/quicktime'
* 'video/mp4'
Make sure to contextualize the files to the current asset to see them on the card.
**`ChecklistItem` view**
You can query all media added to a checklist. Adding and removing media displays in the `ChecklistItem` view in the `ApmAppData` model. When you query this view, you can receive one of the following values for the `files` attribute:
* `files: None` - nothing has been populated for the property.
* `files: []` - an explicitly empty list has been populated.
* `files: [None]` - a list of a single file that was populated once, and that file has since been deleted.
### Trends
The trends card displays time series data relevant to the current asset.
There are 2 ways of contextualizing a time series; using the first one is recommended:
Set the `assetId` field of the time series.
Create a relationship where the source is the time series, and the target is the `assetExternalId`.
InField supports time series with numerical values only, not string values.
To highlight a time series (display it on the card), set the `timeSeries.metadata.is_highlighted` to `true`. Only one time series is displayed on the Trends card at a time. Data for the highlighted time series is automatically refreshed every 2 seconds to provide the most recent data.
## Additional configurations
Complete the application configuration.
### Disciplines
Add disciplines to make sure you assign work orders and checklists to field workers who are experts on the particular tasks.
### AI
Use AI to find information about an asset in the attached documents. Remember that using AI doesn't guarantee that the answers are always accurate. To make sure the information you receive is accurate:
* Make sure the documents are formatted and structured, as AI relies on processed information to search and suggest content.
* Use clear instructions and ask about one thing per question.
* Verify the source of the answers to make sure they're correct.
To learn how using AI complies with the existing privacy, security and compliance commitments, refer to the [Trust and security](/cdf/trust/index#cognite-ai) article.
## Overview: Work orders
A work order can consist of one or several operations. Operations are individual steps in an order or individual tasks in a checklist. Some operations from the work management system, such as SAP, have an order or an operation number. Several operations have the same order/operation number and the same work order number (parentActivityId), which is why one operation in a work order can generate several tasks in a checklist.
For example, you have a work order with 2 operations: operation A and operation B. Operation A doesn't have an order/operation number, and operation B has an order/operation number 10. In your work management system, you have 3 operations with the same order/operation number that belong to the same work order number (parentActivityId). This means that instead of having 1 operation B, that is shown in your work order, you'll get 3 operations/tasks when you create a checklist from this operation.
You can create checklists from work orders only if they have at least one operation.
You can find and filter on the order number:
* In CDF, Data fusion > Data models > APM\_SourceData > APM\_Operation.
* In InField, Overview > expand work orders to see what operation number operations have. To check if there's more than one operation with the same order/operation number, select the work order > Operations.