> ## Documentation Index
> Fetch the complete documentation index at: https://docs.cognite.com/llms.txt
> Use this file to discover all available pages before exploring further.
# Register a custom web app in Microsoft Entra ID
> Register a custom web application in Microsoft Entra ID for user authentication.
Users can sign in to the web app using their browser and the acquired token.
## Register a custom web app
Sign in to the [Azure portal](https://portal.azure.com) as an admin.
If you have access to multiple tenants, use the Directory + subscription filter in the top menu to select the tenant in which you want to register an application.
Search for and select **Microsoft Entra ID**.
Under **Manage**, select **App registrations** > **New registrations**.
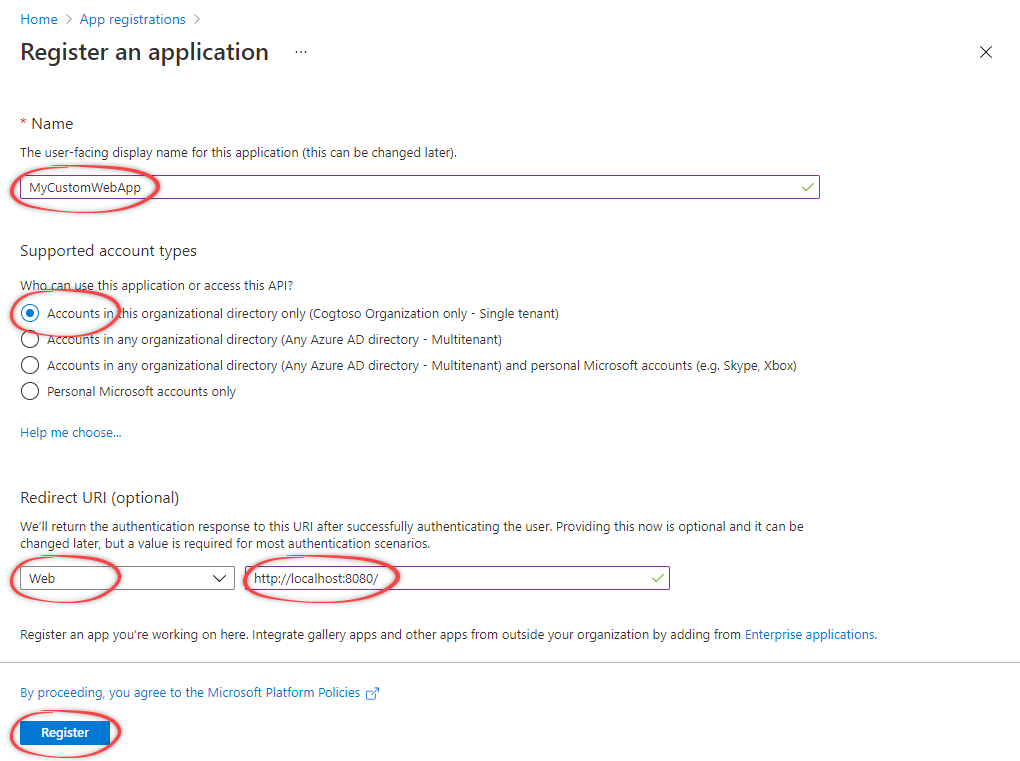
Specify the **name** and select an **account type**. Select the first option unless your organization's preferences specify otherwise.
Under **Redirect URI (optional)**, select **Web** and specify the **redirect URI**. Typically, this is the URL of your web app, or [localhost](#) for development. You can add more **redirect URIs** under **Manage** > **Authentication**.
 Under **Overview**, you can copy and make a note of the **Application (client) ID**. You need this value for authentication.
## Create a client secret
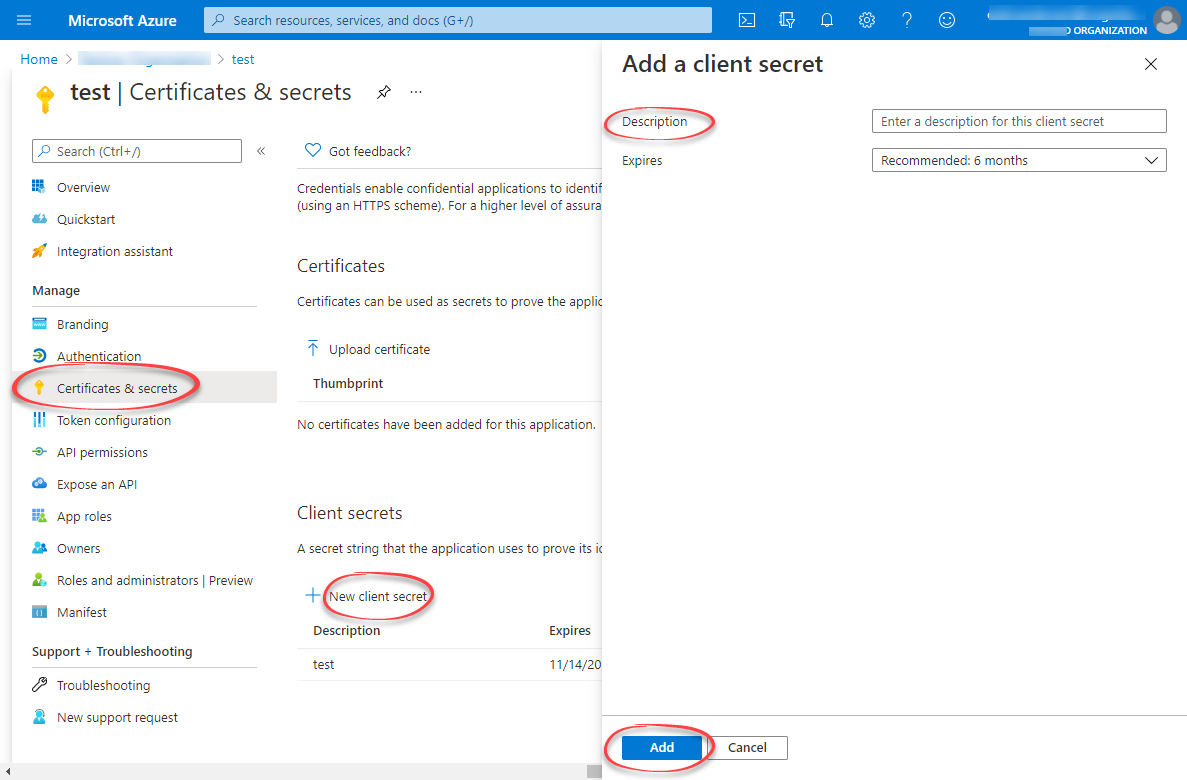
Under **Manage**, select **Certificates & secrets** > **New client secret**.
Enter a description and how long the client secret will be valid. Then, select **Add**.
Copy and make a note of the client secret in the **Value** field.
Make sure you copy this value now. This value will be hidden after you leave this page.
Under **Overview**, you can copy and make a note of the **Application (client) ID**. You need this value for authentication.
## Create a client secret
Under **Manage**, select **Certificates & secrets** > **New client secret**.
Enter a description and how long the client secret will be valid. Then, select **Add**.
Copy and make a note of the client secret in the **Value** field.
Make sure you copy this value now. This value will be hidden after you leave this page.
 ## Configure API permissions
Under **Manage**, select **API permissions**. The Microsoft Graph `User.Read` permissions should already be selected.
Select **+ Add a permission**. In the side panel, open the **APIs my organization uses** tab, and select the Cognite API, for example `westeurope-1`.
For **Delegated permissions**, select the required permissions for your application, for example `user_impersonation`. The delegated permissions filter the permissions a user has based on group memberships, but don't add any permissions.
To use the [token inspection endpoint](/api-reference/concepts/20230101/tokens), select `IDENTITY`.
Learn more about the available permissions [here](/cdf/access/concepts/access_token_scopes).
Select **Add permissions**. The API permissions should look similar to this:
## Configure API permissions
Under **Manage**, select **API permissions**. The Microsoft Graph `User.Read` permissions should already be selected.
Select **+ Add a permission**. In the side panel, open the **APIs my organization uses** tab, and select the Cognite API, for example `westeurope-1`.
For **Delegated permissions**, select the required permissions for your application, for example `user_impersonation`. The delegated permissions filter the permissions a user has based on group memberships, but don't add any permissions.
To use the [token inspection endpoint](/api-reference/concepts/20230101/tokens), select `IDENTITY`.
Learn more about the available permissions [here](/cdf/access/concepts/access_token_scopes).
Select **Add permissions**. The API permissions should look similar to this:
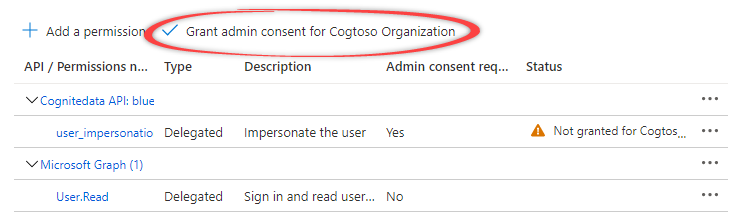 Select **Grant admin consent for...** and confirm that you want to make the new list of permissions active.