> ## Documentation Index
> Fetch the complete documentation index at: https://docs.cognite.com/llms.txt
> Use this file to discover all available pages before exploring further.
# Configure a scene
> Create and configure 3D scenes to view all related 3D data for a physical location in a unified view.
You can create a scene by adding all the 3D data available for a location into one space and aligning the different models to position them correctly in the physical space. Viewing the different 3D content in one scene will give the user a richer context and understanding of the physical conditions of their location.
You can also add a skybox and a ground plane to the scene. This will make it easier to read the depth and perceive the contrast of the scene.
## Before you start
Before creating a scene, make sure you have:
* Created and set up the scene data model (required the first time you create a scene for your project).
* Uploaded and processed all the 3D data you want to add to your scene. For more information, see [Upload 3D models](/cdf/3d/guides/3dmodels_upload).
To use 3D in [Search](/cdf/explore/search#search-in-3d-models), you need to configure a scene and link it to a location. A location is the global [location filter](/cdf/locations/) across Cognite Data Fusion (CDF).
## Create a scene
Go to [CDF](https://fusion.cognite.com) > Data fusion > Configure > 3D.
Select + Create scene and follow the wizard to create a scene.
## Configure a scene
Select the newly created scene to open its overview.
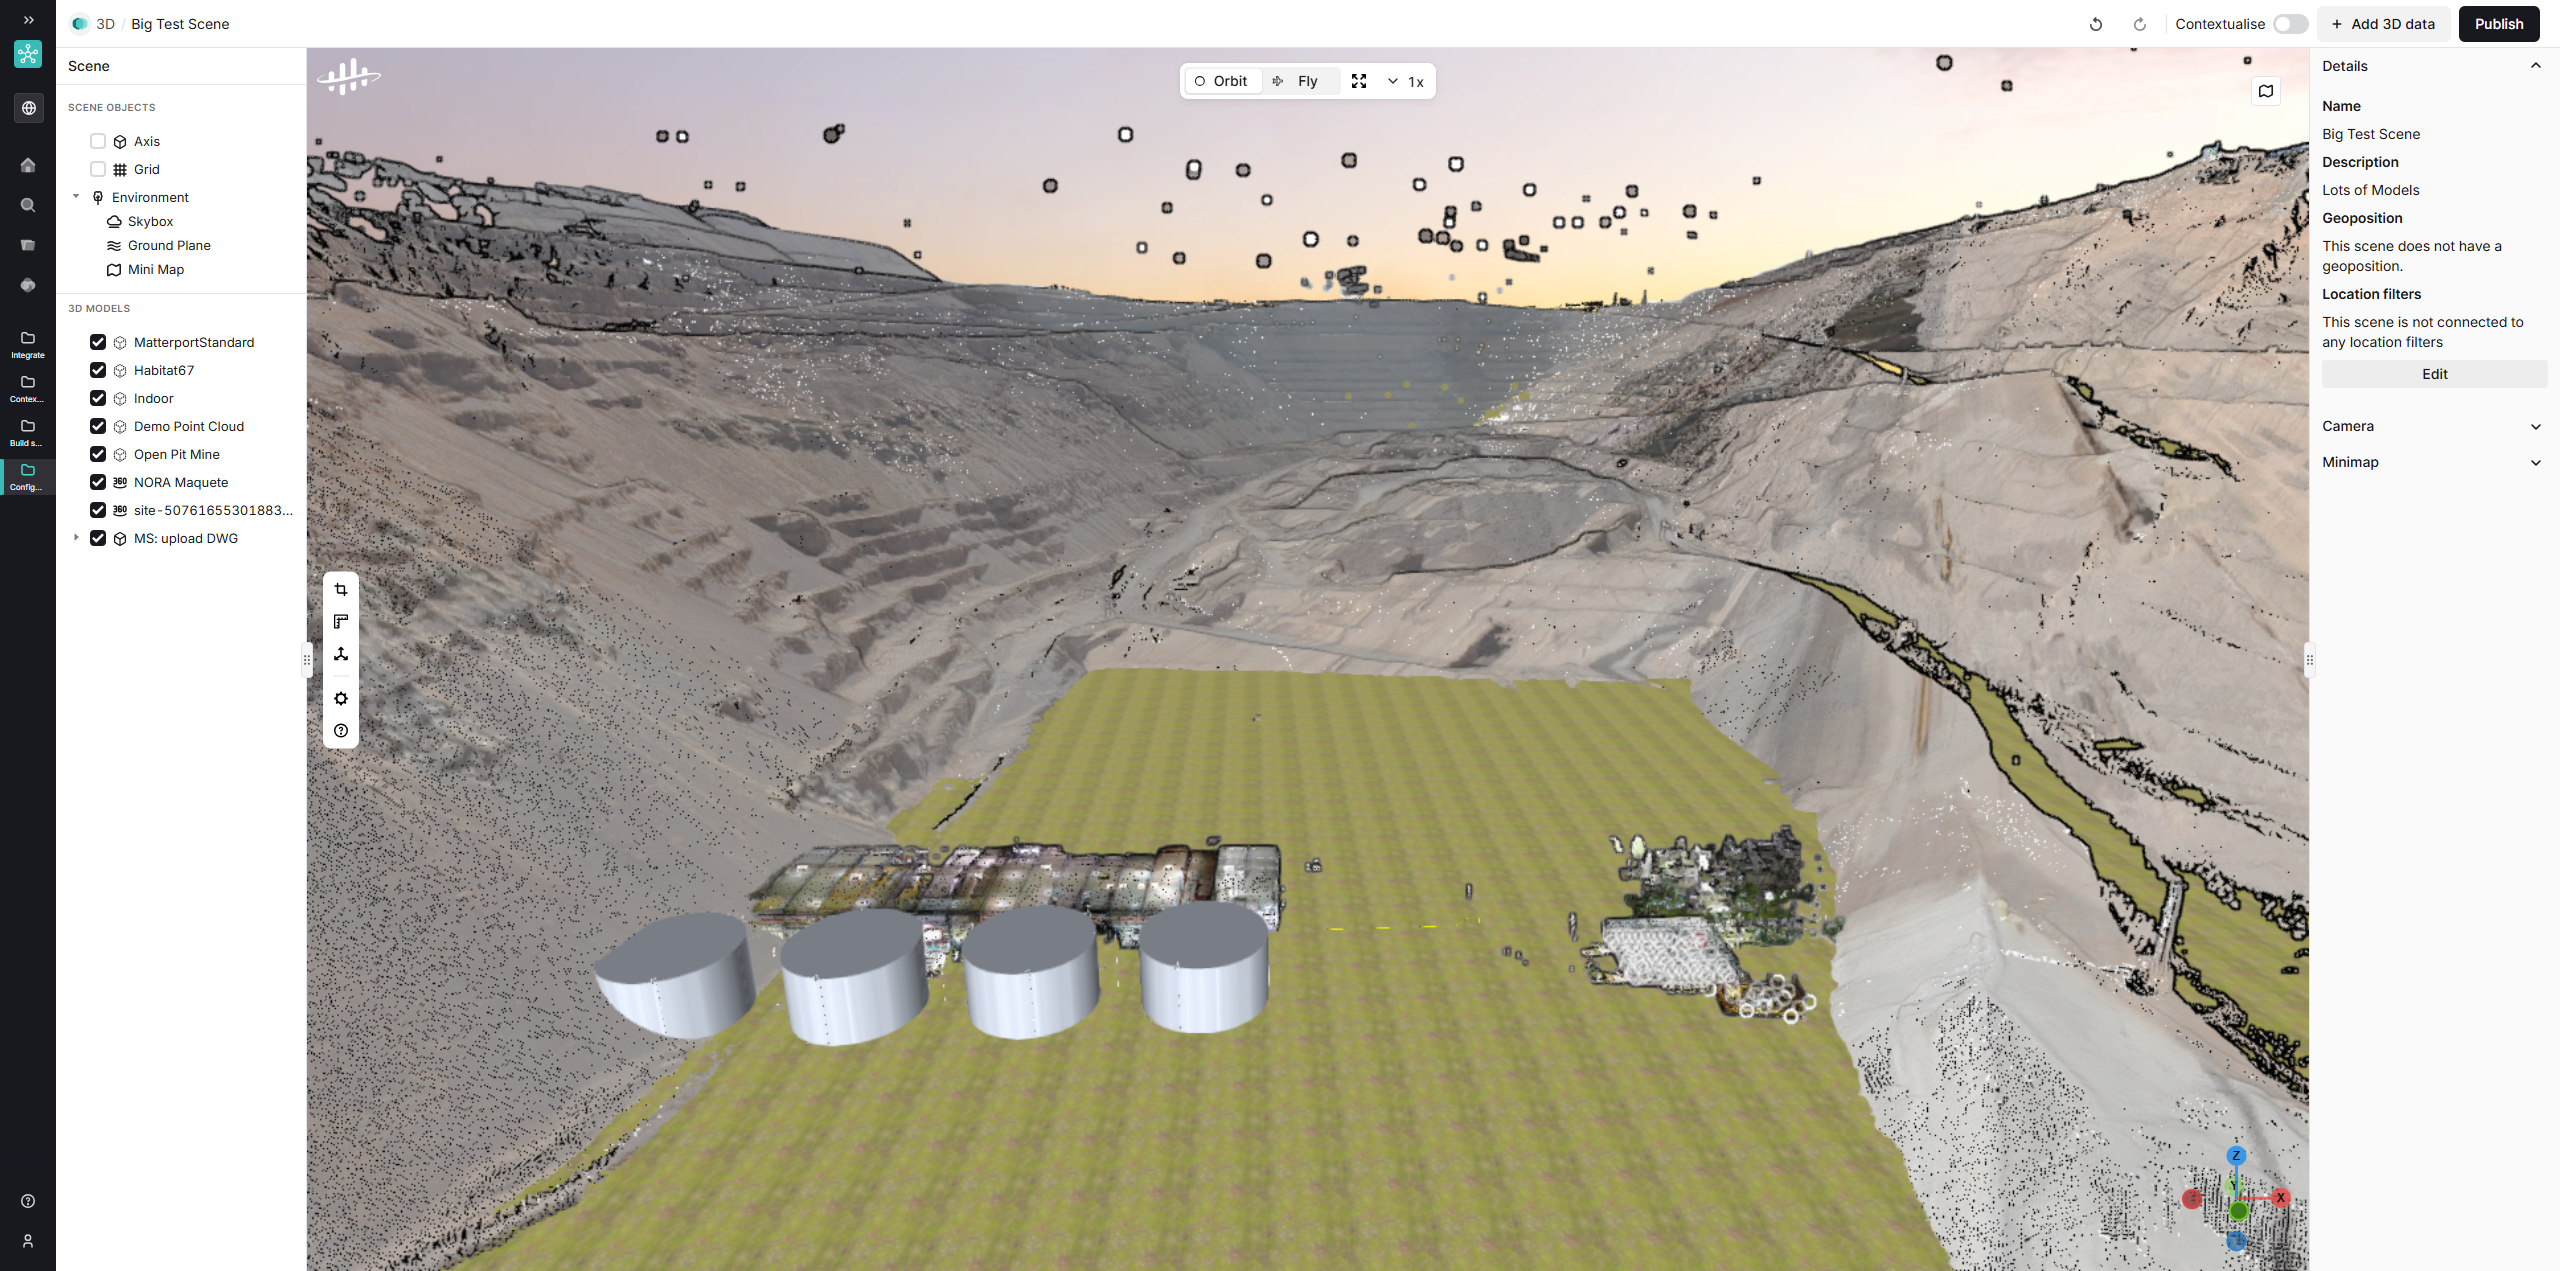 Select **+ Add 3D data** to open the dialog. You can add CAD, point cloud, or 360° images to your scene. Use the search box to find an existing 3D resource, then select **Add**.
Added resources appear in the tree view on the left-hand side. Selecting an item from the tree view opens its settings in the right-hand side panel.
Select the added model from the tree view and adjust its position, rotation, and scale in the side panel.
From the same panel, you can also [contextualize 3D objects](/cdf/3d/guides/scene#unified-3d-contextualization).
You can view the scene from different angles using the options in the top bar:
* Use the Orbit mode to rotate around the objects to view all the sides.
* Use the Fly mode to view the interior and exterior of any closed model.
* Double-click anywhere in the scene to move instantly.
Custom skybox, ground plane, thumbnail, and minimap uploads are stored as **files** in CDF. How access control applies depends on your [project type](/cdf/3d/guides/3dmodels_intro#3d-models-and-project-types):
* **Data modeling** — Uses the scene's space automatically. You can't select a data set in the scene editor.
* **Hybrid** — One **data set** per session applies to all custom scene image uploads, not per image. With no data set selected, files are accessible across all data sets.
In **hybrid projects**, set the data set before you upload custom images:
1. In the scene side panel, expand Details and select Edit.
2. In Advanced settings, select a data set, or leave No data set selected.
3. Select Save.
The data set selection is **not saved** when you publish the scene. It applies only for the current editing session. Set the data set again if you close the scene or start a new session.
To create data sets or configure scoped access, see [Create data sets and add data](/cdf/data_governance/guides/datasets/create_data_sets).
In the tree view, select Environment. You can configure textures and skyboxes for the selected 3D resource in the side panel.
To use custom images for textures, select Add custom and upload your images.
Go to the default scene view, for example, by clicking the scene name in the top bar, and expand the Camera accordion in the side panel.
Position the camera at the desired view and select **Set camera position**. The camera position is the view a user gets when they enter a scene.
If the **Use default camera position for thumbnail** option is turned on, a scene thumbnail is automatically set.
In the Camera accordion, you can set the scene thumbnail in three ways:
* Select the **Use default camera position for thumbnail** option.
* Position the camera to your desired view and select **Set thumbnail**.
* Upload a custom image by selecting **Upload custom thumbnail**.
Expand the Minimap accordion in the side panel. The minimap is a customizable top-down view that helps you navigate in large scenes. It updates in real time based on the camera position.
1. Select Upload minimap and upload a file that represents a top-down view of your scene, for example, a sitemap or aerial image.
2. Once uploaded, configure the **position**, **rotation**, and **scale** of the minimap to align it with the scene.
Double-click a point on the map to jump to that location in the scene.
After configuring the minimap, **Publish** the scene to the project.
You have published the scene.
## Edit a scene
You can modify an existing scene after it's been published, such as updating the scene name, description, geoposition, or linking it to a location.
Expand the Details accordion in the side panel of the scene overview.
Select Edit and make the necessary changes.
Select Save to publish the changes.
## Toolbar tips
* **Cropping tool** : slice through the model to view cross-sections or create a crop box to define a custom 3D boundary.
* Measurements : measure point coordinates, point-to-point distances, areas (vertical, horizontal, and polygons), volumes, and circle diameters for pipes and tanks.
* Settings : set the rendering quality, configure point cloud settings, and change the units.
**Default scene settings**
You can save your preferred model visibility, rendering quality, point cloud settings, and camera position as defaults. These settings persist across sessions, so you don't need to manually adjust scene configurations each time.
* Ghost mode: gray out areas that are out of focus to help you concentrate on specific parts of the model.
* Help : view instructions for navigating in a 3D model.
## Contextualize 3D objects
You can contextualize 3D objects (CAD, point cloud, or 360° images) within a scene using the unified 3D contextualization editor.
To start contextualizing:
In the scene tree view, select the **CAD** model, **point cloud**, or **360° image** collection you want to contextualize.
In the right-hand panel, select Contextualize.
Select **+ Add 3D data** to open the dialog. You can add CAD, point cloud, or 360° images to your scene. Use the search box to find an existing 3D resource, then select **Add**.
Added resources appear in the tree view on the left-hand side. Selecting an item from the tree view opens its settings in the right-hand side panel.
Select the added model from the tree view and adjust its position, rotation, and scale in the side panel.
From the same panel, you can also [contextualize 3D objects](/cdf/3d/guides/scene#unified-3d-contextualization).
You can view the scene from different angles using the options in the top bar:
* Use the Orbit mode to rotate around the objects to view all the sides.
* Use the Fly mode to view the interior and exterior of any closed model.
* Double-click anywhere in the scene to move instantly.
Custom skybox, ground plane, thumbnail, and minimap uploads are stored as **files** in CDF. How access control applies depends on your [project type](/cdf/3d/guides/3dmodels_intro#3d-models-and-project-types):
* **Data modeling** — Uses the scene's space automatically. You can't select a data set in the scene editor.
* **Hybrid** — One **data set** per session applies to all custom scene image uploads, not per image. With no data set selected, files are accessible across all data sets.
In **hybrid projects**, set the data set before you upload custom images:
1. In the scene side panel, expand Details and select Edit.
2. In Advanced settings, select a data set, or leave No data set selected.
3. Select Save.
The data set selection is **not saved** when you publish the scene. It applies only for the current editing session. Set the data set again if you close the scene or start a new session.
To create data sets or configure scoped access, see [Create data sets and add data](/cdf/data_governance/guides/datasets/create_data_sets).
In the tree view, select Environment. You can configure textures and skyboxes for the selected 3D resource in the side panel.
To use custom images for textures, select Add custom and upload your images.
Go to the default scene view, for example, by clicking the scene name in the top bar, and expand the Camera accordion in the side panel.
Position the camera at the desired view and select **Set camera position**. The camera position is the view a user gets when they enter a scene.
If the **Use default camera position for thumbnail** option is turned on, a scene thumbnail is automatically set.
In the Camera accordion, you can set the scene thumbnail in three ways:
* Select the **Use default camera position for thumbnail** option.
* Position the camera to your desired view and select **Set thumbnail**.
* Upload a custom image by selecting **Upload custom thumbnail**.
Expand the Minimap accordion in the side panel. The minimap is a customizable top-down view that helps you navigate in large scenes. It updates in real time based on the camera position.
1. Select Upload minimap and upload a file that represents a top-down view of your scene, for example, a sitemap or aerial image.
2. Once uploaded, configure the **position**, **rotation**, and **scale** of the minimap to align it with the scene.
Double-click a point on the map to jump to that location in the scene.
After configuring the minimap, **Publish** the scene to the project.
You have published the scene.
## Edit a scene
You can modify an existing scene after it's been published, such as updating the scene name, description, geoposition, or linking it to a location.
Expand the Details accordion in the side panel of the scene overview.
Select Edit and make the necessary changes.
Select Save to publish the changes.
## Toolbar tips
* **Cropping tool** : slice through the model to view cross-sections or create a crop box to define a custom 3D boundary.
* Measurements : measure point coordinates, point-to-point distances, areas (vertical, horizontal, and polygons), volumes, and circle diameters for pipes and tanks.
* Settings : set the rendering quality, configure point cloud settings, and change the units.
**Default scene settings**
You can save your preferred model visibility, rendering quality, point cloud settings, and camera position as defaults. These settings persist across sessions, so you don't need to manually adjust scene configurations each time.
* Ghost mode: gray out areas that are out of focus to help you concentrate on specific parts of the model.
* Help : view instructions for navigating in a 3D model.
## Contextualize 3D objects
You can contextualize 3D objects (CAD, point cloud, or 360° images) within a scene using the unified 3D contextualization editor.
To start contextualizing:
In the scene tree view, select the **CAD** model, **point cloud**, or **360° image** collection you want to contextualize.
In the right-hand panel, select Contextualize.
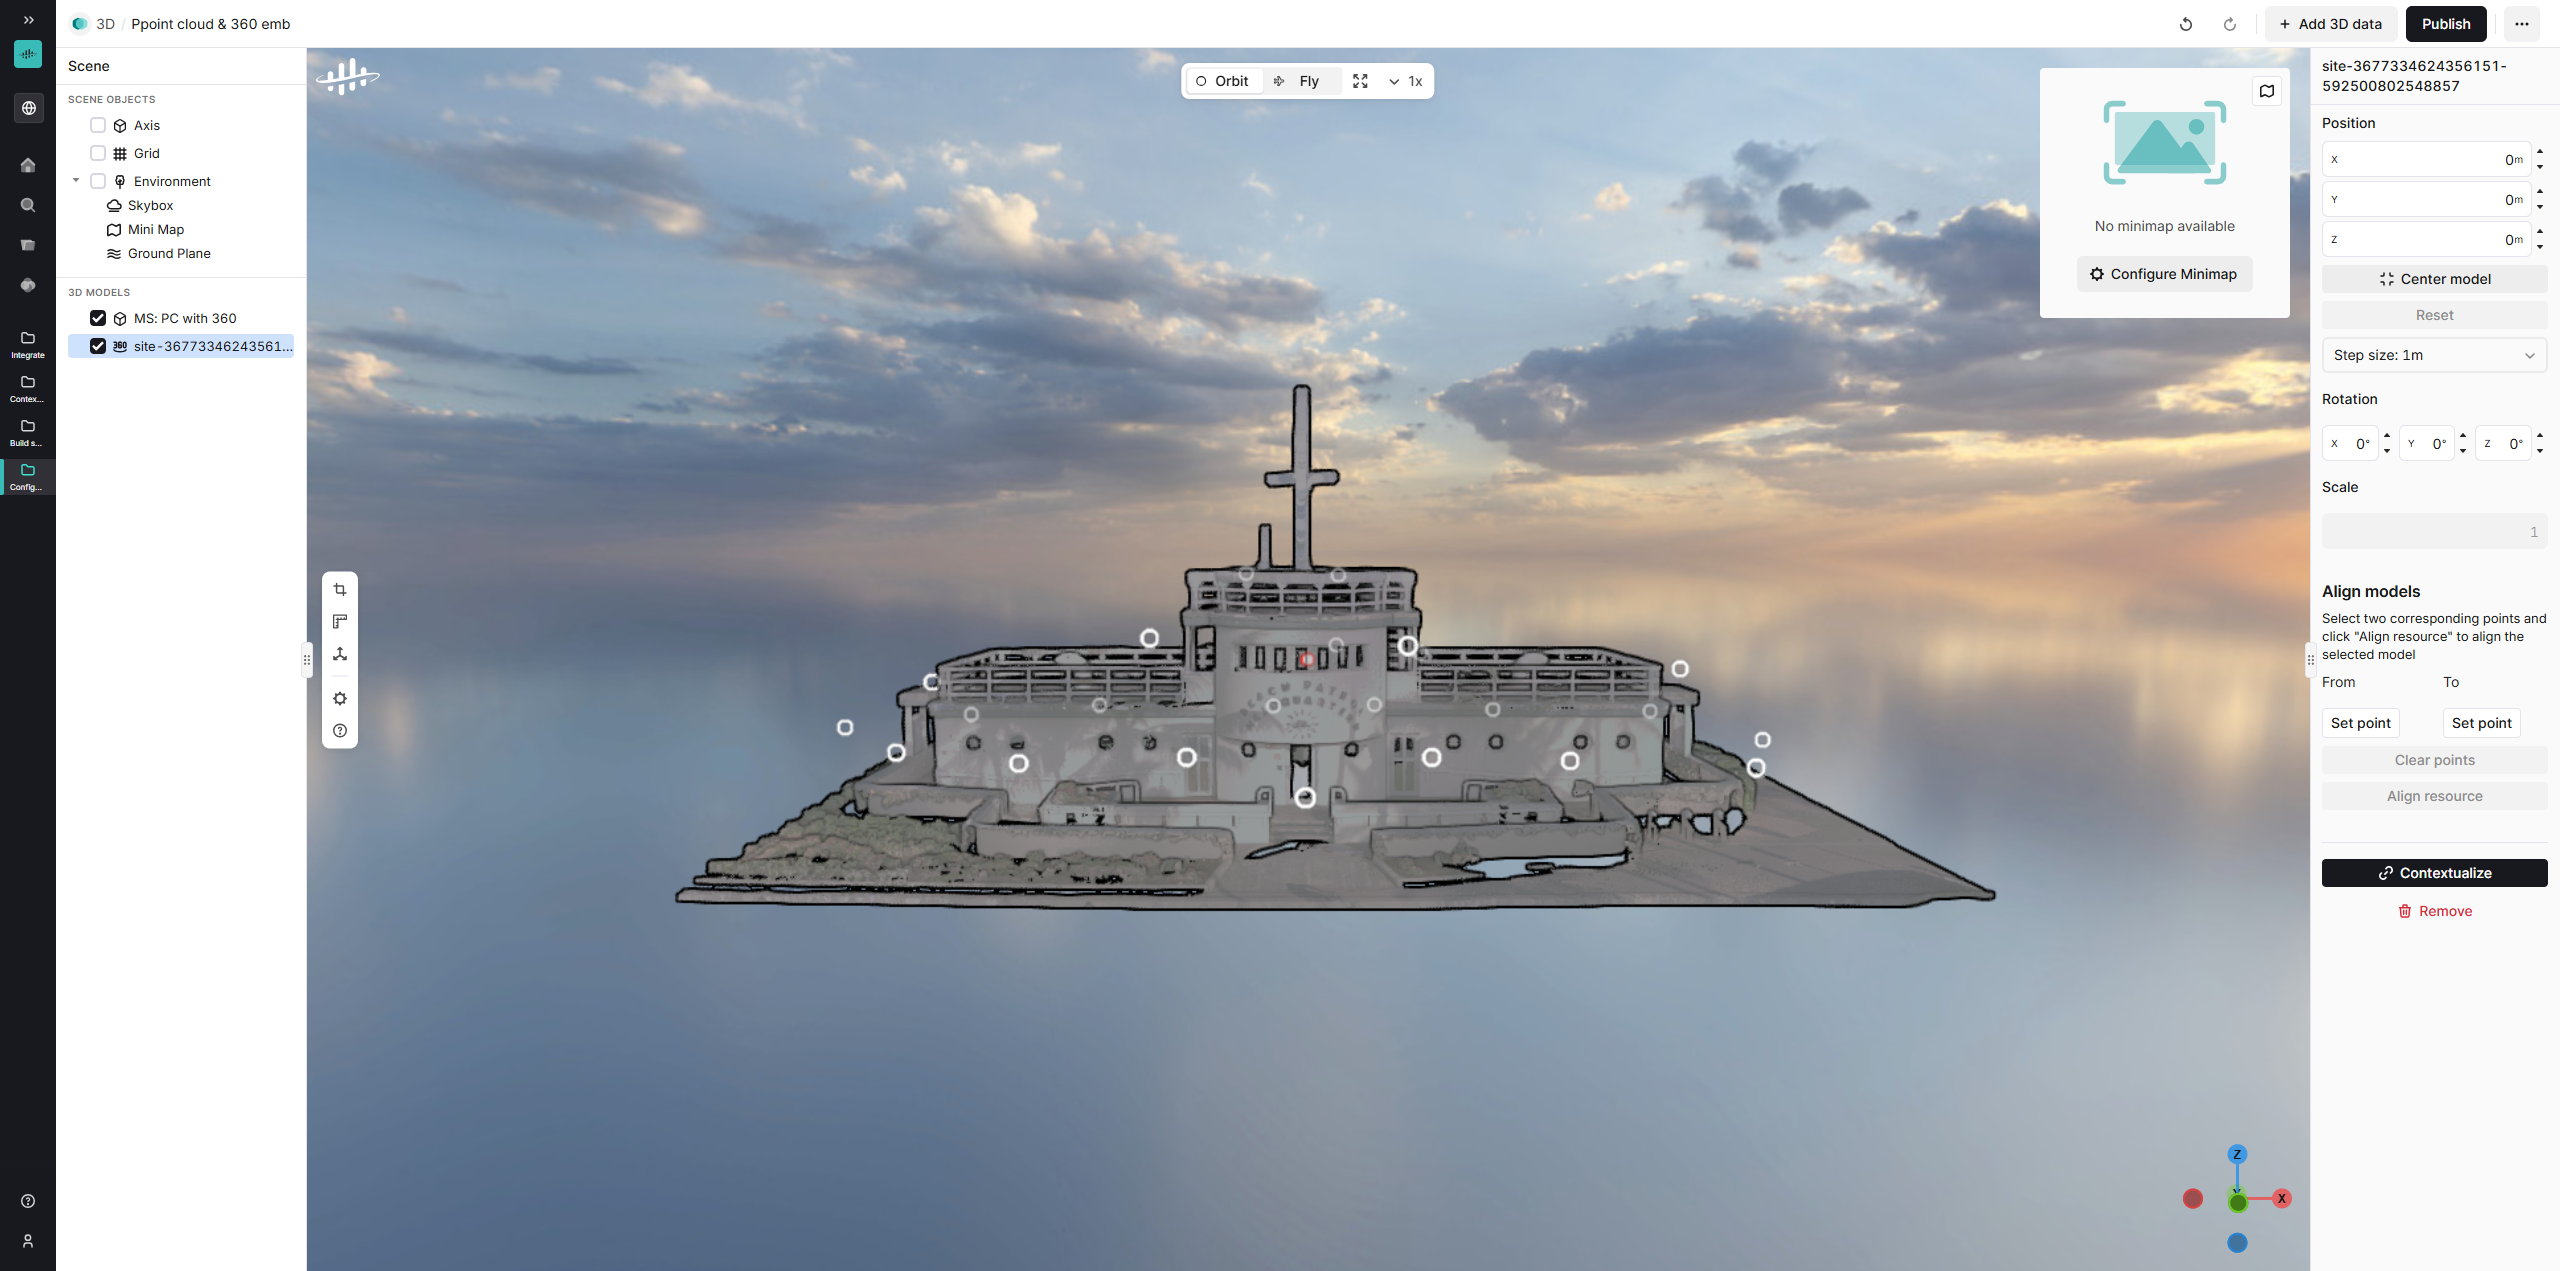 For detailed steps on contextualizing each type of 3D model, see:
* [CAD](/cdf/3d/guides/3dmodels_contextualize)
* [Point cloud](/cdf/3d/guides/pointcloud_contextualize)
* [360° image](/cdf/3d/guides/360images_contextualize)
For detailed steps on contextualizing each type of 3D model, see:
* [CAD](/cdf/3d/guides/3dmodels_contextualize)
* [Point cloud](/cdf/3d/guides/pointcloud_contextualize)
* [360° image](/cdf/3d/guides/360images_contextualize)