> ## Documentation Index
> Fetch the complete documentation index at: https://docs.cognite.com/llms.txt
> Use this file to discover all available pages before exploring further.
# Upload 3D models with file extractor
> From **Upload 3D models** in Cognite Data Fusion (CDF), you can upload 3D models and revisions to CDF without writing any code.
CDF supports CAD files from common systems and standard formats such as RVM, OBJ, and FBX.
For more information on supported formats, see [Supported 3D file formats](/cdf/3d/guides/3dmodels_intro#supported-3d-file-formats).
## Get started
To upload 3D models, use the **file extractor** in the CDF. The file extractor is a tool that extracts 3D models from CAD files and uploads them to CDF. The file extractor is available in the CDF under **Integrate** > **Connect to source systems**.
See the [Cognite File Extractor](/cdf/integration/guides/extraction/file/file_setup).
Once you set up the file extractor, you can upload 3D models to CDF by following the extractor's instructions.
Once the upload is complete, find the **file-id** of the uploaded 3D model and use it to create a 3D model or revision for an existing 3D model in CDF.
Identify the **file-id** of the uploaded 3D model by enabling console logs in the file extractor and examining the logs for the **file-id**. Adjust the log level to DEBUG in the file extractor configuration file and subsequently run the file extractor.
For example:
```yaml theme={"languages":{"custom":["/_languages/kuiper.json","../_languages/kuiper.json"]}}
logger:
# Logging to console/terminal. Remove or comment out to turn off the terminal
# logging
console:
level: DEBUG
```
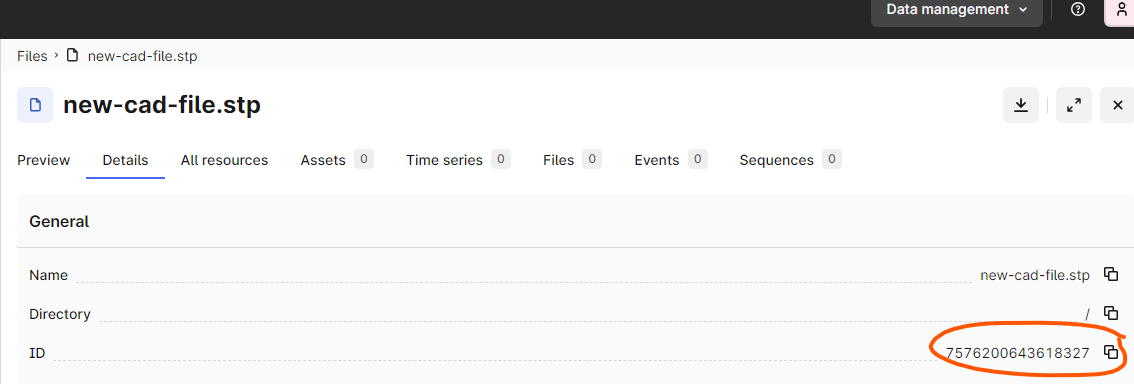
 Locate the **file-id** of the uploaded 3D model. Navigate to the [CDF homepage](https://fusion.cognite.com) > **Data fusion** > **Data explorer**. Next, select **Files**, and find the **file-id** of the uploaded 3D model by searching for the file name.
 ## Process a 3D model
Navigate to **Data fusion** > **Configure** > **3D**.
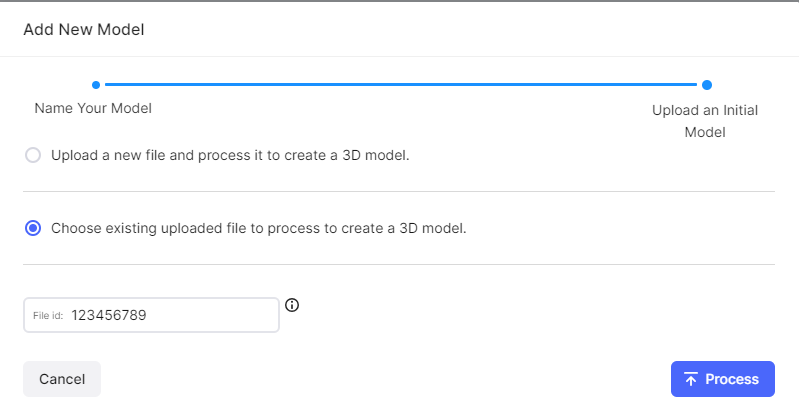
Select Upload model and follow the wizard to create the model and upload the initial revision of the model.
## Process a 3D model
Navigate to **Data fusion** > **Configure** > **3D**.
Select Upload model and follow the wizard to create the model and upload the initial revision of the model.
 ## More information
To upload a revision to an existing 3D model, see [Upload a revision](/cdf/3d/guides/3dmodels_upload#upload-a-revision-to-an-existing-3d-model).
## More information
To upload a revision to an existing 3D model, see [Upload a revision](/cdf/3d/guides/3dmodels_upload#upload-a-revision-to-an-existing-3d-model).